Make this DIY Christmas shirt using Mod Podge photo transfer medium! It’s a perfect option to make a cute wardrobe for your kids this holiday season.
Skills Required: Intermediate. You should have some prior crafting experience before making this project. Hayley says it’s relatively easy, and I believe that to be true, but if you’ve never done a project like this before – please practice first.

Hey guys! My name is Hayley and I blog over at Welcome to the Mouse House, where I chat about decorating, food, kids, crafts, and sewing! I am so excited to be over here sharing my no-sew DIY Christmas shirt tutorial for the upcoming holiday season.
Even though sewing is one of my main hobbies, I am well aware that not everyone has the desire (or capability) to sew clothing items for their kids. I am here today to save the day with my “No-Sew DIY Christmas Shirt” that literally anyone can make. I promise it is relatively easy and totally worth it!
Kids Christmas Shirts
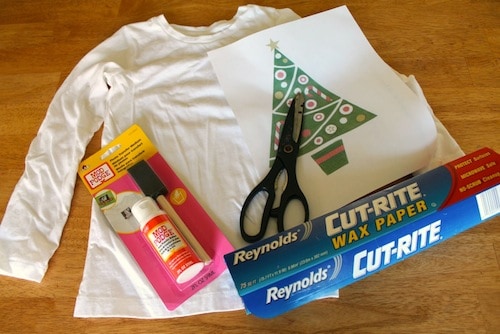
Gather your supplies:
- T-shirt (either old or new)
- Mod Podge Photo Transfer Medium
- Graphic of your choice
- Foam brush
- Wax paper
- Scissors
I got that awesome retro Christmas tree image from The Graphics Fairy!
IMPORTANT: Make sure to print your image from a laser printer, not an ink jet printer. If you don’t have one at home, print out your image and bring it to your local Staples or Kinkos to have them make a laserjet photocopy. It only costs a few cents.
Lay wax paper over your work surface and also insert a large sheet of wax paper inside of your shirt between the two layers (this will keep the back of your shirt from getting glue on it)
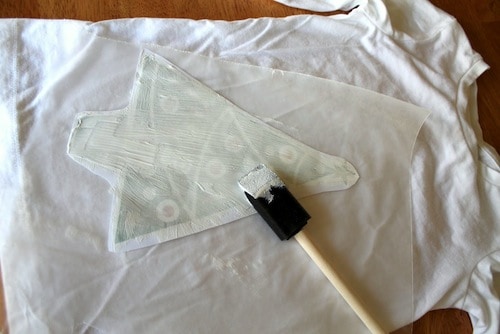
Step One: Cut your image to size. Generously apply a thick layer of Mod Podge Photo Transfer Medium to the FRONT of the image. Apply as much Mod Podge as it takes to basically make the image disappear.
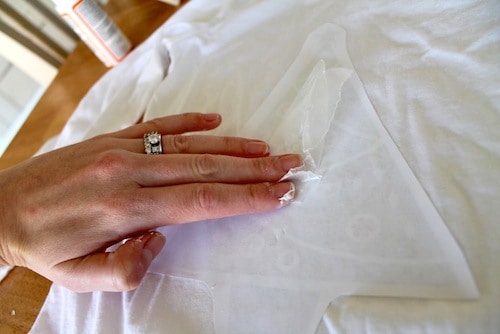
Step Two: Once completely covered with Mod Podge, place your image picture-side down onto the shirt. Make sure it is in the right spot and not crooked. Now, gently, but firmly secure it to the shirt by rubbing in small circles all over the paper. Make sure there are no wrinkles or bumps.
Step Three: Lay flat to dry. Wait at least 24 hours! Do not try to peek or lift up the paper before then (I *may* have done that with my first attempt because I am extremely impatient.)
Step Four: After you patiently waited the 24 hours, grab a damp sponge or towel. It is time to remove that paper and see your lovely image again.
Gently rub the paper off using the damp sponge using a small circular motion. You will then see the paper start to flake off and your image will start to show!
Once you feel that all of the paper has been removed, it is time to let your shirt hang dry (product cannot be washed for at least 72 hours and hang drying is always best).
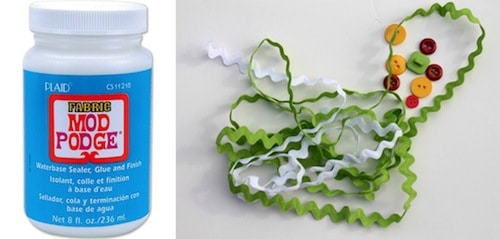
Step Five: (Optional) Because I can never leave well-enough alone, I decided to embellish this particular image using fun ric-rac, buttons, glass bead, and Fabric Mod Podge glue.
If you sew, you can certainly sew all of the embellishments on at this point, but I wanted to keep this project accessible for everyone!
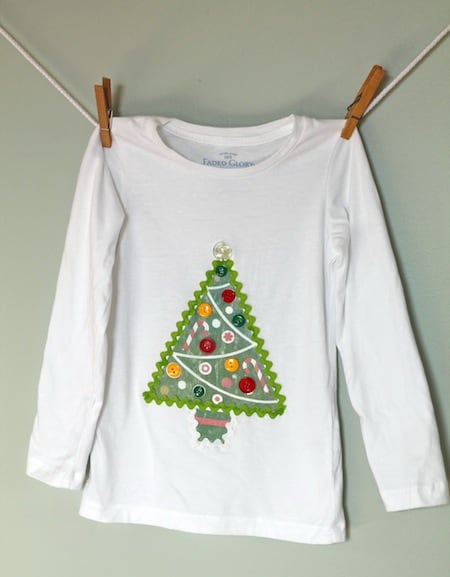
Now, embellish the shirt to your heart’s content! I just love the whimsy that the buttons add.
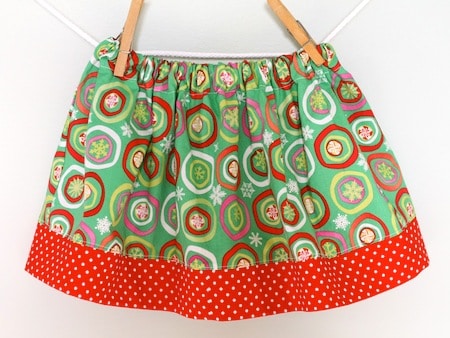
And because I apparently can’t stand doing anything without some sort of sewing involvement, I made my daughter a quick skirt to match her awesome new shirt!

Does she like her kids Christmas shirt?

I would say my DIY Christmas shirt was a hit!
Christmas Shirt
Equipment
- Sponge
- Towel
Materials
- T-shirt either old or new
- Mod Podge Photo Transfer Medium
- Graphic of your choice, printed on laserjet
- Wax paper
Instructions
- Print and cut your image to size.
- Generously apply a thick layer of Mod Podge Photo Transfer Medium to the FRONT of the image. Apply as much Mod Podge as it takes to make the image disappear.
- Place the image picture-side down onto the shirt. Gently but firmly secure it to the shirt by rubbing in small circles all over the paper. Make sure there are no wrinkles or bumps.
- Lay flat to dry for at least 24 hours.
- Grab a damp sponge or towel. Gently rub the paper off using the damp sponge using a small circular motion. You will then see the paper start to flake off and the image will start to show.
- Once all the paper has been removed, let the shirt hang dry (product cannot be washed for at least 72 hours and hang drying is always best). If you notice more paper that needs to be removed, repeat the step above.
- Add embellishments to the shirt with fabric glue. Alternatively, you can hand sew on the buttons and ric rac.
Notes
Don’t forget to visit our photo transfer Christmas napkins and fabric Christmas bowl for more decoupage fun!






I love this project! I haven’t seen this fomulation of Mod Podge before. Definitely going to look for it and see what I can create. Thanks!
So cute! I think I’ll have to try this one!! BTW, I think your adorable daughter needs some red sparkle shoes to go with that outfit 🙂 They are a staple in our house! It’s amazing how many things they go with!!
Hahaha, so true! Red sparkle shoes are always in style 🙂
Oh my cuteness! My Kate would love this…putting on my to do list!
I just love this! And your little girl is adorable, too!
where to buy wax paper?
Hi JJ! Any grocery store has it 😀
Oh my gosh, SO CUTE!! My boys would love this.