Give those boring shelves a complete makeover – decoupage fabric with Mod Podge Hard Coat – this is an easy and budget friendly project!
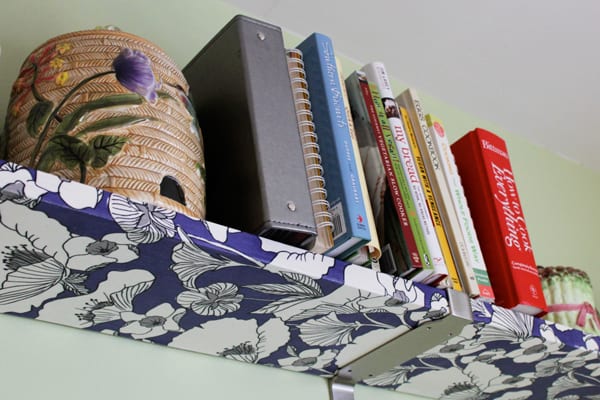
Hi! This is Heidi from Hands Occupied with tips on how to decoupage fabric onto shelves. This DIY home decor project is easier than you might think – especially when you’re working with something like a simple shelf.
I had some shelves to makeover because I moved to a new apartment, and the black shelves went well with my old living room decor, not so much with my new kitchen decor that’s all white, natural-finish wood and light green.
I grabbed some fabric and did this craft at home quite easily. I’m going to show you how to do it below!
Decoupage Shelves
Gather These Supplies
- Wooden shelves in need of a makeover
- Mod Podge Matte
- Mod Podge Hard Coat
- Fabric
- Sanding & priming supplies (optional)
- Scissors
- Iron (optional)
- Tape measure
- Sponge brush
- Brayer
Directions
Start by sanding and priming your shelves (if necessary). The color of the shelf will show through the fabric you decoupage onto it, which is how you’ll know if priming is needed.
My shelves are those ekby bjarnums from IKEA, in the dark finish, with brackets covering the left and right-facing ends. I only needed to prime the front edge, top, and bottom of the shelves. My fabric is white, which is why I used white primer on my shelves.
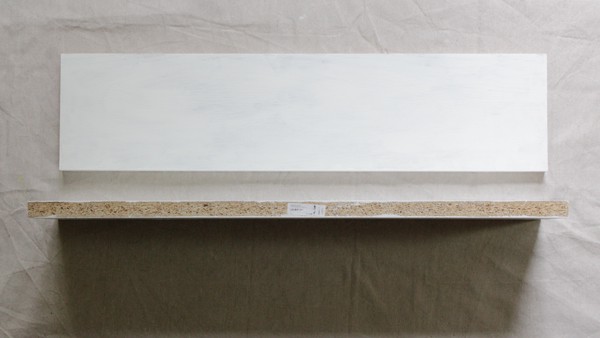
Cut a piece of fabric large enough to cover your shelf, plus half an inch on the ends.
Since my shelf only required coverage on the top, bottom and front edge, I only needed a rectangle large enough to wrap around my shelf (like a Christmas present).
However, I needed open ends on the short sides of the shelf and a little bit extra on the long side. This was so I could wrap the fabric over to the edge that would be facing the wall the shelf is mounted on.
Next, apply a layer of Mod Podge Matte onto one side of your shelf. Carefully align the fabric so it lays square on the shelf, leaving about an extra half inch of fabric hanging off the first end.
This is the time to get your fabric perfectly straight – you won’t be able to adjust it after this step. When you’re all lined up, smooth down the fabric onto the shelf and Mod Podge.
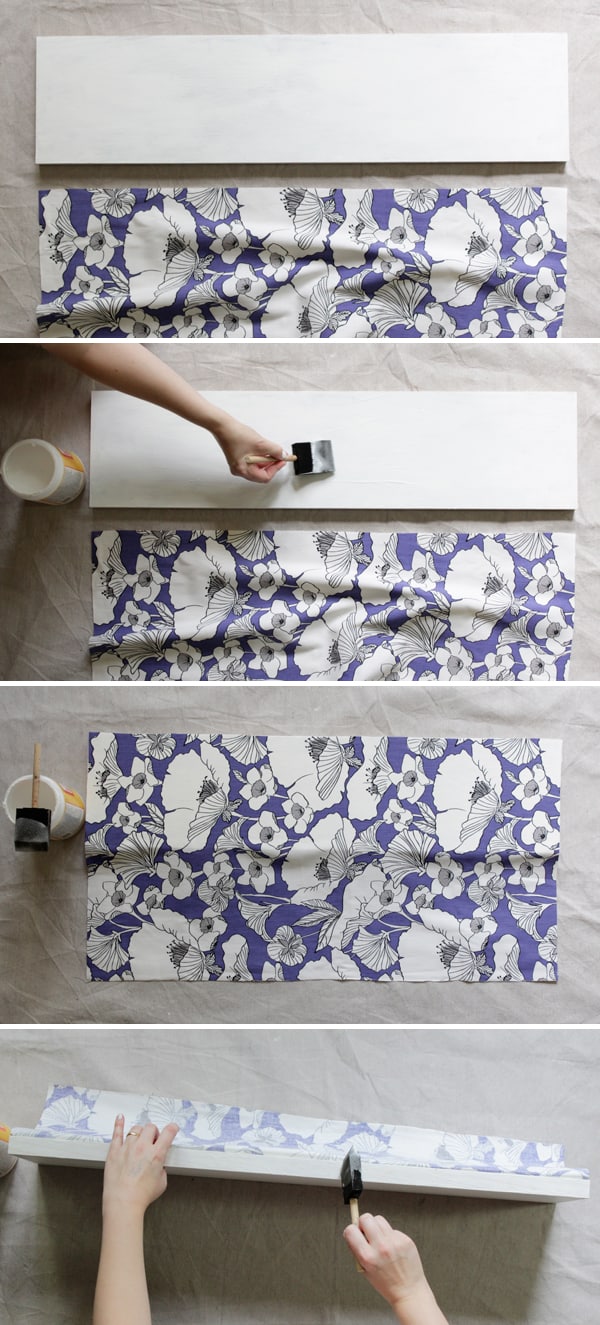
Apply Mod Podge to the front edge of the shelf. Carefully fold the fabric over it, smoothing it into place snugly. Feel free to pull on your fabric as needed. However, don’t pull on it so hard that you stretch your fabric weirdly, warping the pattern.
Next, paint Mod Podge onto the third side of the shelf and smooth the fabric into place once again. There should be about a half inch of extra fabric on both raw ends of your fabric.
Paint a last layer of Mod Podge onto the wall-side edge of your shelf and stick the raw ends onto it.
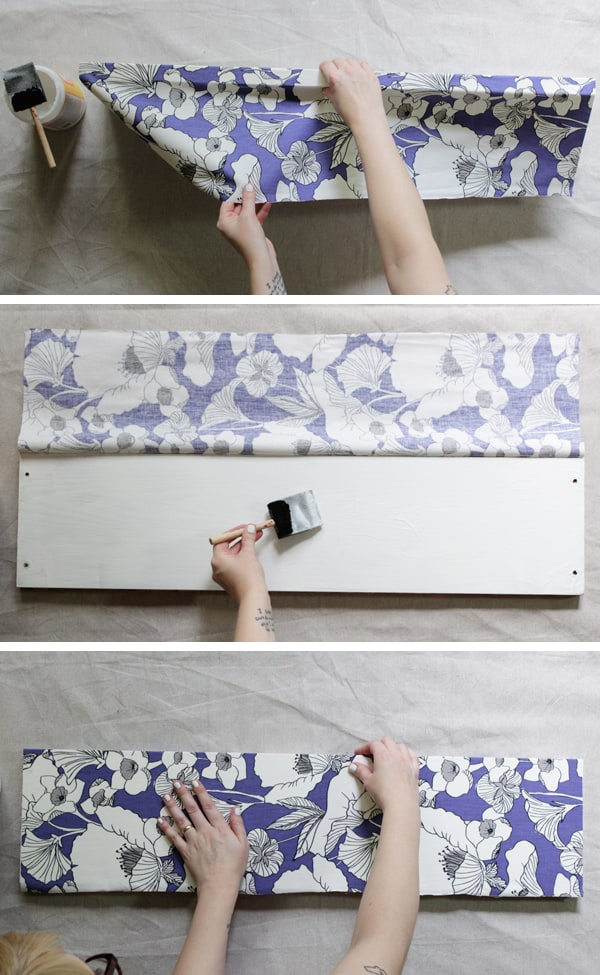
The next phase is to – one side at a time – paint Mod Podge all over the outside of your fabric. Use a brayer to force the Mod Podge all the way through the fabric. Do all four sides and let the whole shelf dry completely.
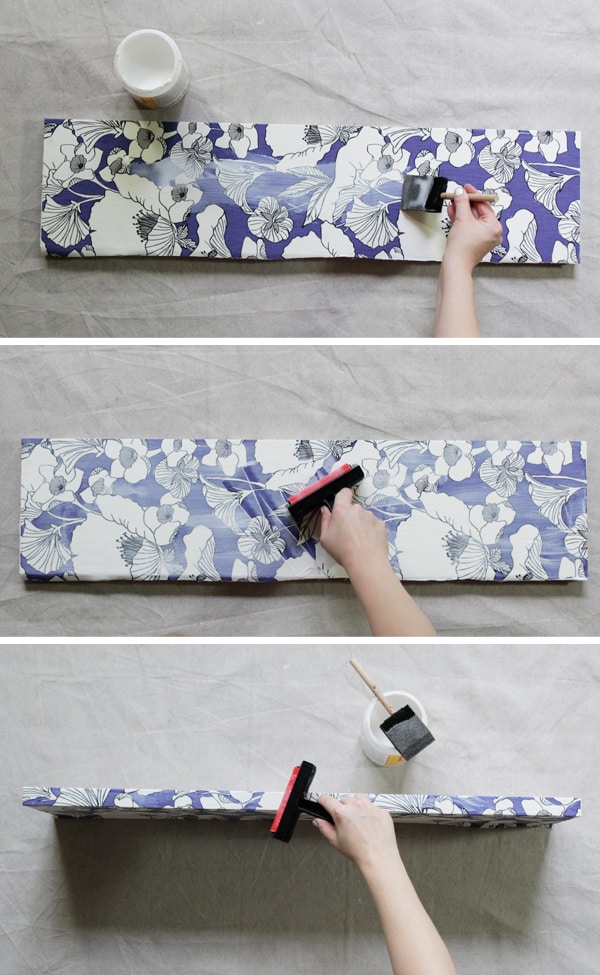
After your shelves are dry, paint over all four sides again with a layer of Mod Podge Hard Coat. Let your shelves dry completely once again. Before hanging them up, let them sit and cure for four days.
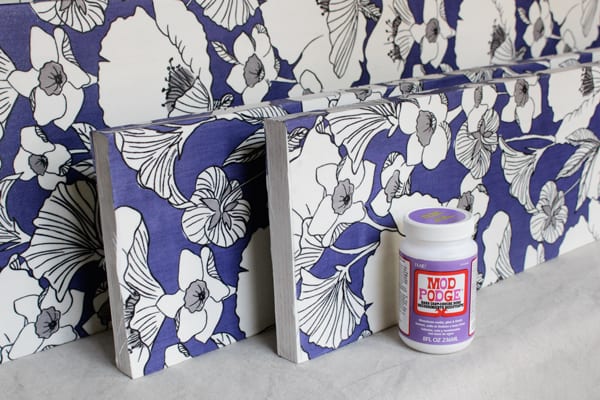
Fabric Covered Shelves
Equipment
- Tape measure
- Iron
Materials
- Wood shelves in need of a makeover
- Fabric enough to cover the shelves
- Mod Podge Matte
- Mod Podge Hard Coat
- Sanding and priming supplies
Video
Instructions
- Sand and prime if necessary. If your fabric is thin, you’ll want to prime with white so that the color of the shelves doesn’t show through the fabric.
- Cut a piece of fabric large enough to cover your shelf, plus half an inch on the ends.
- Apply a layer of Mod Podge Matte onto one side of your shelf. Carefully align the fabric so it lays square on the shelf, leaving about an extra half inch of fabric hanging off the first end.
- Apply Mod Podge to the front edge of the shelf and carefully fold the fabric over it, smoothing it into place. Feel free to pull on your fabric as needed.
- Paint Mod Podge onto the third side of the shelf and smooth the fabric into place once again. There should be about a half inch of extra fabric on both raw ends of your fabric.
- Paint a last layer of Mod Podge onto the wall-side edge of your shelf and stick the raw ends onto it.
- Paint Mod Podge all over the outside of your fabric and use a brayer to force the Mod Podge all the way through the fabric. Do all four sides and let the whole shelf dry completely.
- Paint all four sides again with a layer of Mod Podge Hard Coat, and let your shelves dry completely before hanging.
If you enjoyed these fabric covered shelves, I’d love for you to check out some of these other home decor projects:



Love the idea of using fabric to cover the shelves, it really opens up a whole world of prints and textures.
This is such a pretty and inexpensive way to add color to a bookcase or shelf. I love this idea – Great job!
How about using fabric to cover the brackets too? The shelf would appear to float!
Bobbi from Rhode island.
What a great idea! love it! I have just started doing a couple of decoupage projects but haven’t been that brave yet! This could well be the next thing I try – will let you know how it goes!
Great idea. Can’t wait to try this project.