
You won’t believe what this unique DIY starfish is REALLY made of! Learn how to make one (or 12!) to add to your beach-y home decor. Easy to make, and fun for all ages.
Skills Required: Beginner. You’ll be using a styrofoam cutter ideally (or a warm knife) to cut craft foam. Then you’ll be using Mod Podge. It’s pretty simple, even if you haven’t crafted much before.
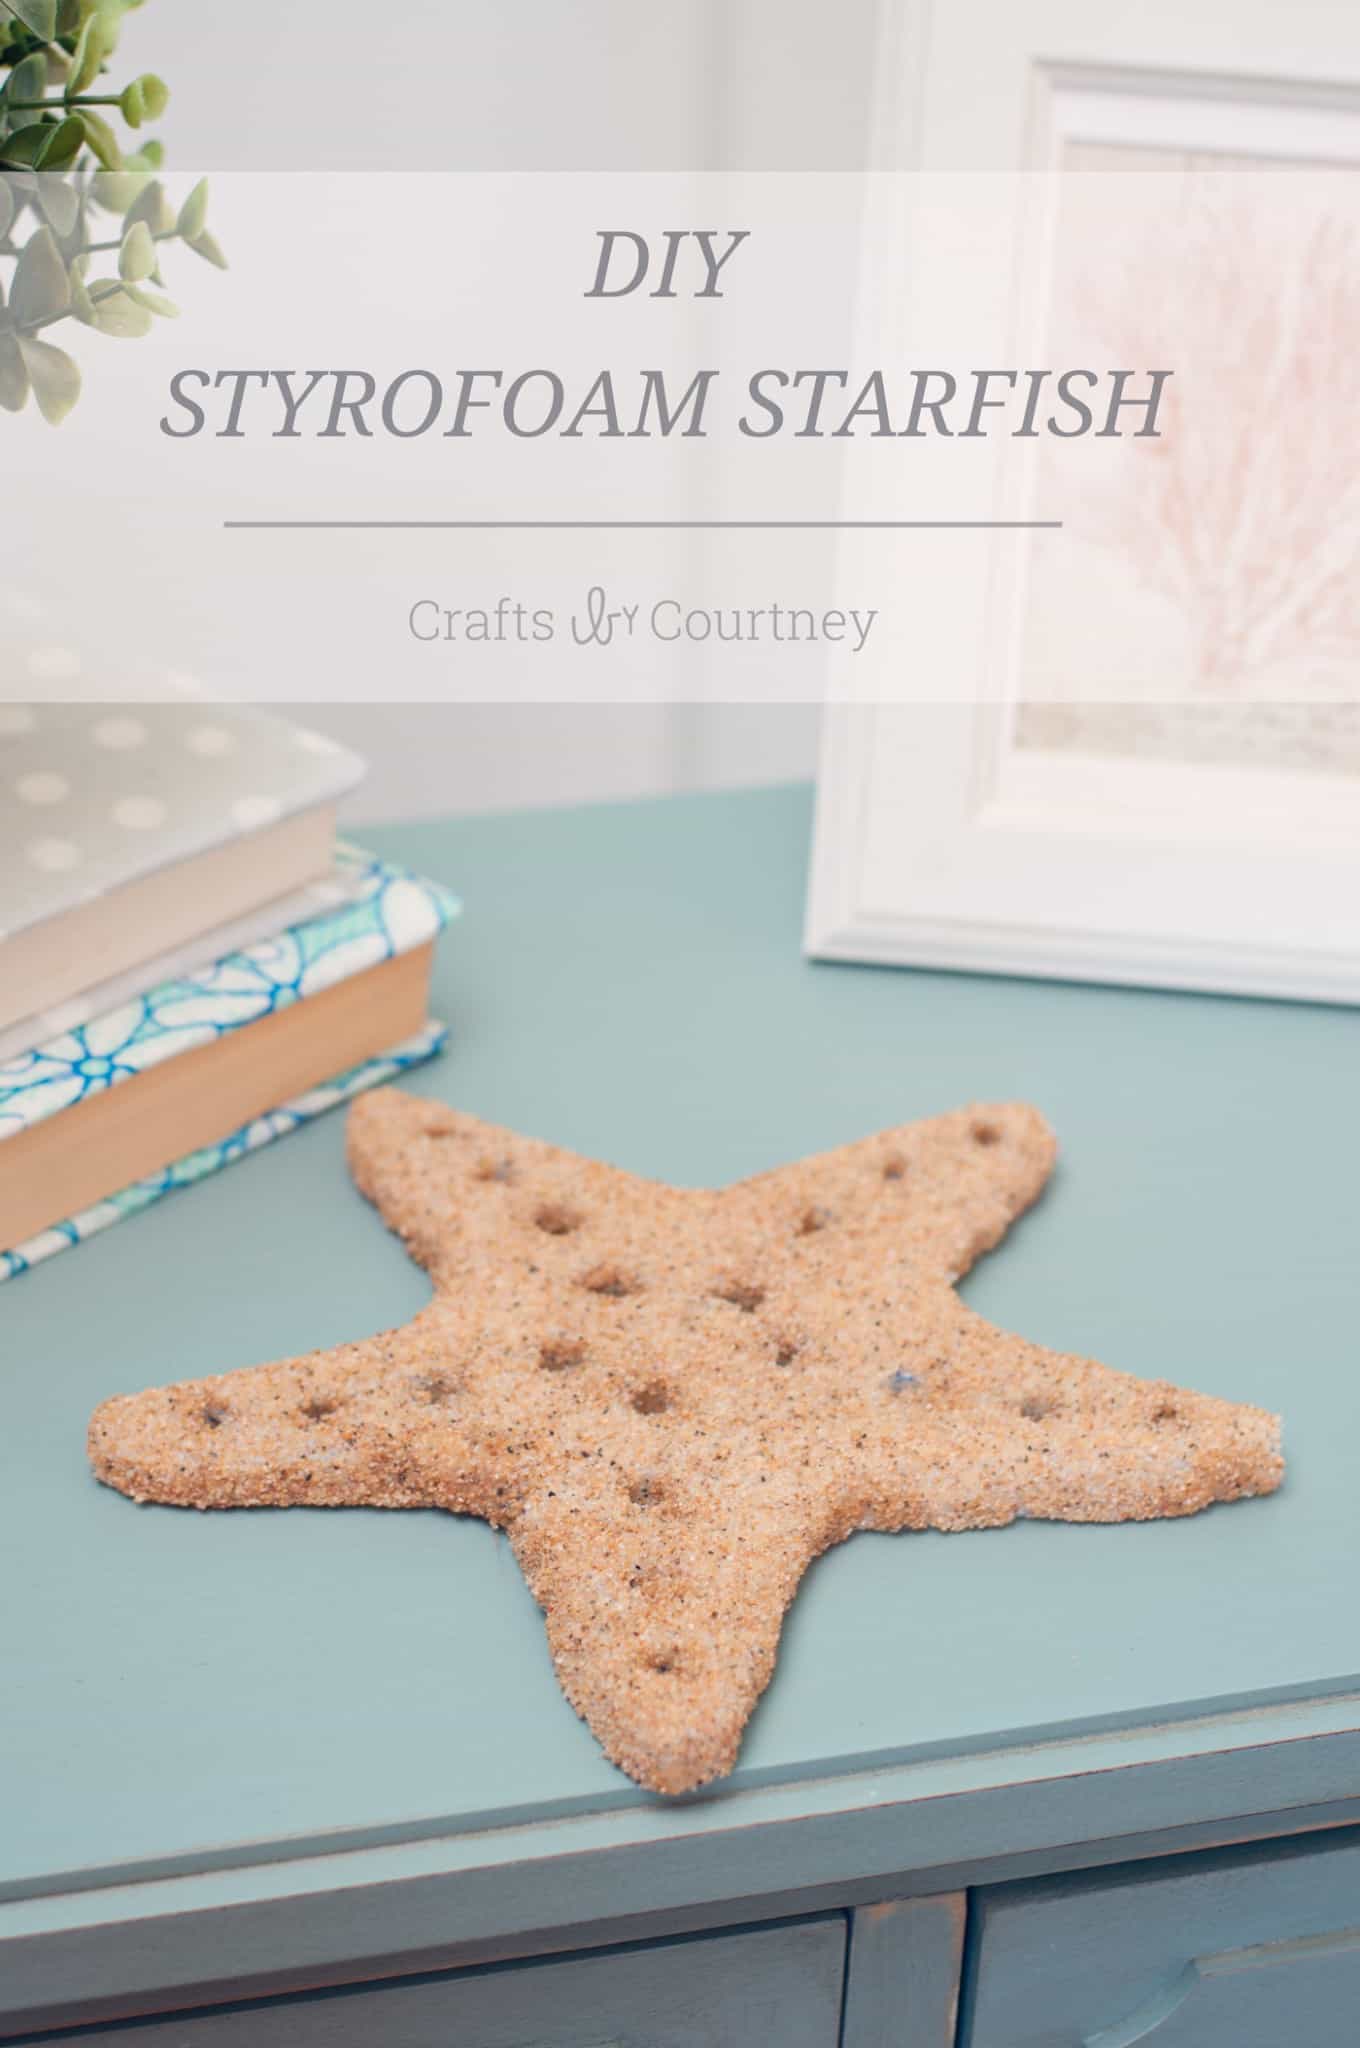
Are you ready to add a splash of beachy charm to your home decor? This easy DIY starfish project is a delightful way to bring the seaside right to your living room! Whether you’re dreaming of ocean waves or just love coastal vibes, making these starfish is a fantastic way to get creative.
Using simple materials like Mod Podge, sand, and craft foam, you can craft stunning starfish that look like they came straight from the ocean.
I can picture these beauties as centerpieces for a summer party, decor for a beach-themed wedding, or just to add a touch of coastal charm to your living space.
What makes this project so special is its simplicity. With a few basic supplies and a bit of creativity, you can transform ordinary craft foam into beautiful, realistic starfish.
You can experiment with different colors of sand, add some glitter for a bit of sparkle, or even paint designs on your starfish. The possibilities are endless, and the results are always impressive.
It’s a wonderful way to spend a creative afternoon and end up with beautiful, beach-inspired decor that you’ll be proud to display. Jump into the world of crafting with Mod Podge and bring a little bit of the beach into your home!
How to Make a Starfish
For this beach-y craft you’re going to need:
Gather These Supplies
- Mod Podge Gloss
- Mod Podge sealer
- Sheet of foam
- Sand
- Styrofoam cutter – you NEED this tool – makes it so easy!
- Starfish template
- Black marker
- Paintbrush
- Sandpaper (optional)
Before you get started, you’ll want to either 1) pull a starfish template from the internets (you just need the basic shape) or use your die cutter to make a template. You can also just wing it if you choose!
Step 1 – Trace Starfish Silhouette
I started off by cutting out my starfish template with my Silhouette Cameo. Then I used a large foam sheet and traced out all my starfish with a black marker.
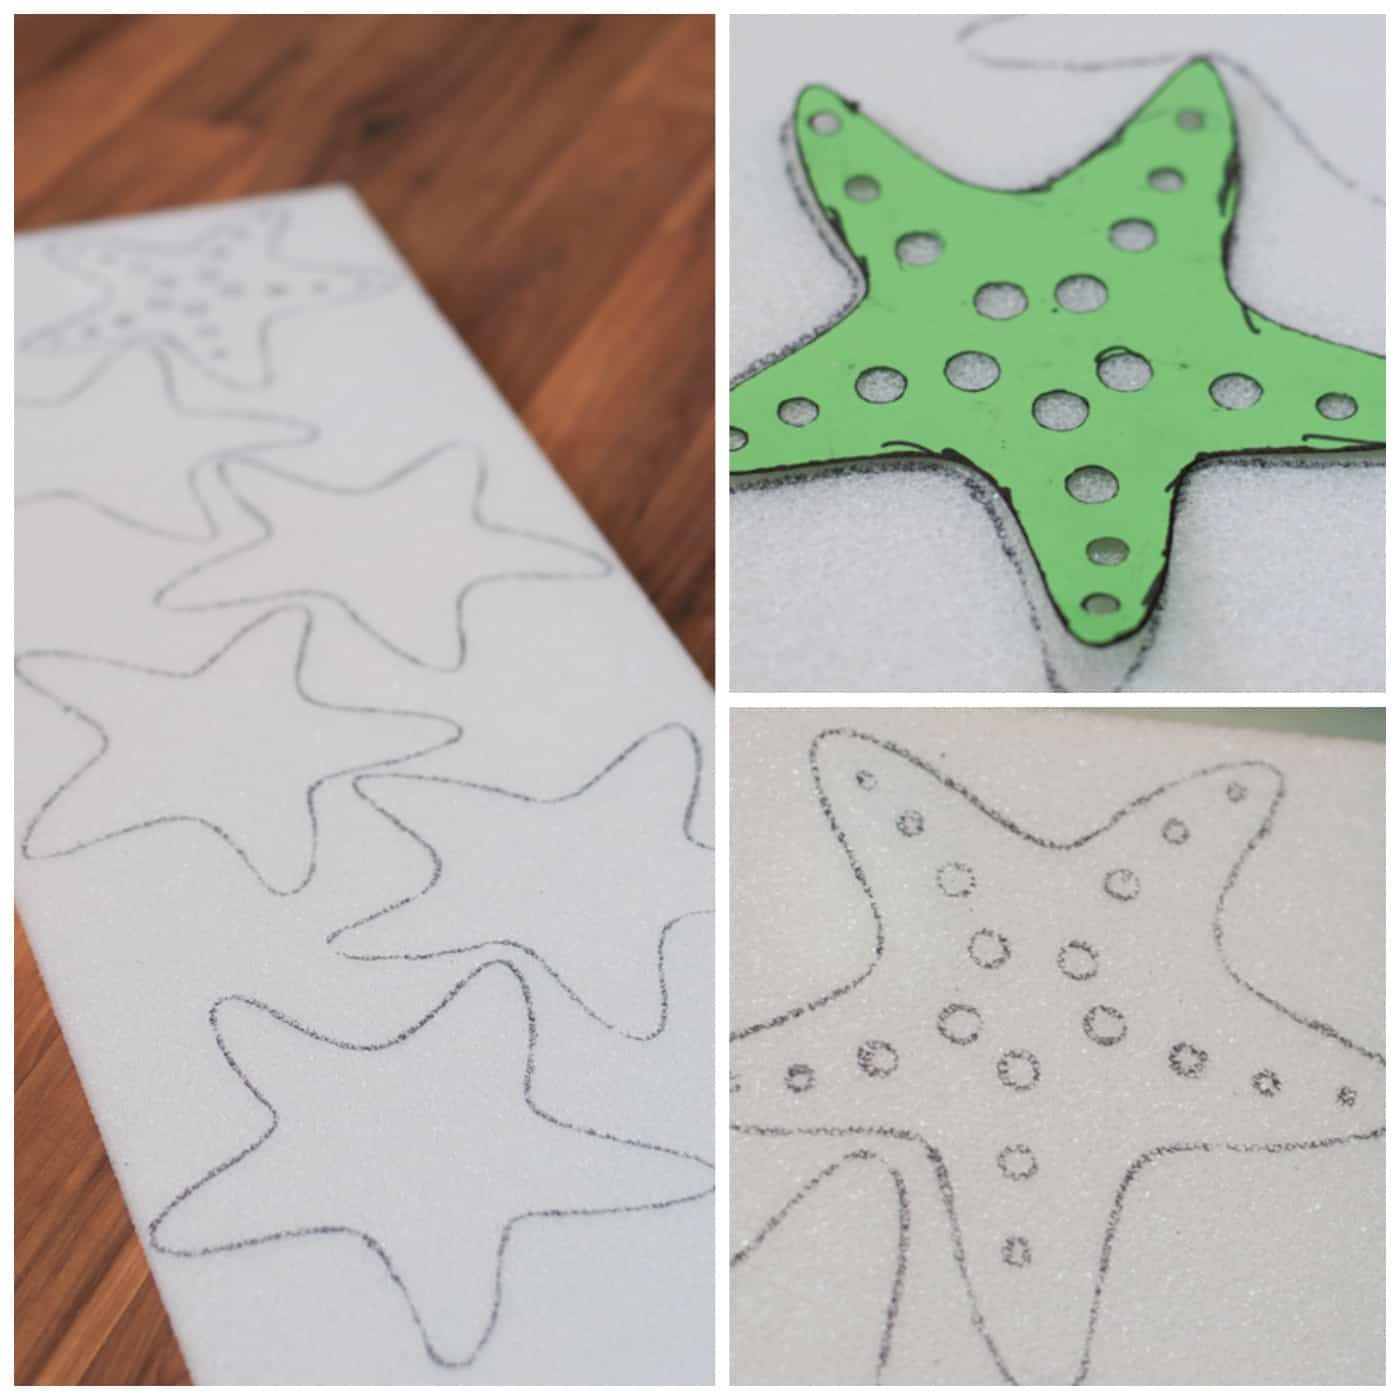
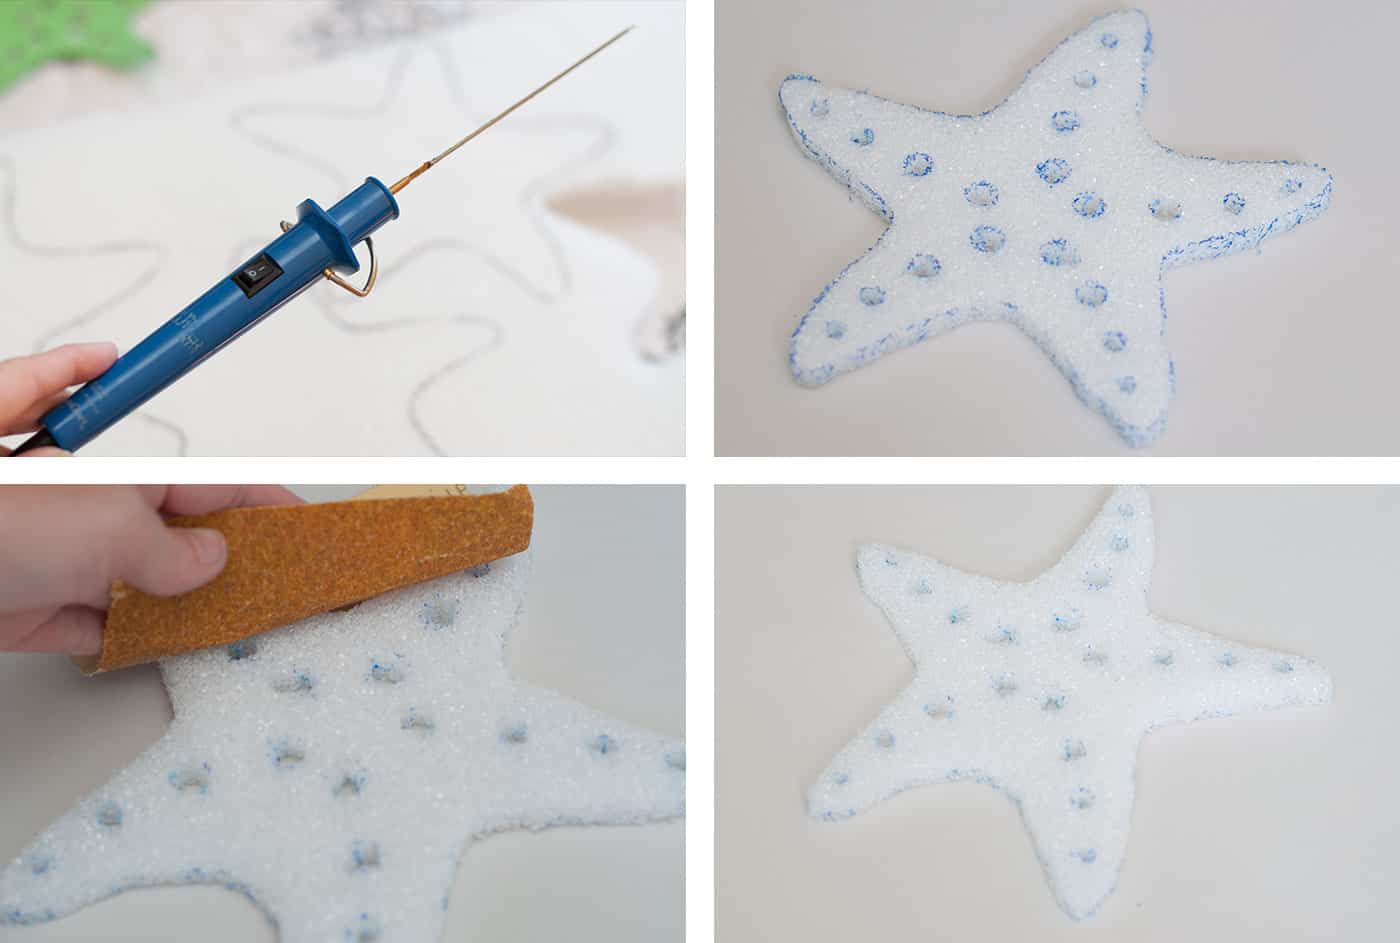
Step 2 – Cut Out Starfish
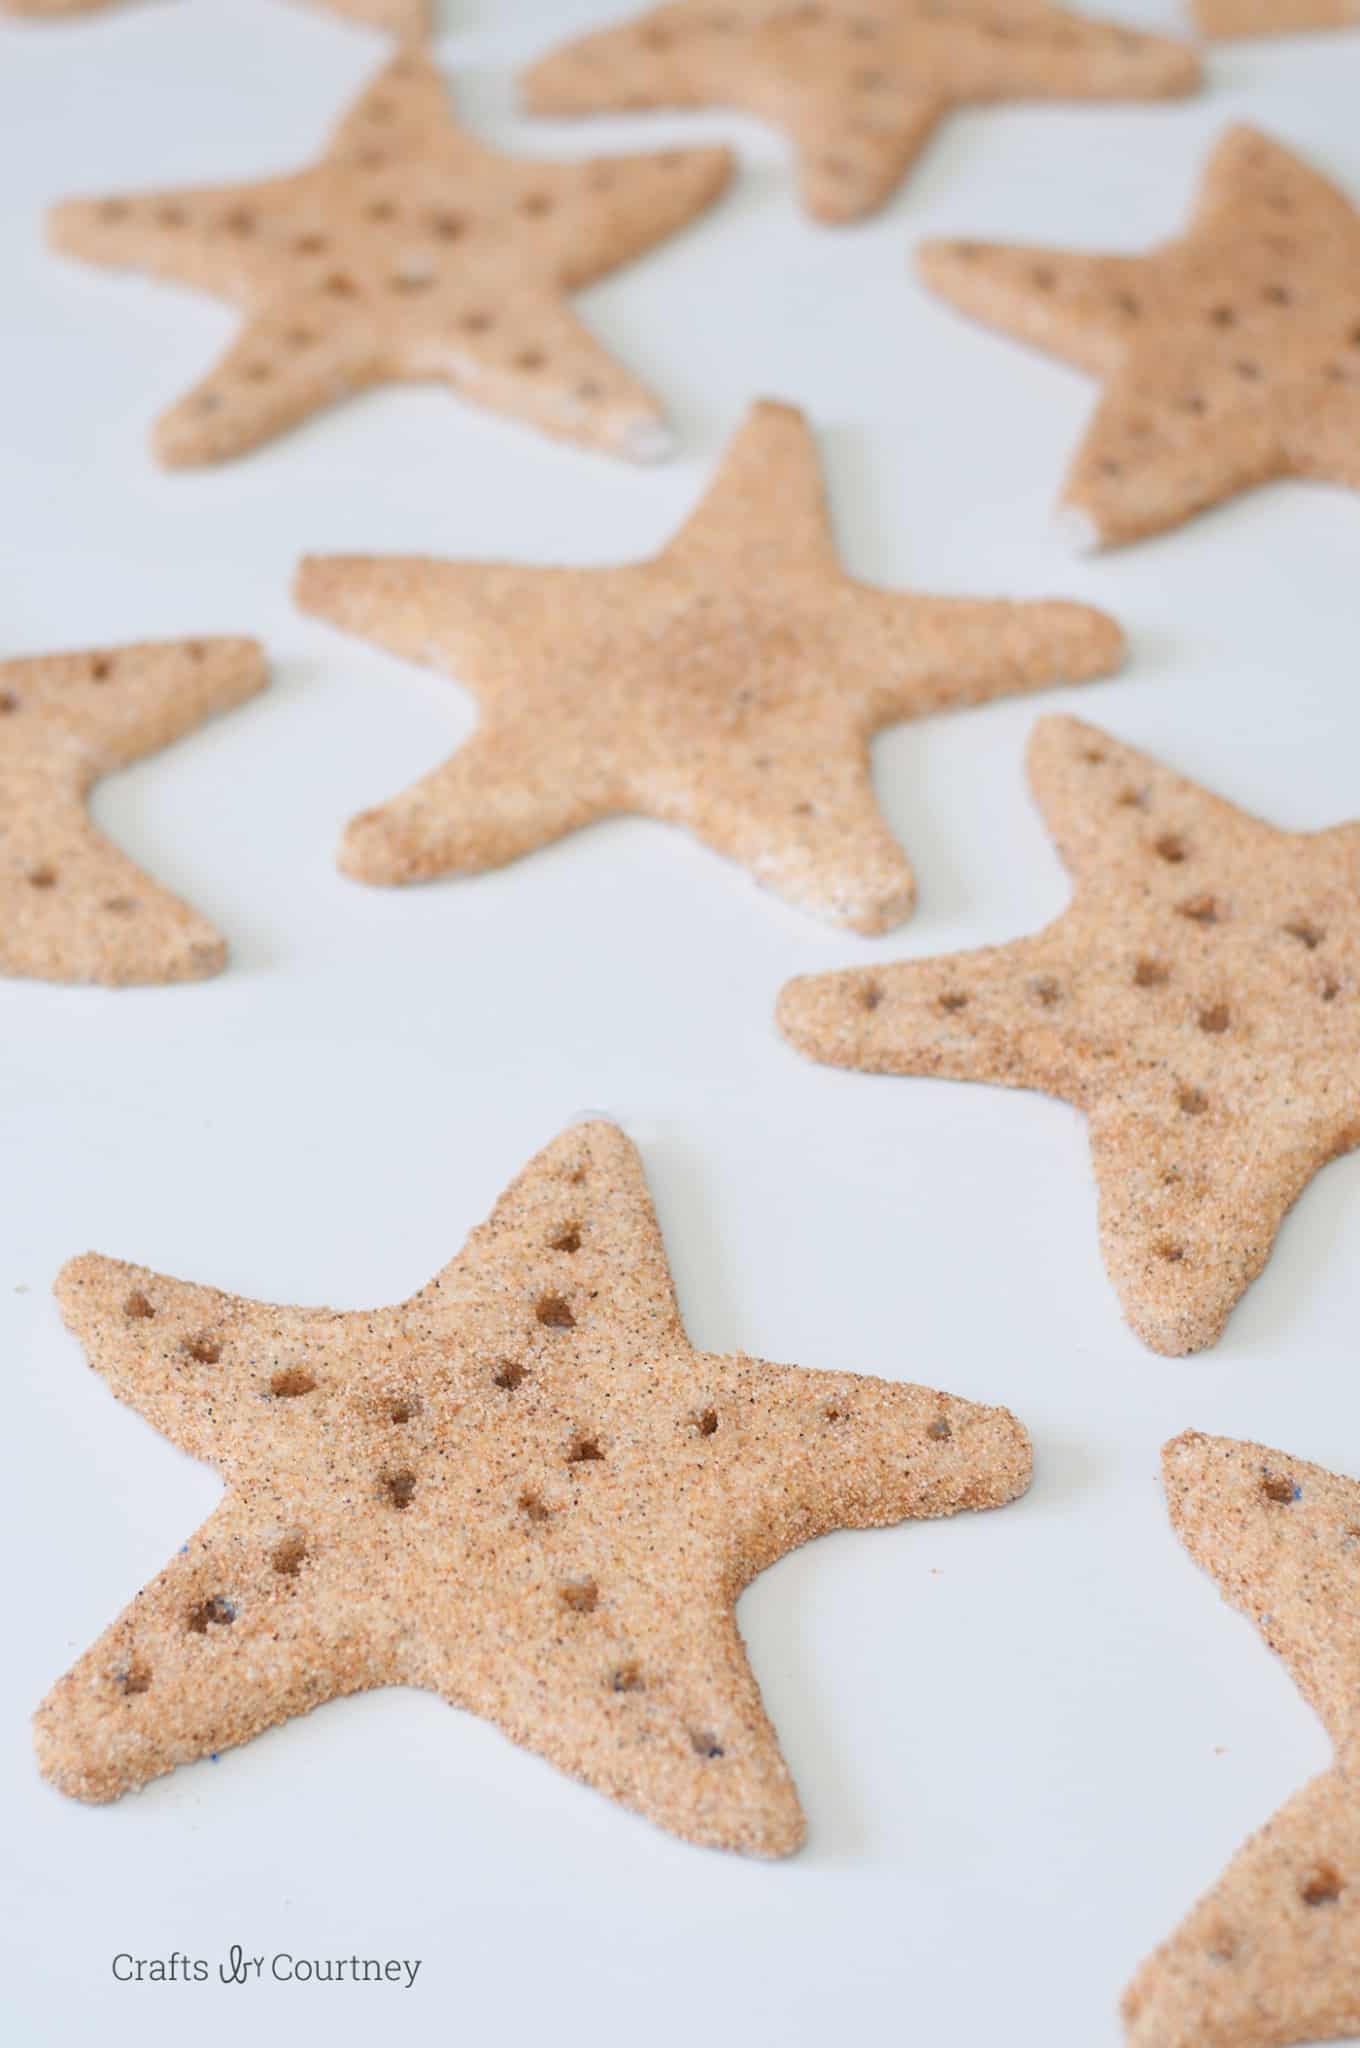
Next I used a foam cutter and cut out all 12 of my starfish! It was super easy. Then I grabbed some light sandpaper and rounded the edges. How cool is this starfish?!?!
If you don’t want to purchase a foam cutter, go ahead and use a craft knife to cut out your starfish. You not be able to achieve the little detail holes (or make as many), but you’ll still get your general starfish shape. Foam is just a little harder to cut with a craft knife.
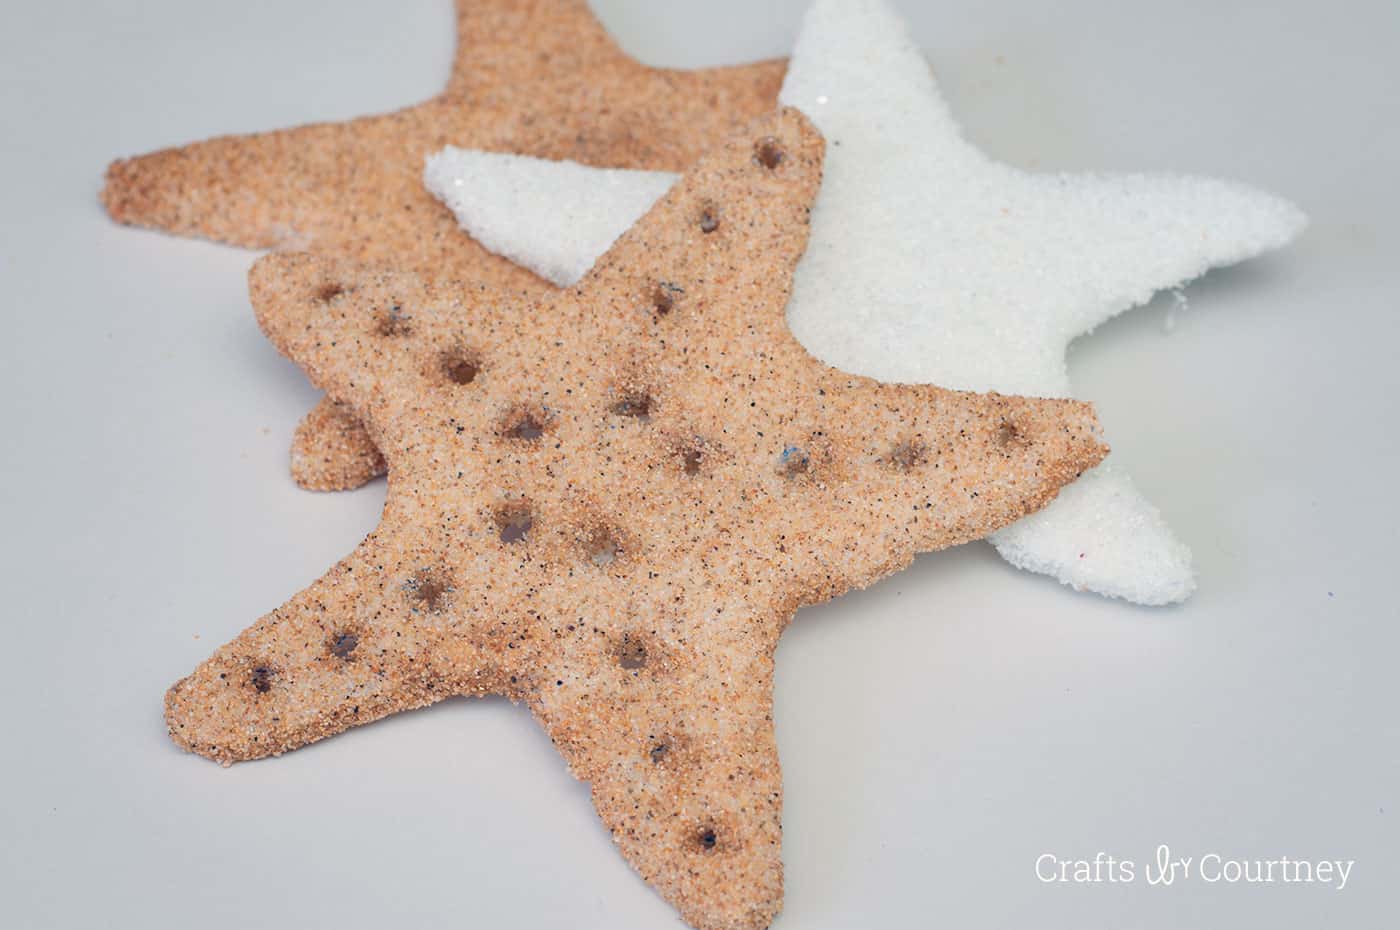
Step 3 – Add Your Sand
So of course I had to make it look more like a “real” starfish! What better materials to use then Mod Podge and sand for this project.
I painted on my Mod Podge in spots then sprinkled my sand over top. If you decide to make the holes then use a thinner paintbrush, it makes it a little easier to get your Mod Podge inside. Let dry 25 minutes.
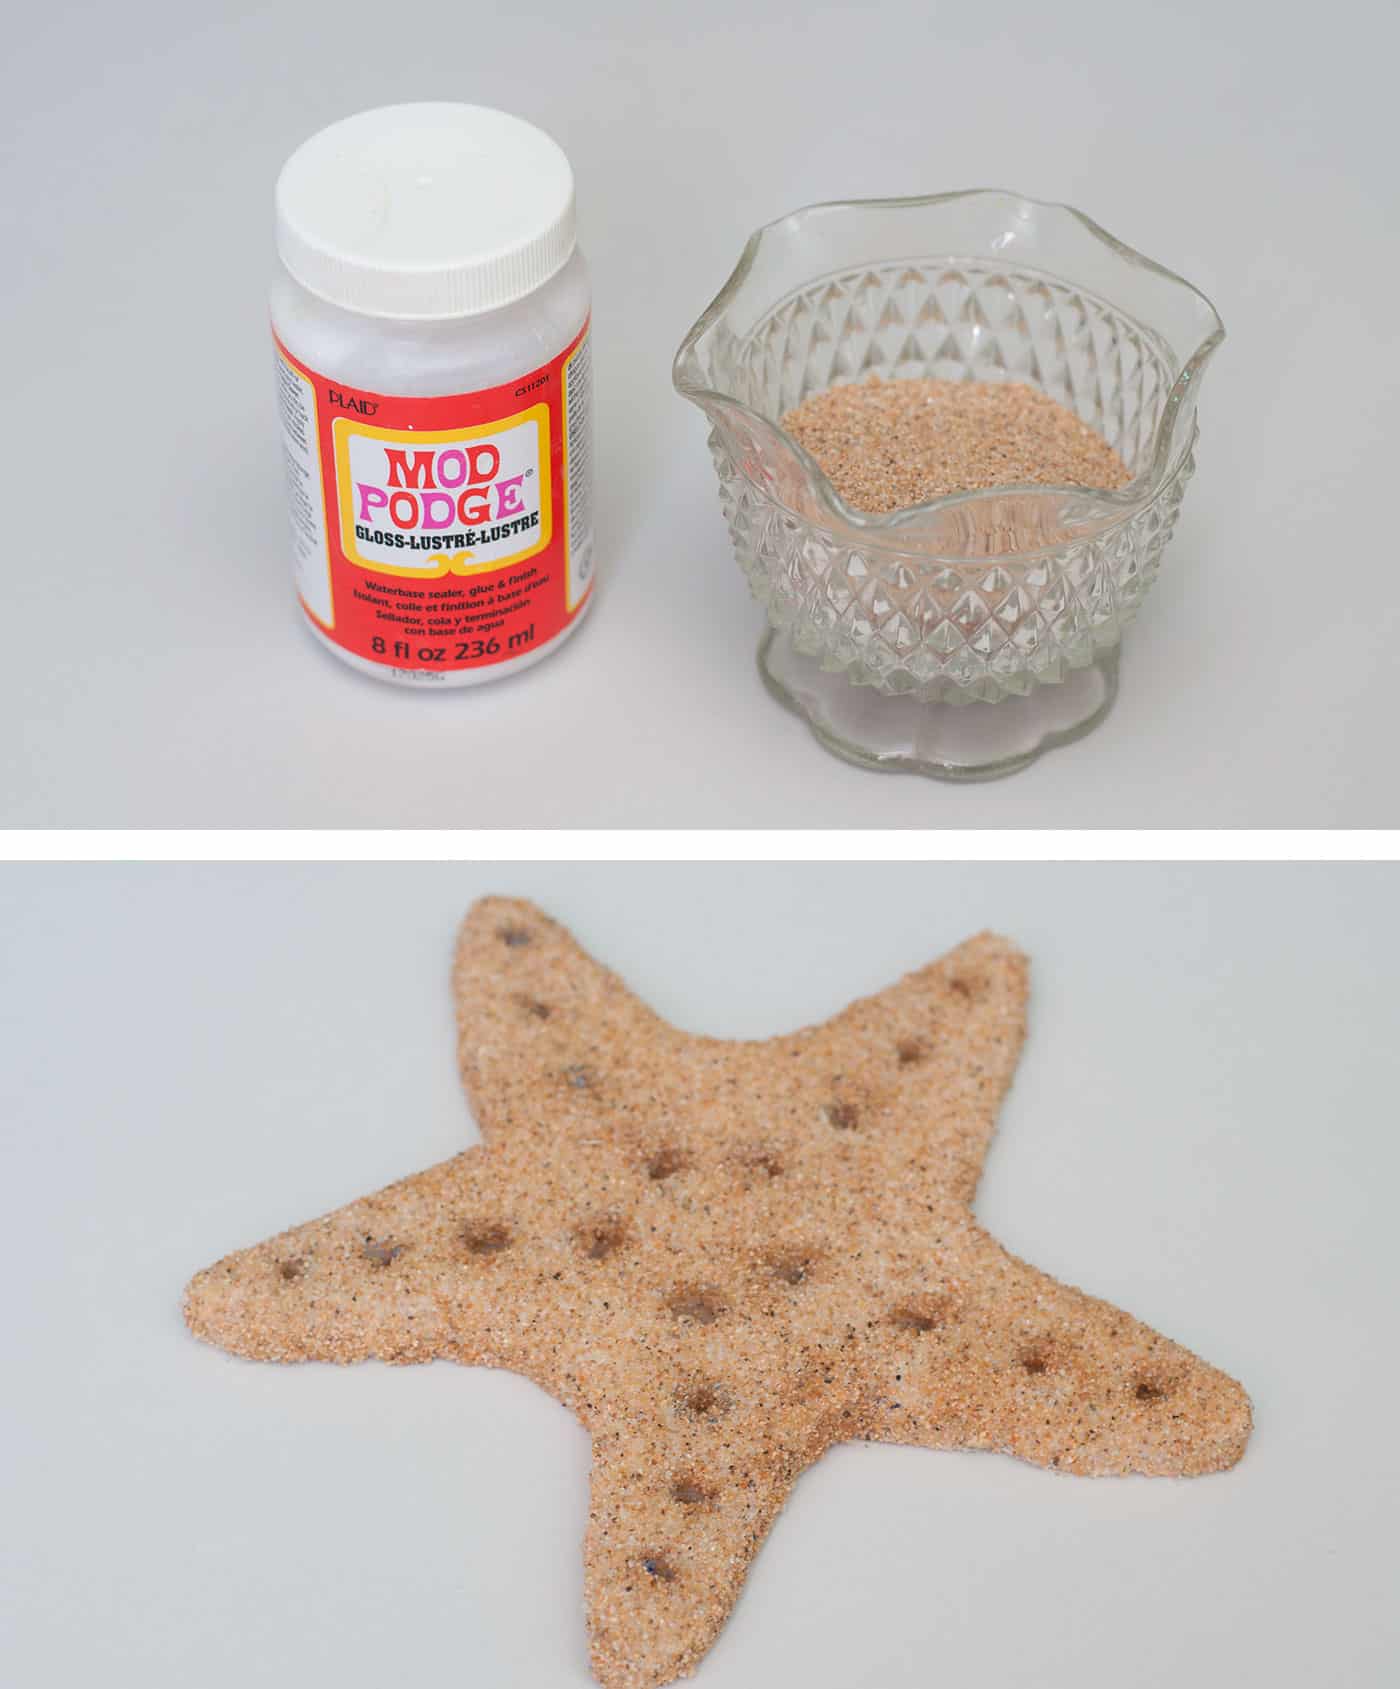
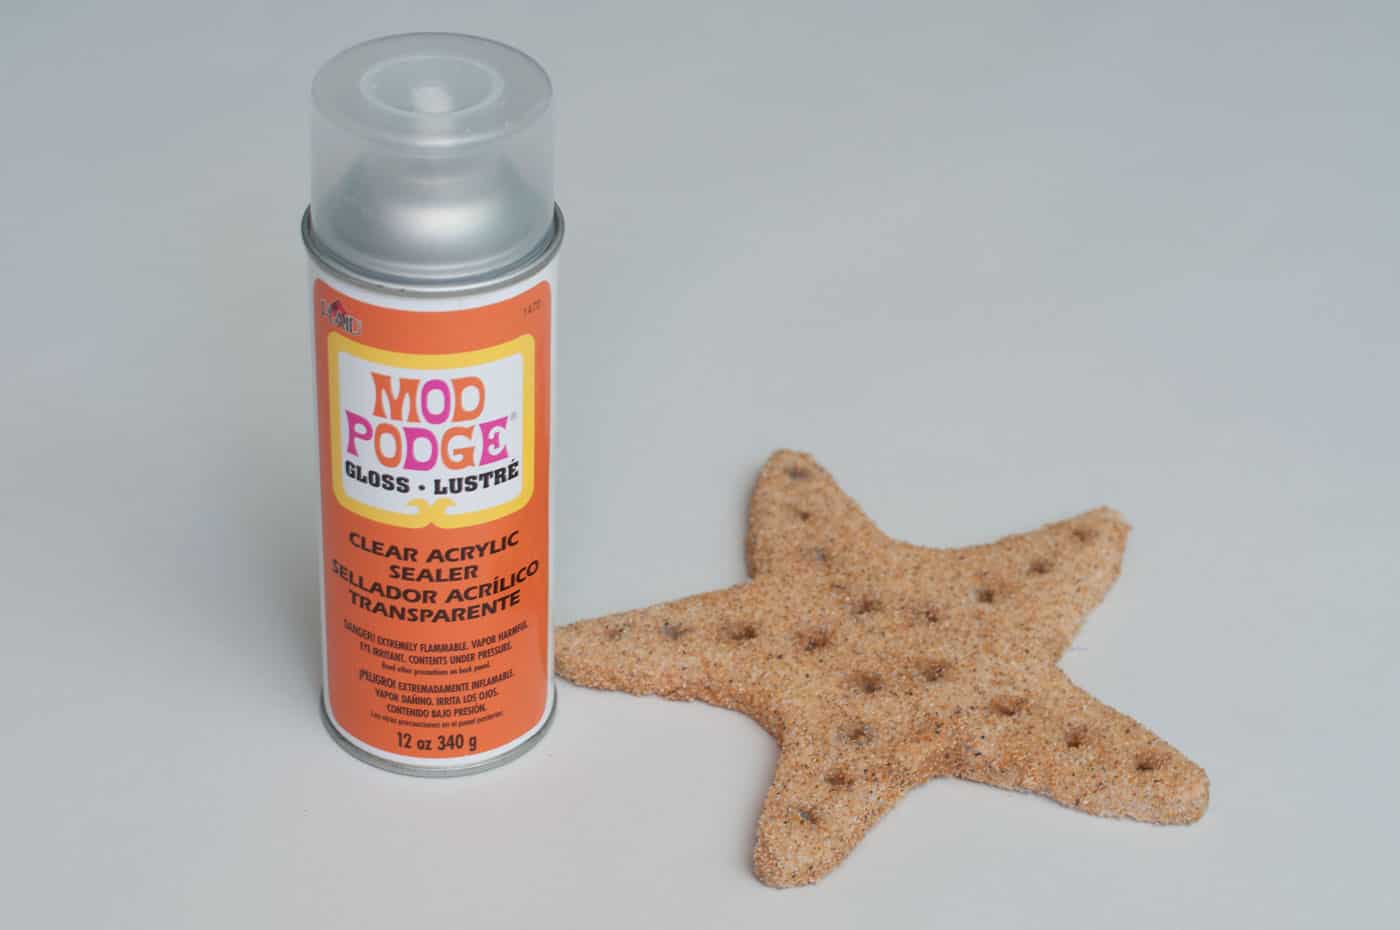
Step 4 – Seal Your Starfish
Now let’s seal that starfish so the sand won’t fall all over the place!! I just lightly went over the starfish with the sealer. Once it dried that sand wasn’t going anywhere. My kids made sure to test that out!
Finishing Touches
I made several while testing out various effects. I used a lighter sand on one and thought that turned out pretty cool too. But the darker sand was my favorite.
As you can see, this starfish craft is pretty easy to do once you round up all your materials.
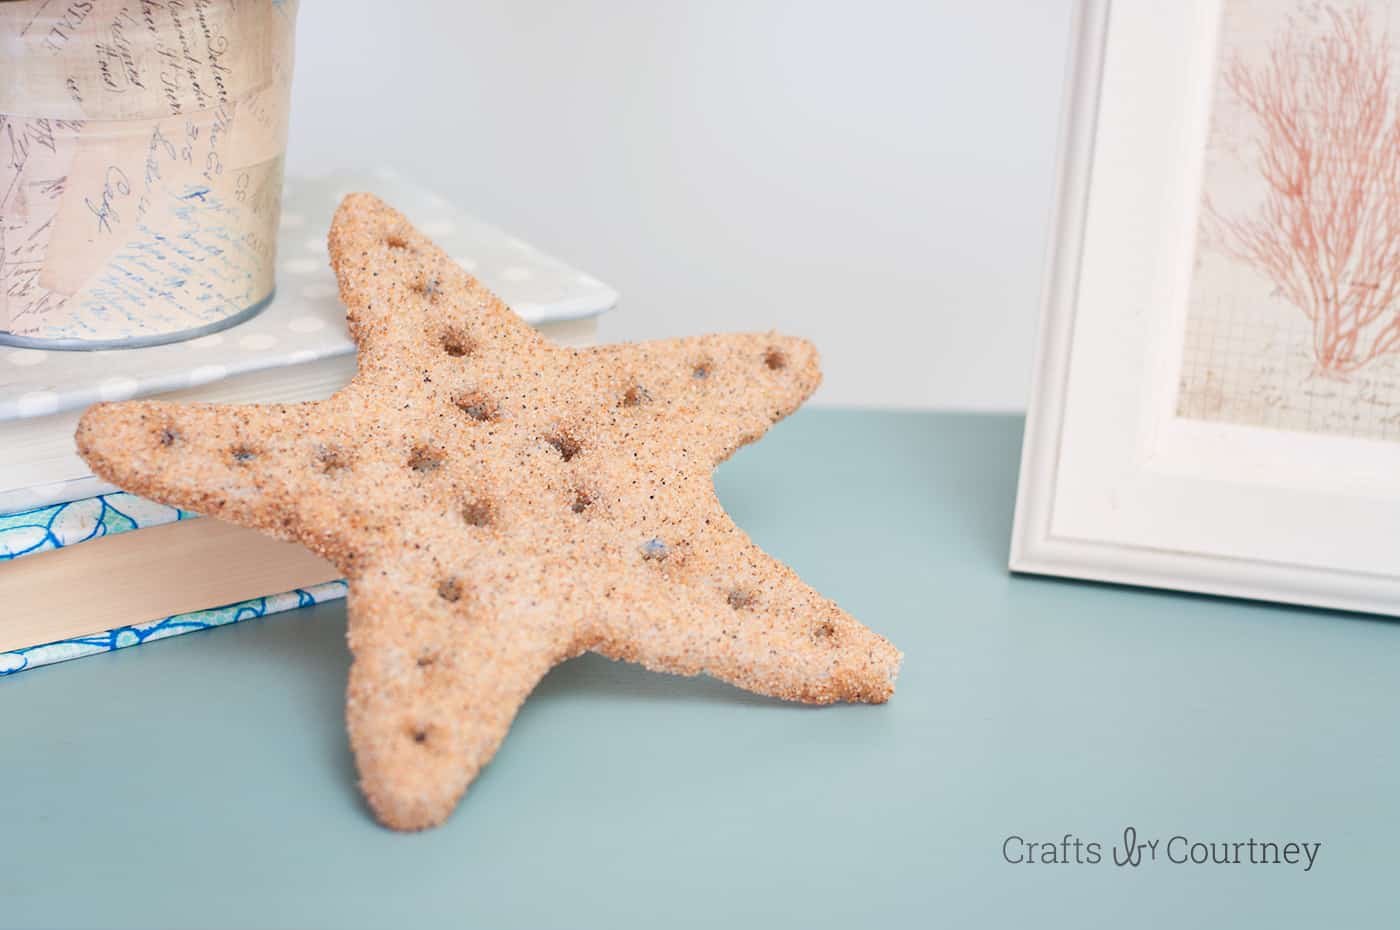
I love the look of individual starfish placed together for a summer display. But I also think a really large one would be a stunning centerpiece sitting on a mantel.
Now that winter is over, I’m so ready to get started on more beach-y crafts for the house! If you enjoyed this coastal-themed craft, I’d love for you to check out these other ideas:


Is there a template to print for the starfish???
Hello Mary Ann, I have a Silhouette cutting machine and I used that for my template. I found a starfish and I cut it off on heaving cardstock. Do you have a Silhouette or Cricket cutting machIne?
These are really fun! Sharing!