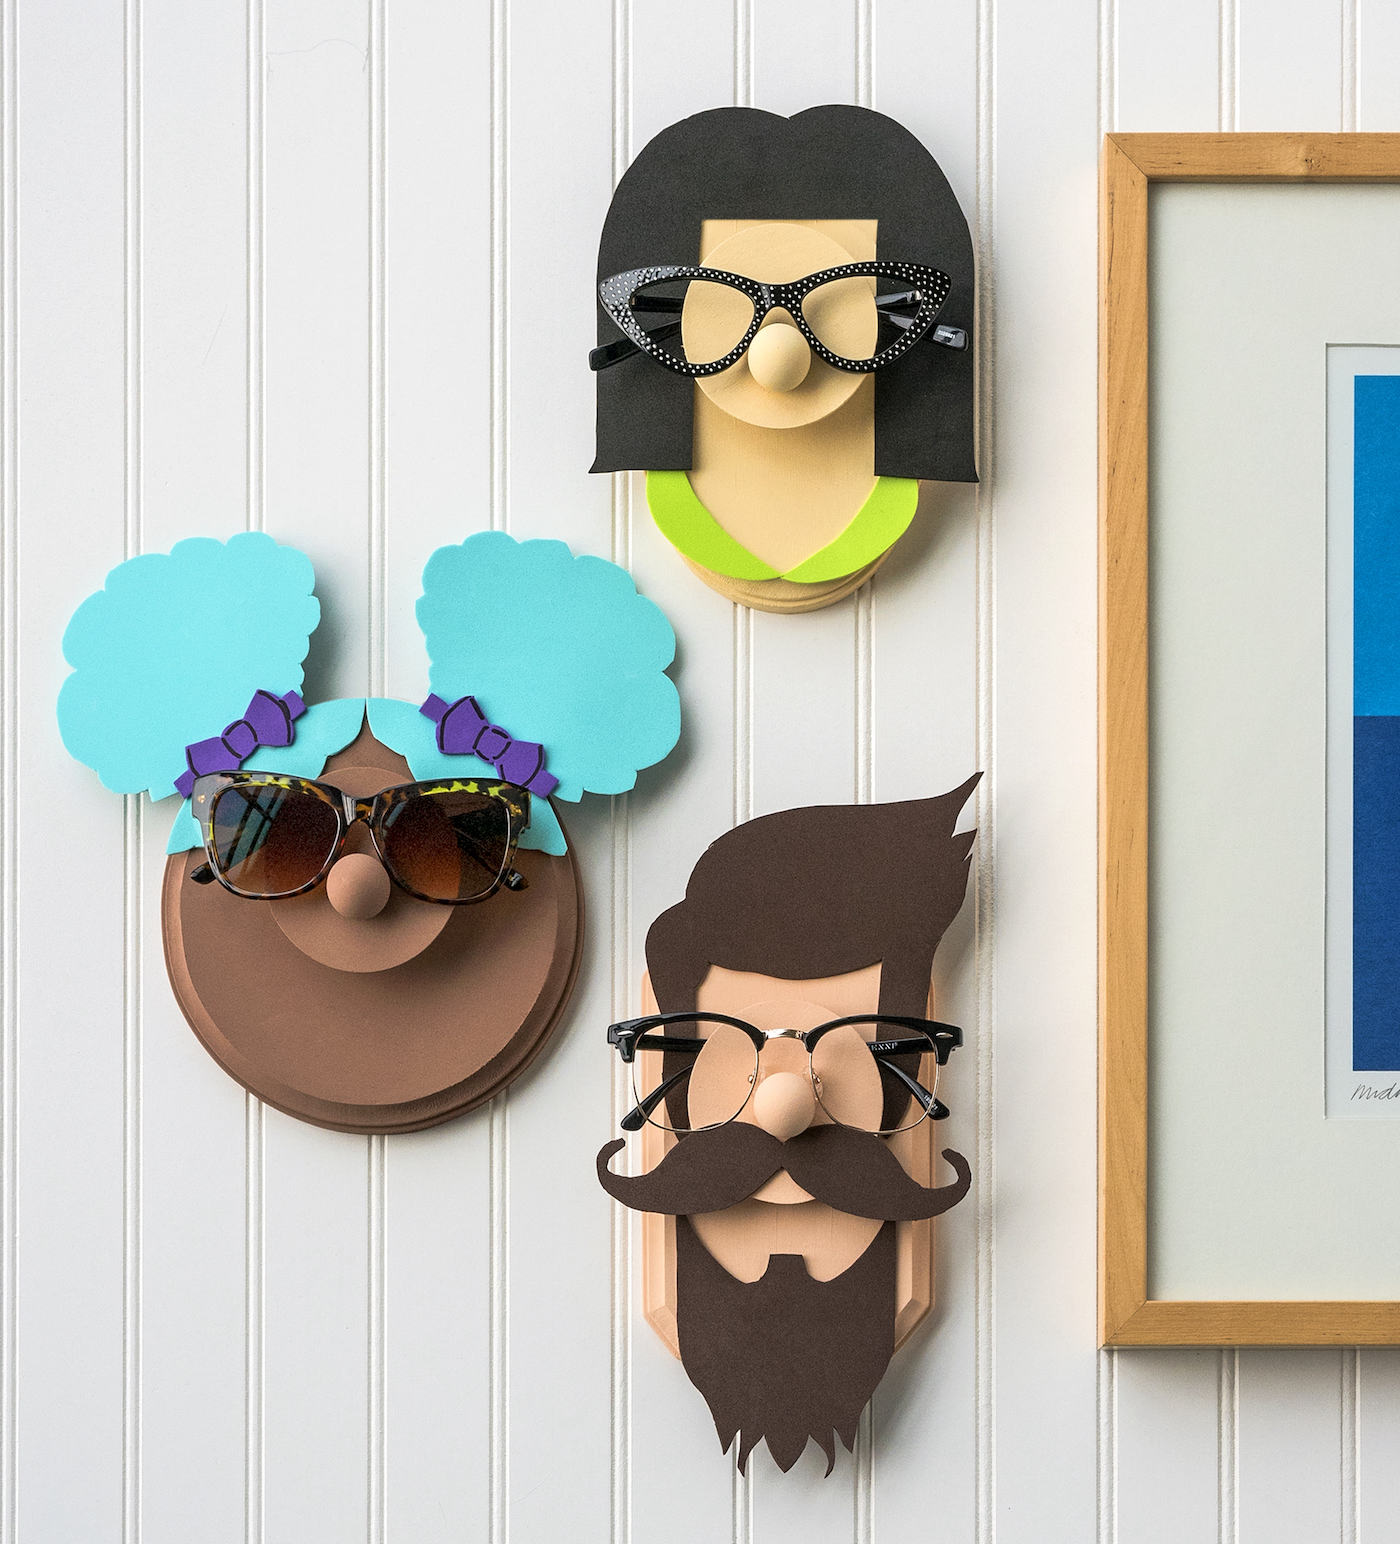
Learn how to make a DIY glasses holder that looks like a face with simple wood surfaces from the craft store. This eyeglass holder is SO cute and easily customized.
Skills Required: Beginner. You’re going to be painting and gluing wood, as well as cutting out foam with scissors (using templates). If you don’t have very much crafting experience, that’s okay! You’ll be successful.
If you’ve been around this blog for any length of time, you might have noticed that I wear glasses. The weird thing is that for many years I was not a glasses wear-er; I didn’t start wearing them full time until my mid-twenties.
When I was in grade school I did have to wear them to see the chalkboard, and at one point I attempted contacts to make it easier. Unfortunately I have astigmatism and dry eyes, which means (as I discovered), that contacts get glued into one corner of your eye and become difficult to get out. This can be traumatizing for a fifth grader.
Instead of suffering with little pieces of silicone stuck to my eyeballs, I decided to just suck it up and wear glasses! For a long time it annoyed me to wear eyeglasses – but then somehow it became part of my personality.
Now I’m at the point in my life where I’ve considered Lasik, but at the same time, I don’t know if I could or should do it. I feel like my glasses are part of me. Sometimes Steve refers to me as “teeth with glasses” because that’s the first thing you see when you see me!
In this post, I’ll show you how to make a DIY glasses holder that looks like a face. What I love about this craft is that it’s really modern and simple, and would look really cute in a kids’ room (or a craft room or office, no judgements!). Customize it to your heart’s content – skin color, hair, clothing, and more.
I’ve got three versions of this wood craft for you to check out, starting with a single face and single pair of glasses. Version two holds five pairs of glasses and version three can hold up to ten! Learn how to make them below.
Note: all glasses featured in this tutorial are from Zenni Optical.
Gather These Supplies
- Wood plaque – various sizes, 8 – 10″
- Wood circle – 3″
- Wood knob – 1″
- 2 Wood pieces – 2″ x 5/8″ x 3/8″ (craft wood section of Michaels)
- Mod Podge Hard Coat
- Foam – colors to make the hair, bows, accessories
- Scissors
- Craft glue
- Hot glue gun
- Paintbrushes
- Command Strips (for hanging)
- Patterns for the hair (optional)
Get Your Wood Pieces
These are the pieces you’ll need for your DIY eyeglasses holder. I bought all of them at Michaels! Everything was in the wood section. The wood circles and knobs were hanging from pegs.
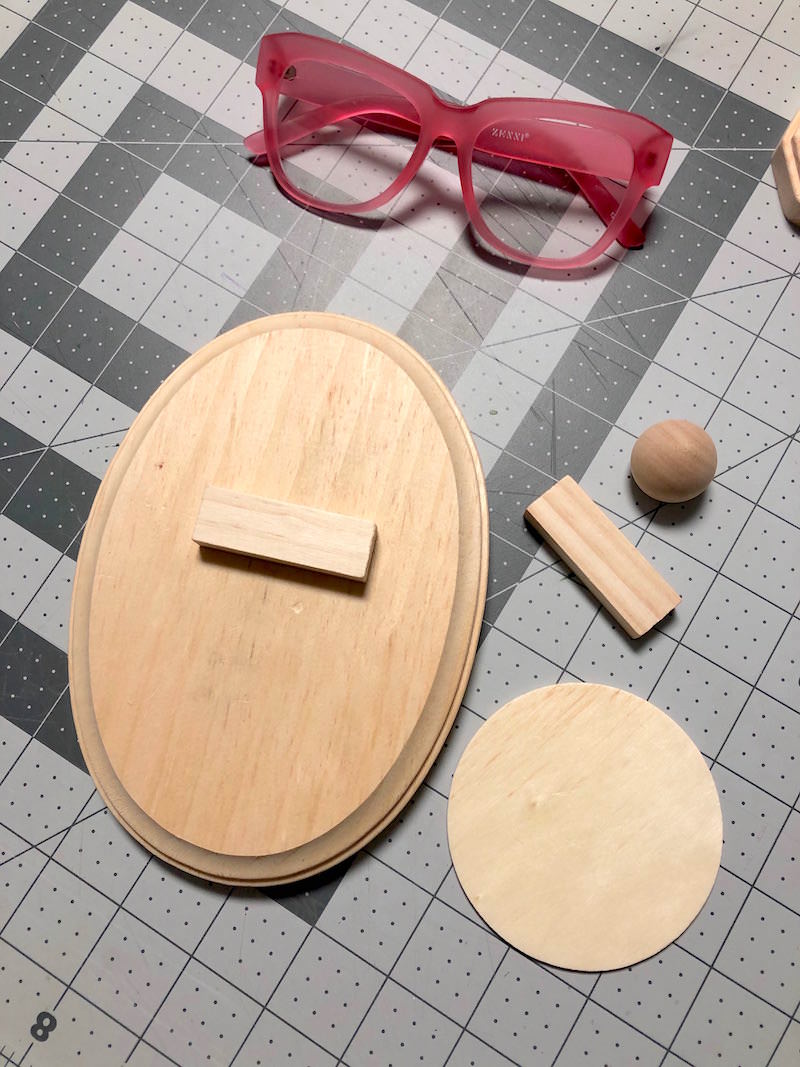
The smaller wood rectangles were also in the wood section, and they don’t have to be exactly that size. You’ll see how it all fits together below . . .
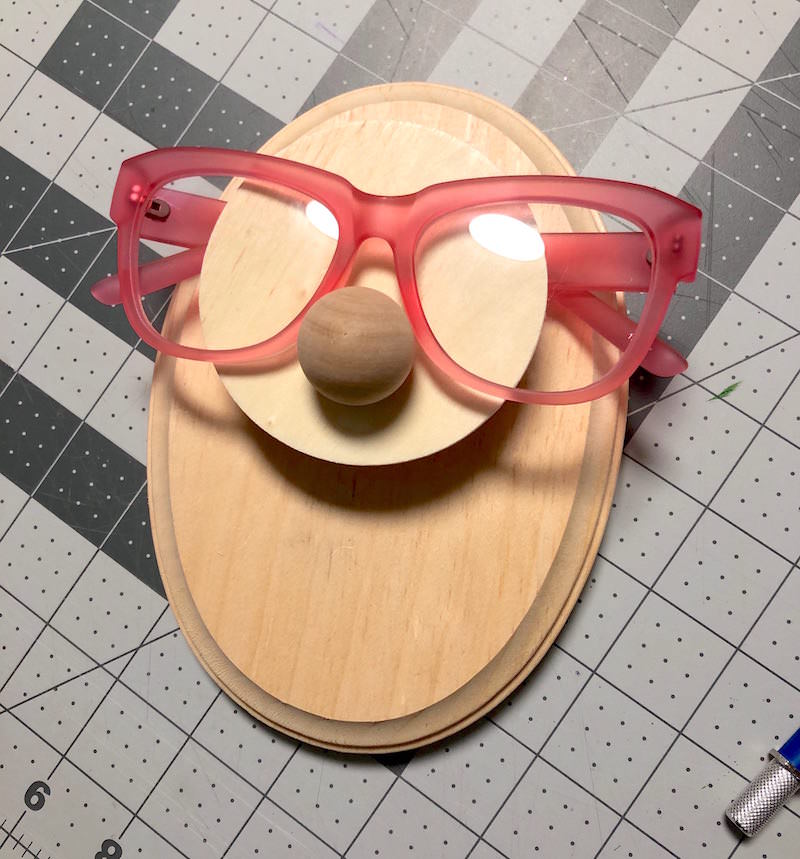
Your glasses will balance on the wood knob as the nose, and the wood circle will hold them secure.

From the side, you can see how the eyeglass holder is assembled – you’ll use the two wood pieces to bring the wood circle and knob out from the plaque. That gives a place for your glasses temple pieces to rest.
Glue the Pieces

Use wood glue to attach the small wood pieces about 1/3rd of the way down from the top of the plaque.
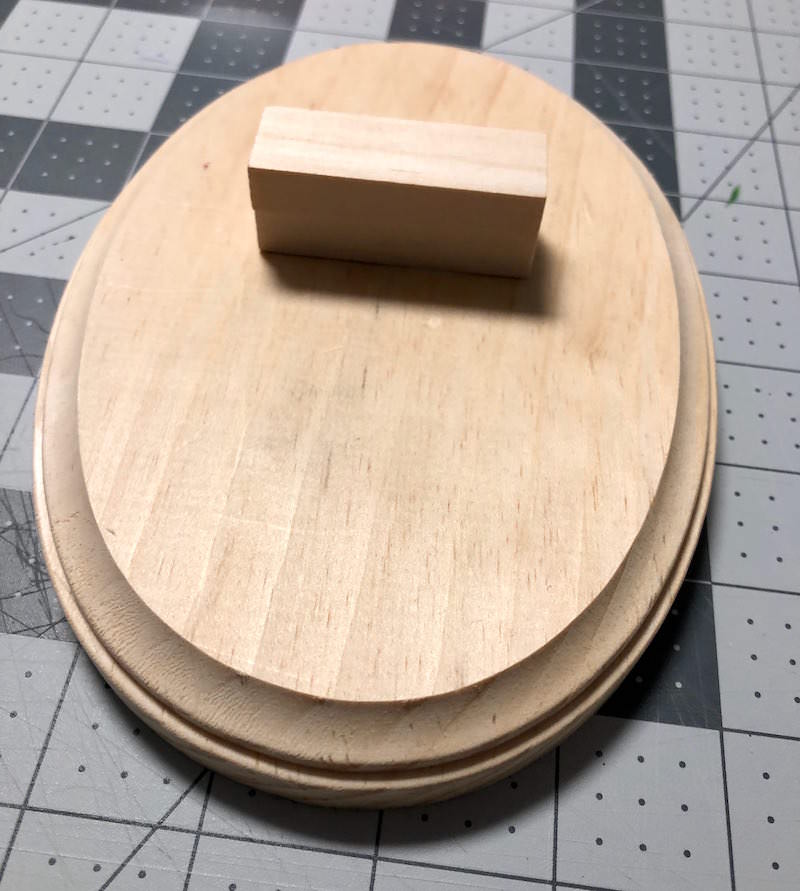
Stack them as shown above and then let dry.

Glue the wood circle on top of the wood pieces, in the center. Glue the wood knob down, but take careful consideration of where the glasses will sit on the “nose.”
You want the temple pieces to rest on the wood pieces behind the circle, and the nose portion of your glasses to rest on the wood knob in the front. Let dry.
Paint the Holder
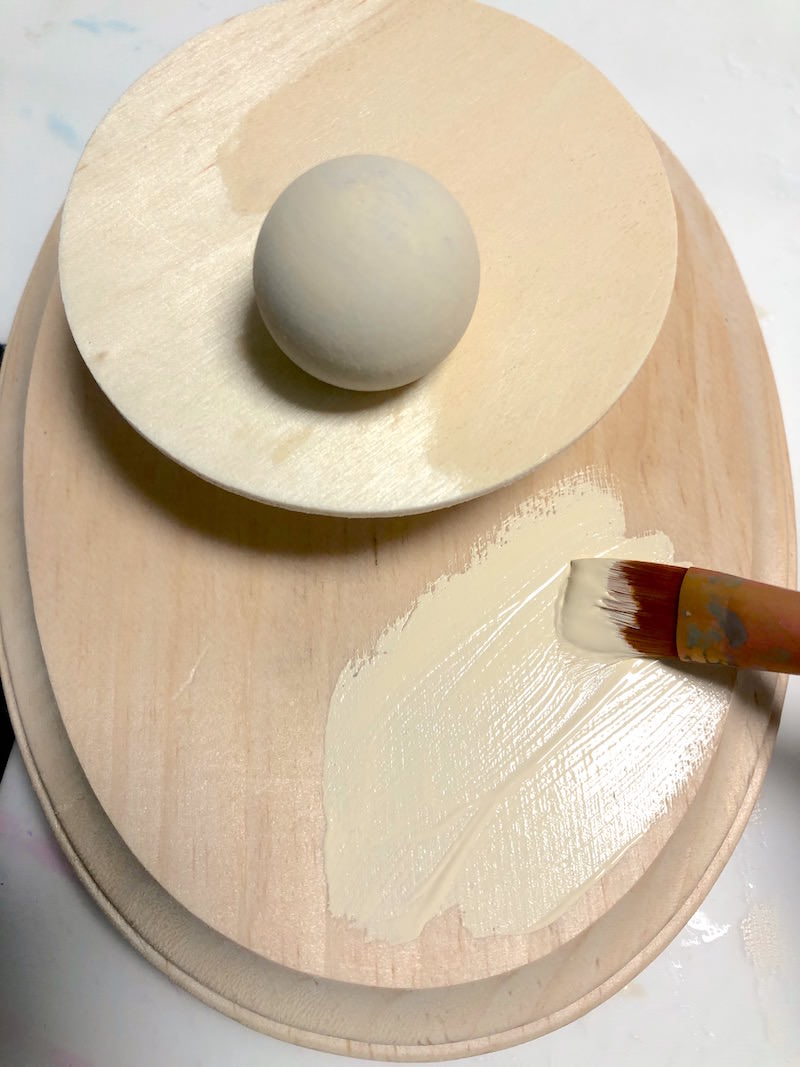
Choose your favorite skin tone color and paint your plaque – including the wood pieces, circle, and wood knob.
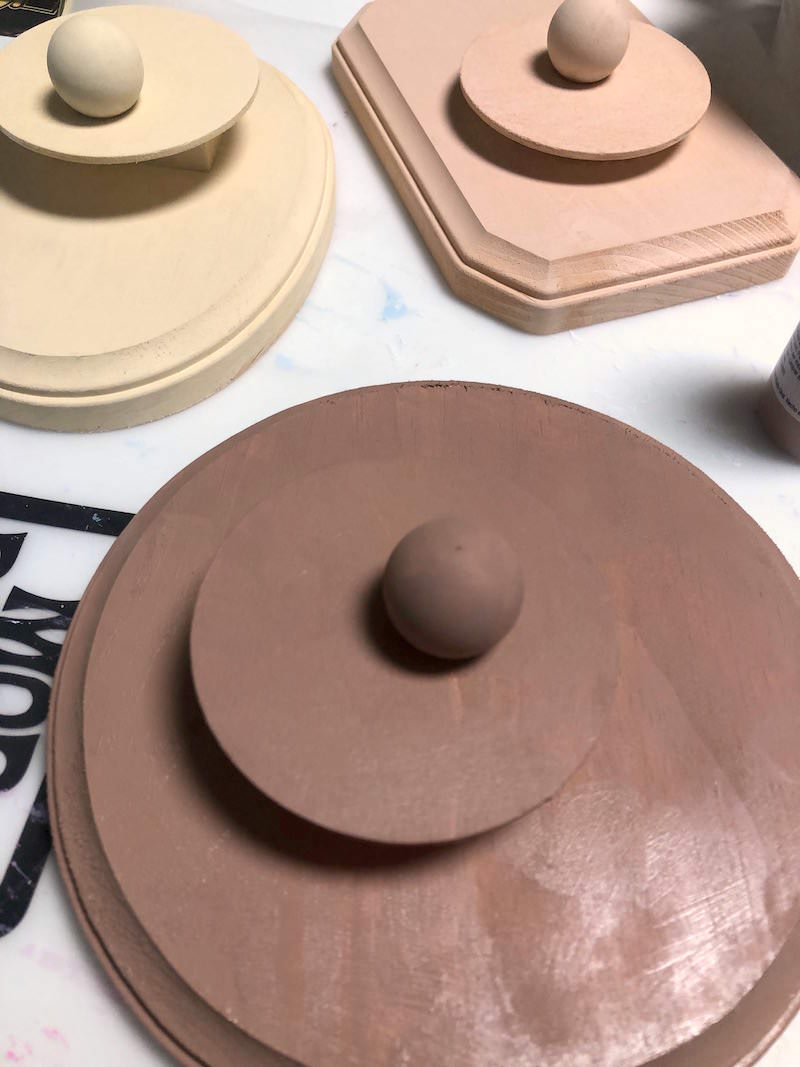
Give the plaques several coats and let them dry. Your glasses holder DIY is coming together!
When the glasses holders are dry, give them a coat of Hard Coat Mod Podge. Let dry and give a second coat.
Add the Embellishments

Now it’s time to have a little fun! You’re going to add accessories to your eyeglass holder with glue. Simply cut them out of foam.

I provided patterns so that you could make the same hair that we did. I think my favorite are the puffy ponytails . . . but I like them all! The beard is especially fun for a dude.
You can also cut any hairstyle you like. If you have kids that wear glasses, it would be fun to make a glasses holder that looks like your child. Same skintone, hair, clothing, etc.
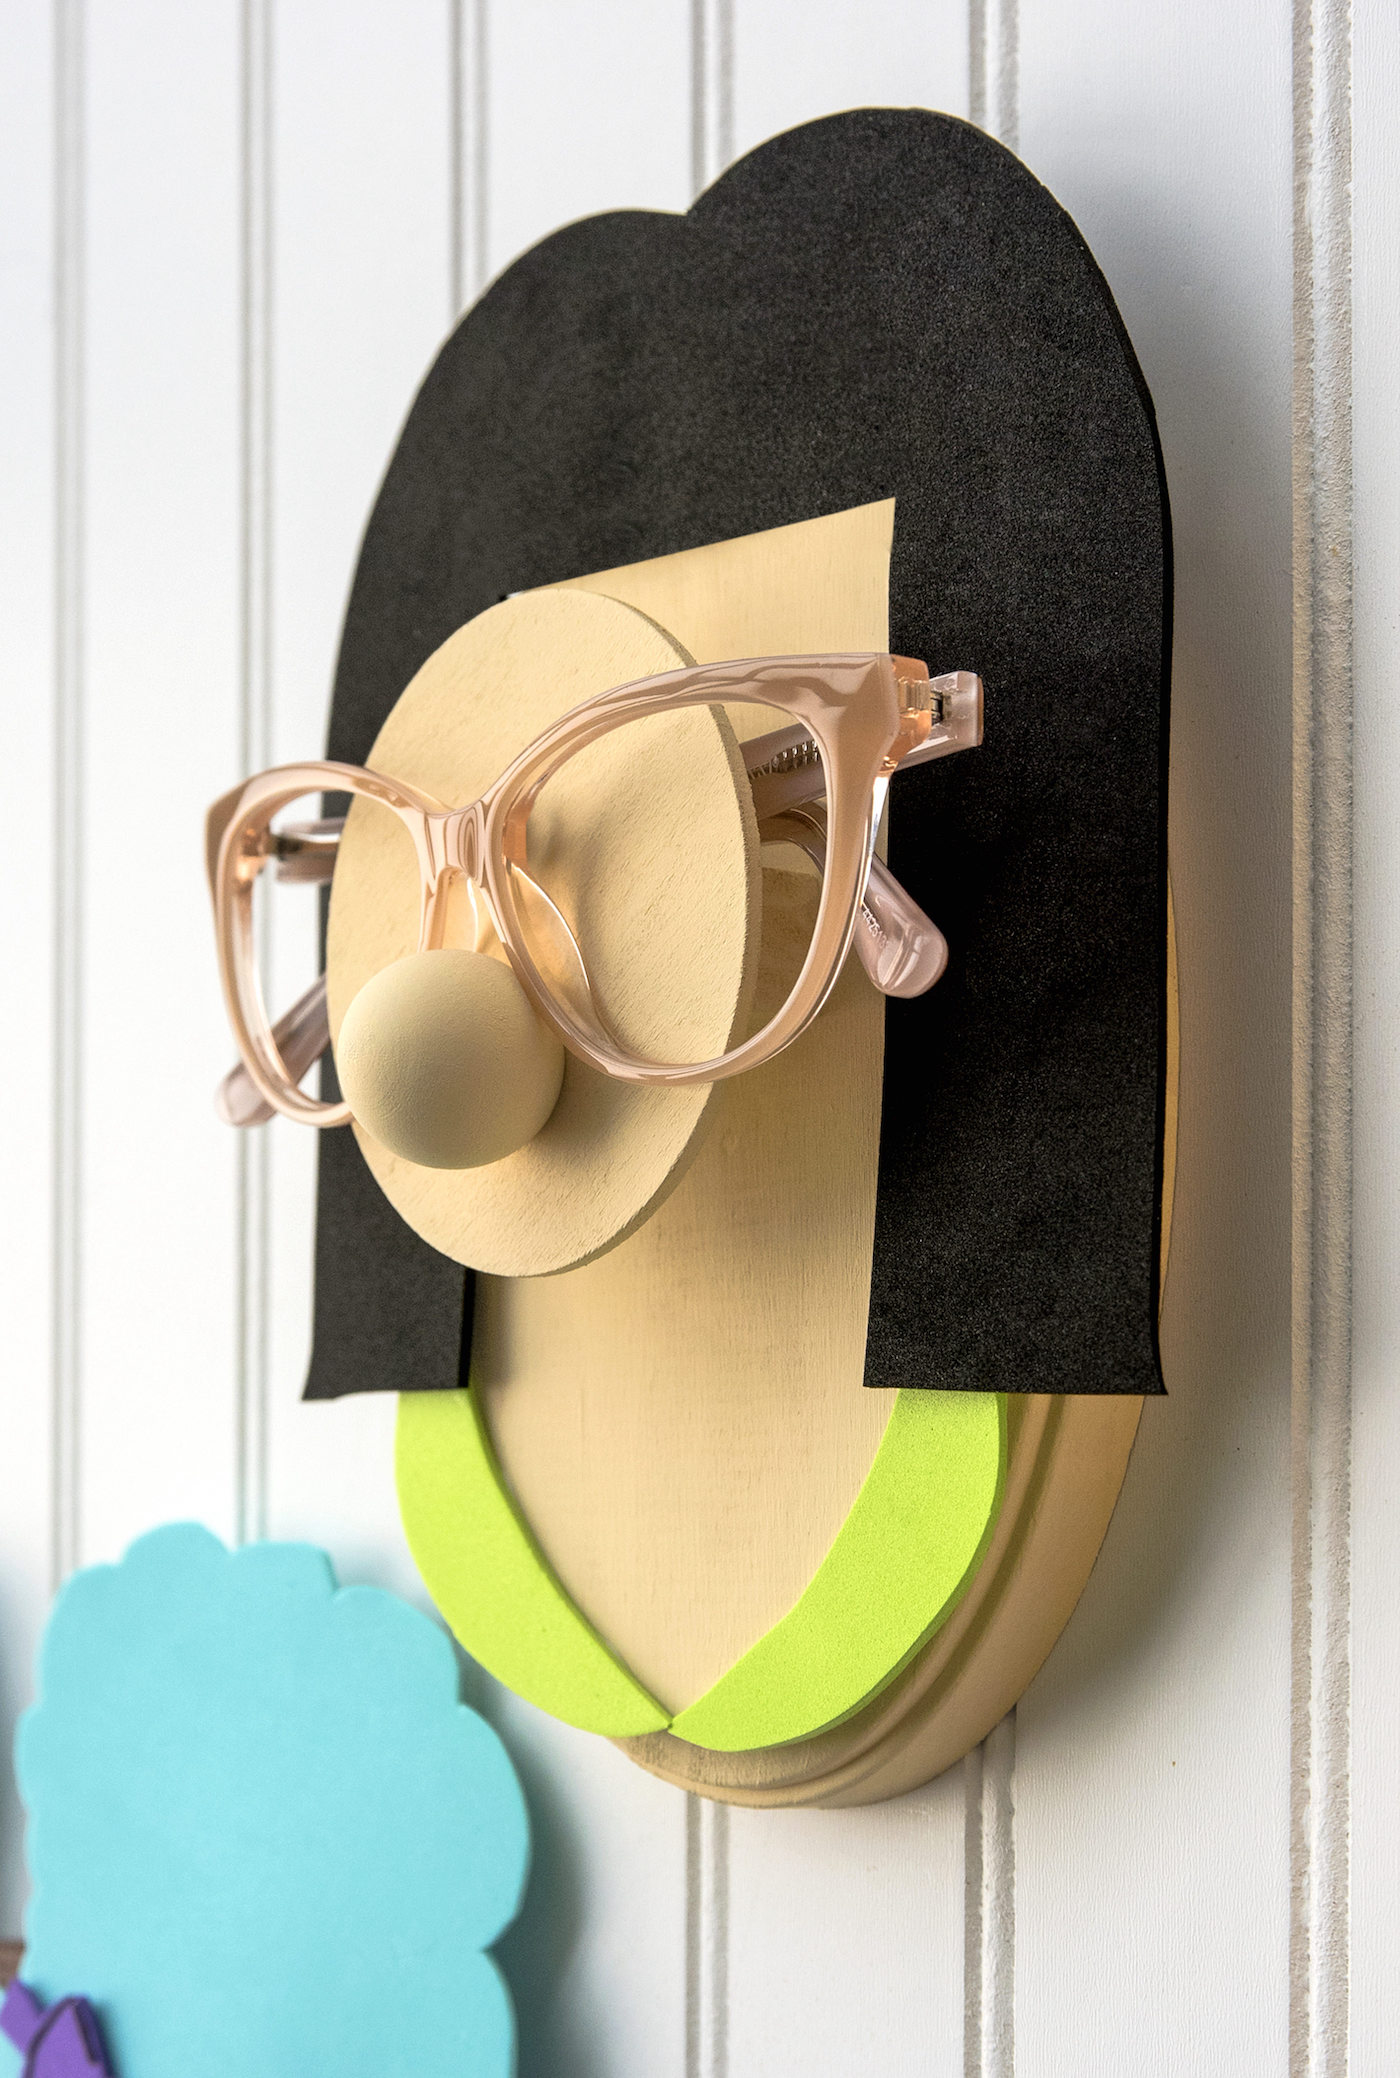
You’re going to hang each DIY glasses holder to the wall using a Command Strip. They are very light, so you shouldn’t have any problems keeping them up with lightweight strips.
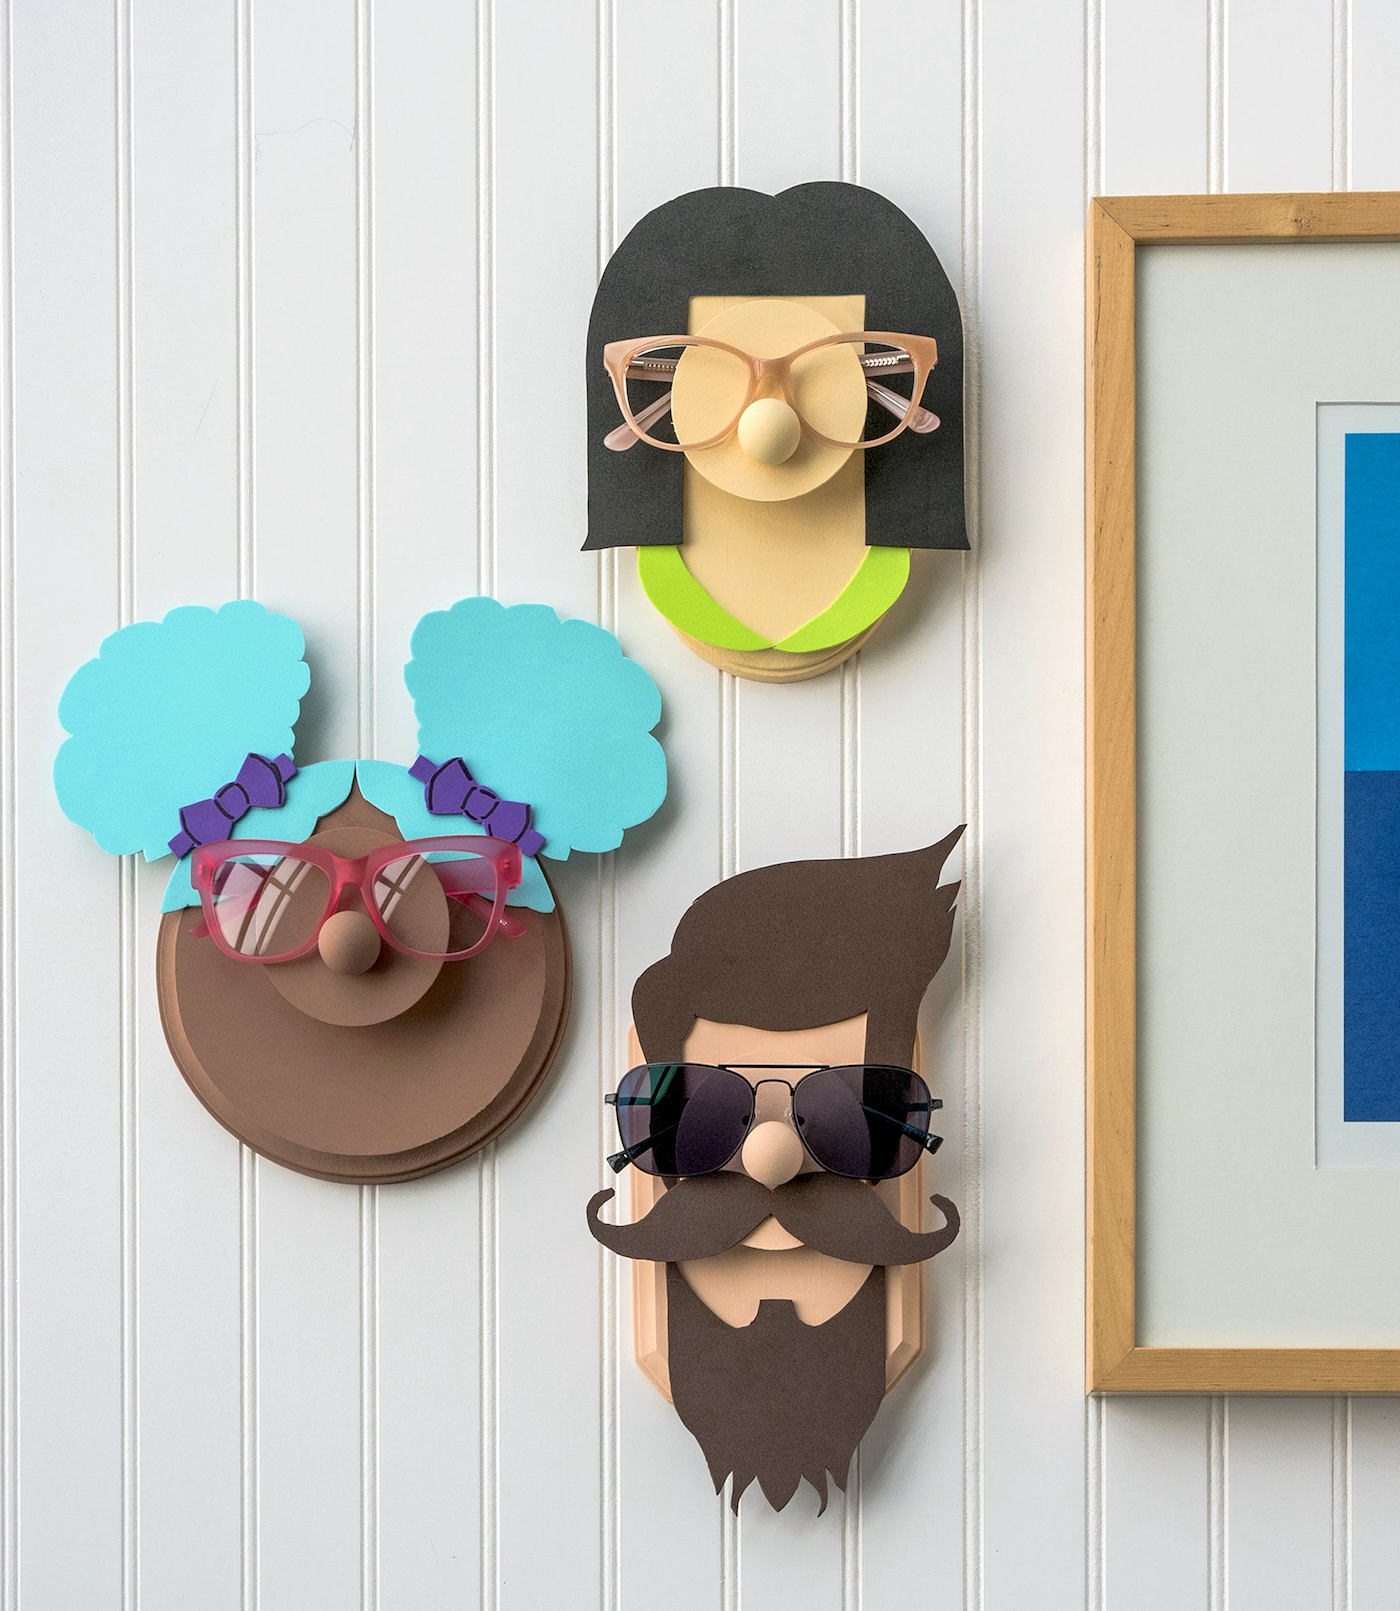
Every time I see these, it makes me squeal! In fact, I think I’m going to hang them on the wall of my craft room with some old pairs of glasses. That’s how much I love looking at them.
Oh, but we’re not done yet . . . I wanted to show you how to make two additional versions that can hold more glasses – in two different styles.
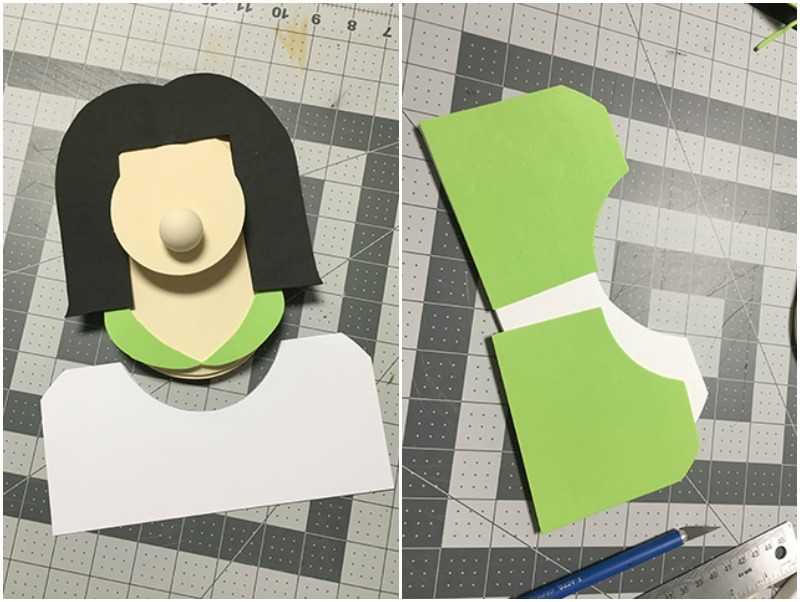
For version two, we added a shirt portion below the plaque using foam core, and then covered it with green foam to look like a shirt.
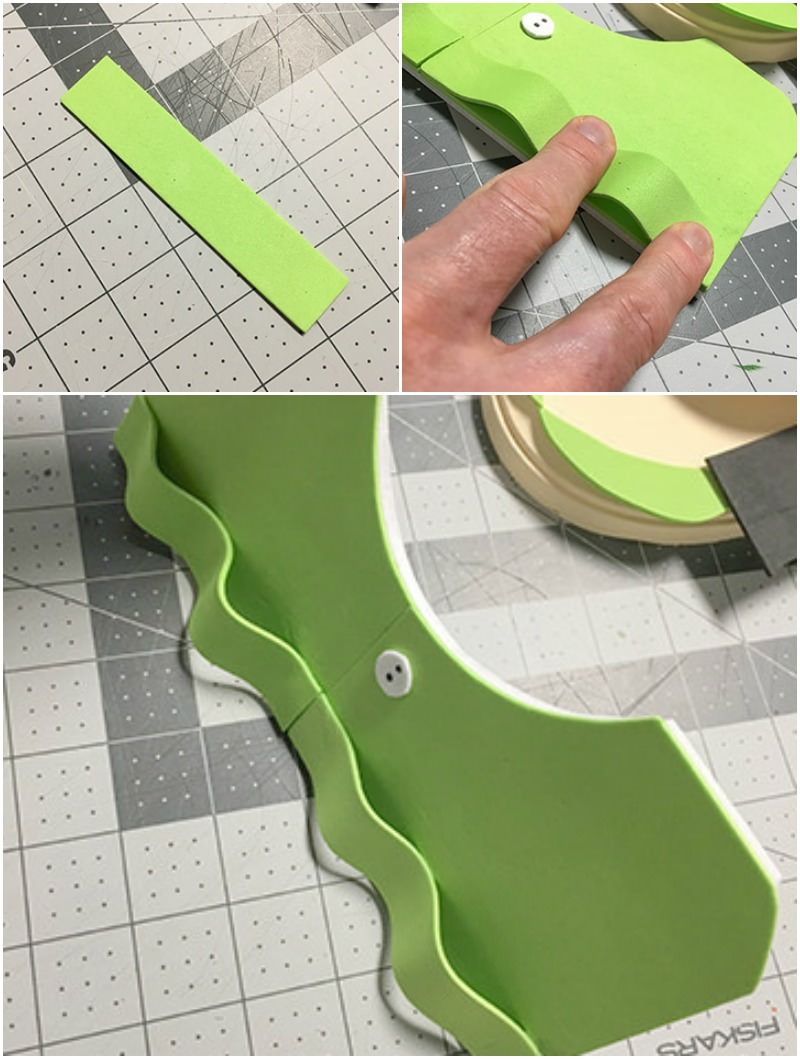
Then we took two long strips of foam and hot glued them onto the base in ripples, leaving four total spaces to hang the glasses. Once the base is done and glued, you’ll glue it to the top plaque.
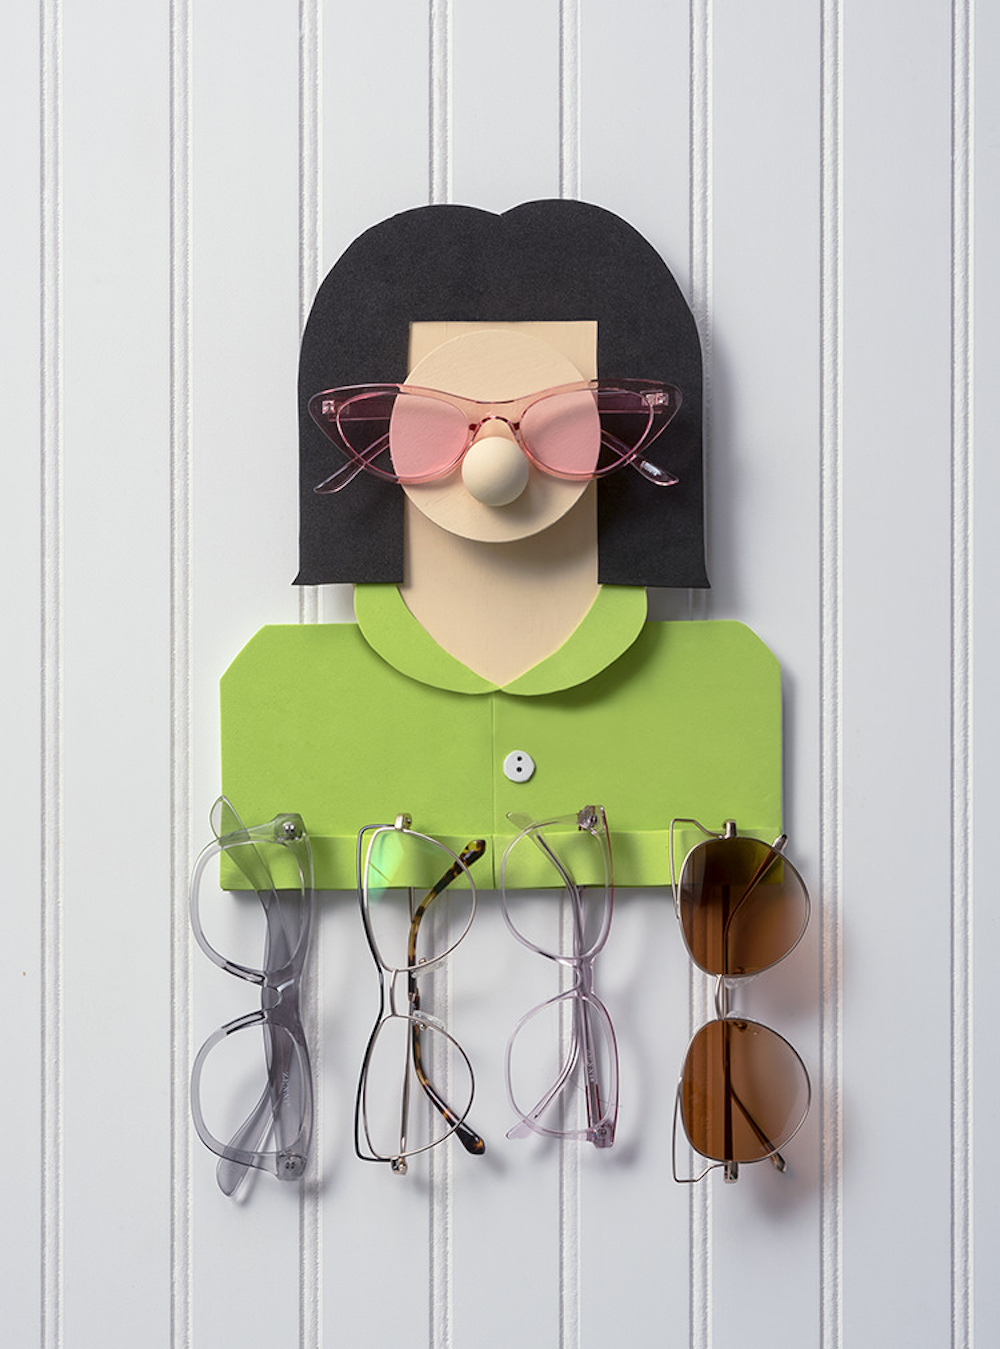
For this glasses organizer, you’ll be able to display five frames – one at the top on the face, and then four below (hanging from the temple pieces). You’ll probably want to use two Command strips to hang this version so it stays more stable as you remove the glasses.
And now onto version three . . . for the user with a LOT of glasses!
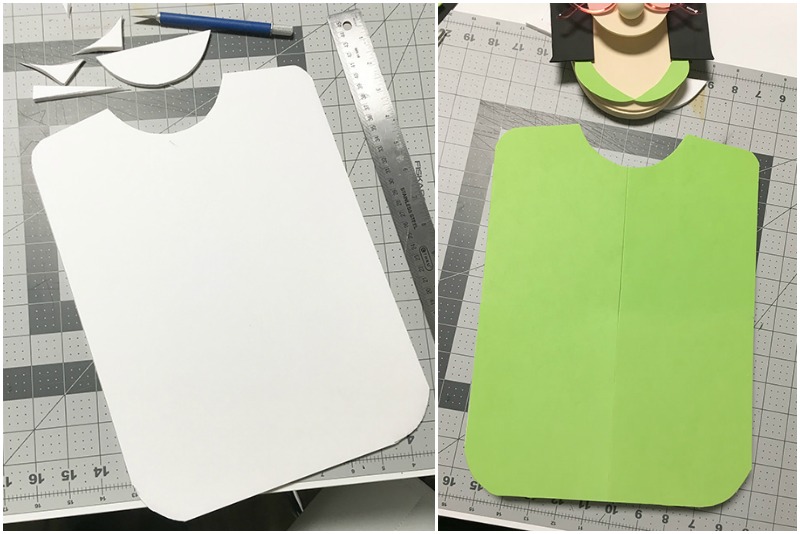
For this glasses holder DIY version, you’ll cut a larger piece of foam core, and again cover it with craft foam in the color of your choice (using glue).
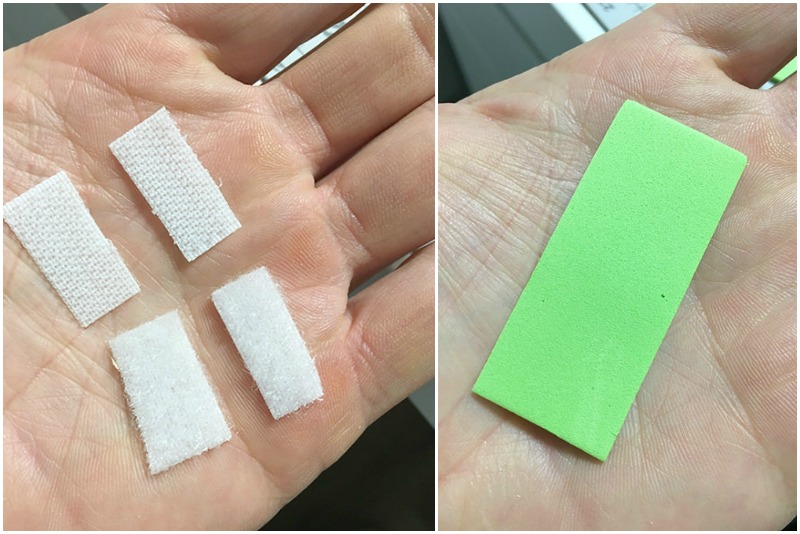
You’ll also need small pieces of Velcro as well as smaller pieces of foam, to create tabs.
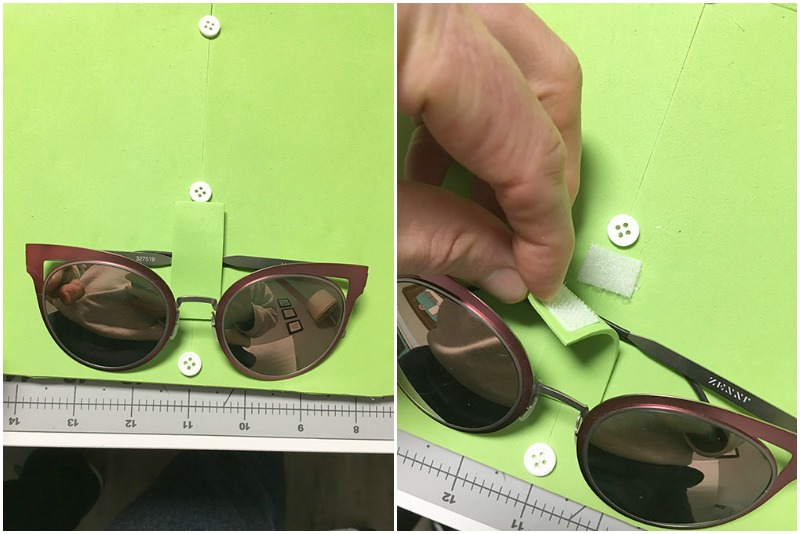
For each pair of glasses, you’re going to create a Velcro tab as shown. Glue the base of the foam piece to the board, then glue a piece of Velcro to the bottom of the foam piece at the top. Place the other side of the Velcro on the holder.
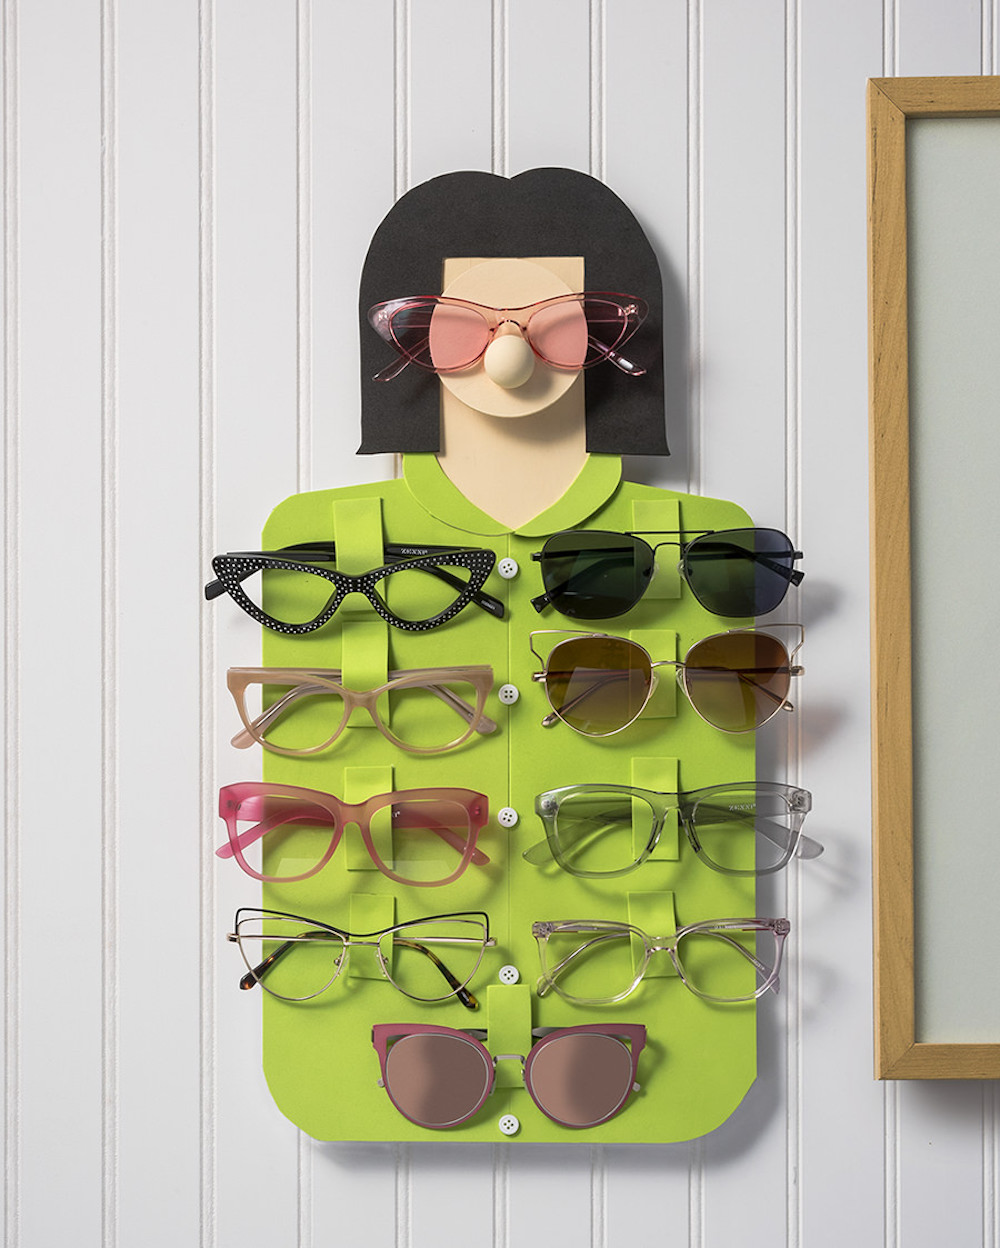
Place these tabs anywhere on the eyeglass holder that you would like to hang a pair. You can see that our version holds a total of ten pairs, which is super cool!
What do you think? Would you make your own DIY glasses holder – and if so, which version would you pick? I’d love to know what you think in the comments!
If you enjoyed this DIY eyeglasses holder, here are some of my other fun crafts you might also enjoy:



That has to be the cutest craft for glasses I have ever seen. Thank you for sharing. I have a grandson who wears glasses and since he is only 9 years old, I’m sure he will love one of these.
Again thanks.
Theresa thank you so much! If you end up making one, please share!!
These glasses holders are just adorable. I have a bunch of glasses all over the house. this will be a wonderful way to corral them. Thanks for a great idea.
This is adorable! I want to make some of my favorite book characters who wear glasses! What a great idea!
I want to make outdoor one with the person using binoculars.
That’s a great idea!! So fun!
I had to snicker at the male model glasses holder. He looks like my son. He wears contacts and does switch out at times to his glasses so this would be a good little gift for him.
ADORABLE! As a long time glasses wearer, I WILL be making the lady.
So much fun!!! Thanks!!
My pleasure – thank you for reading!
Amy,
These eye glass holders are so cute! Thank you for sharing.
I am excited to make one for my sister, she will be amused and surprised.
I’m so glad you like them!! Thank you!
You have some really cute ideas. I only wish I could find a website that gives me ideas for things that are not “quick and easy”. I’d like ideas that are a little challenging that make me feel as if I actually put some extra effort into my gift giving.
Hi Sarah! We have some harder ideas. But you make a good point! I will have to see what I can put together 🙂
I want to buy this
Hi Deepak! These are on my wall right now BUT – you can make them!