Make some personalized photo bookmarks using your favorite Instagram photos! These are the perfect gift idea – and so easy to do.
I love to read – but with all of my days being so busy, sometimes I hit the pillow at night realizing I haven’t cracked a book open all day.
I love getting caught up in a good story, and I feel that reading definitely boosts my brainpower. So I’ve made it one of my New Year’s resolutions to read again!
This project is the perfect gift for the person in your life who LOVES to read or has promised themselves to get reading in the New Year.
Make some personalized photo DIY bookmarks and think about including a gift card for books. This is one gift that I might give myself! Here’s how I made them.

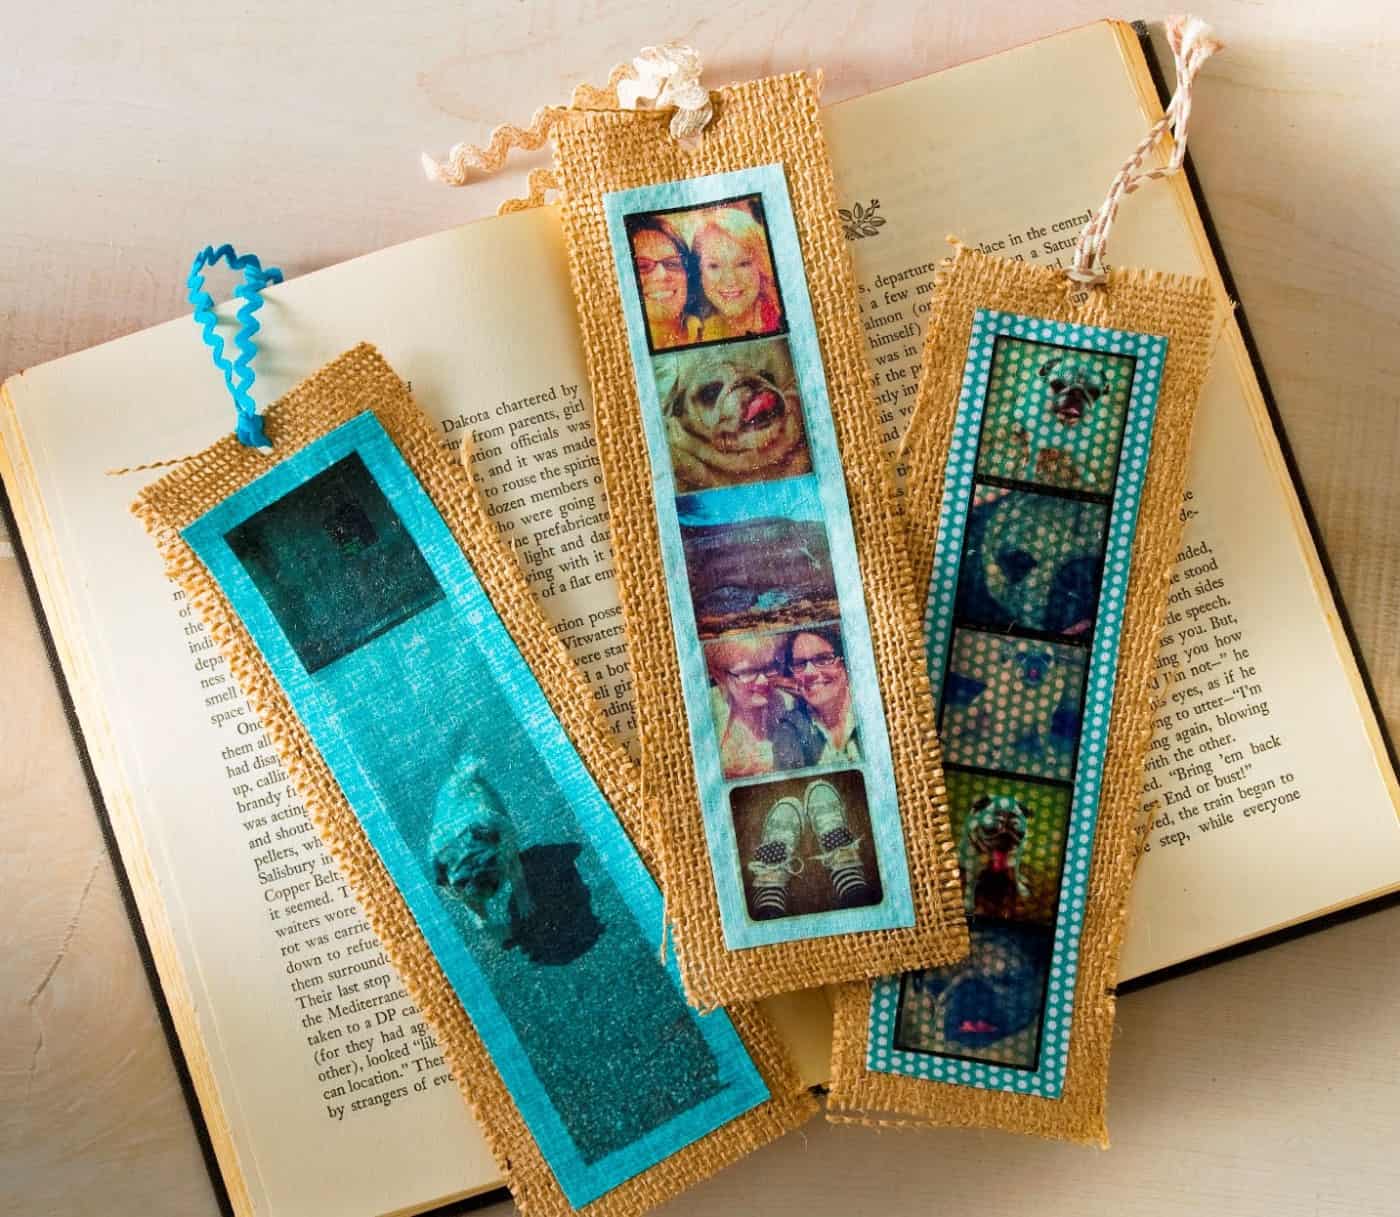
DIY Photo Bookmarks
Gather These Supplies:
- Printer and ink
- HP Iron-On Transfers
- Mod Podge Matte
- Fabric
- Burlap
- Photos of your choice
- Iron and ironing board
- Paintbrush
- Scissors
- Ribbon or ric rac
- Awl or something to poke a hole with
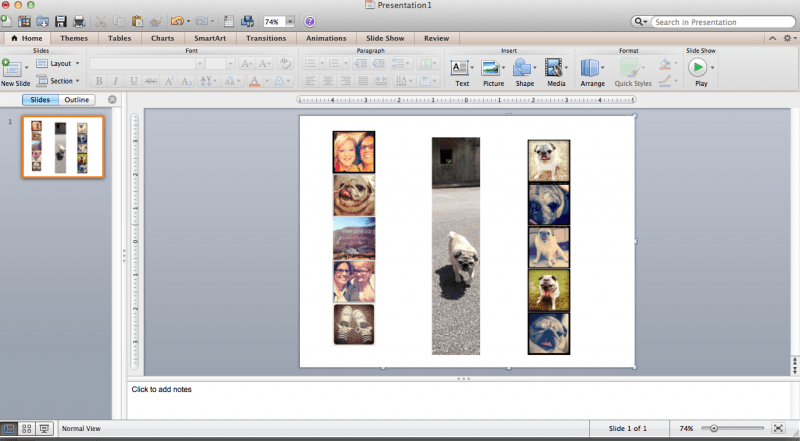
Use a program like PowerPoint to organize and crop your photos. I chose one large photo and cropped it to approximately 1.4” x 6.5”. At this point you can organize the photos however you like.
I made photo strips using my Instagram photos. I imported them into PowerPoint and resized them to 1.3” square, then stacked five on top of each other.
TIP#1: If you have any photos with words in them, you’ll want to reverse those photos on the computer so that you can read the text when printed.
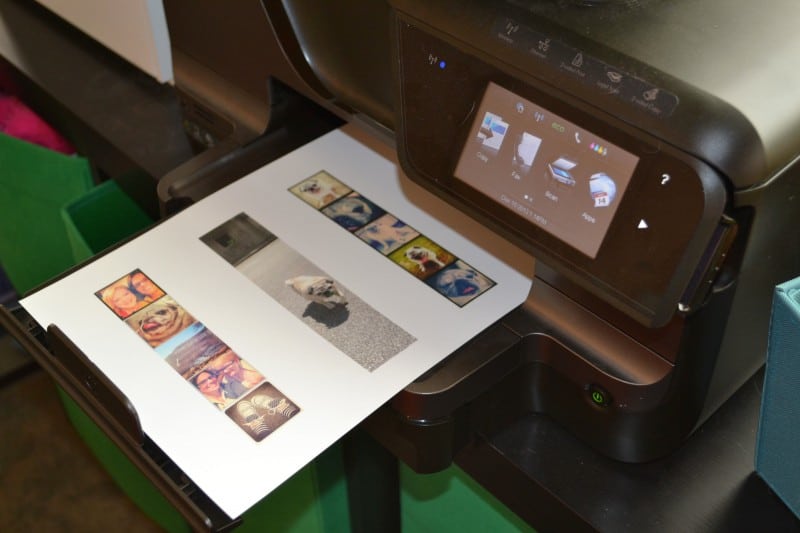
Print your photos in color onto the Iron-On Transfer paper using your HP Printer.

Trim your photos exactly on the edges using your scissors.
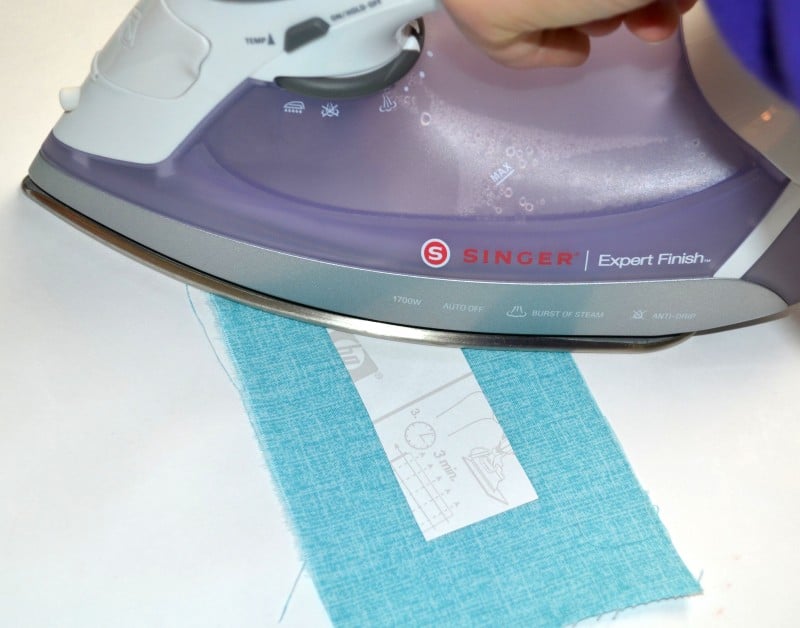
Follow the instructions on the package to iron the transfers onto your fabric. You’ll use the highest setting on your iron, and it will take about three minutes.
TIP #2: Remember to move the iron around, back and forth over the transfers.
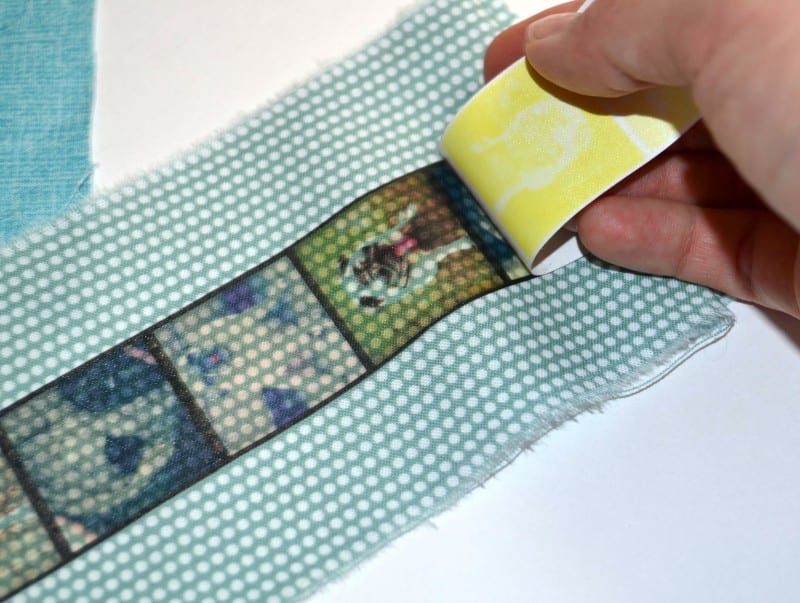
When the iron-on has cooled, slowly peel it from the fabric. The fabric will show through the iron-on, making a cool design!
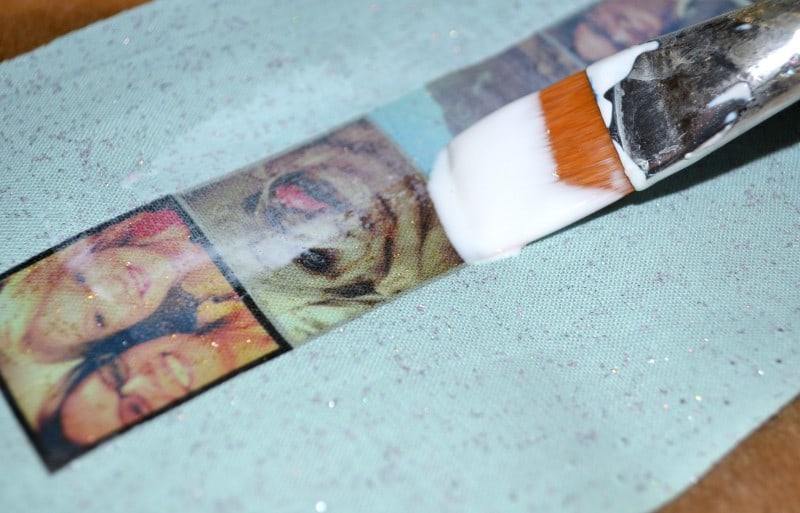
Mod Podge over the top of the photos plus approximately 1” around each edge.
TIP #3: Make sure you Mod Podge that extra inch around the edge. You’ll do this so that you can cut around the photo strip without it fraying.
Let dry for about 20 minutes. Then trim around the photo strip, leaving about ½” of fabric showing on each edge.
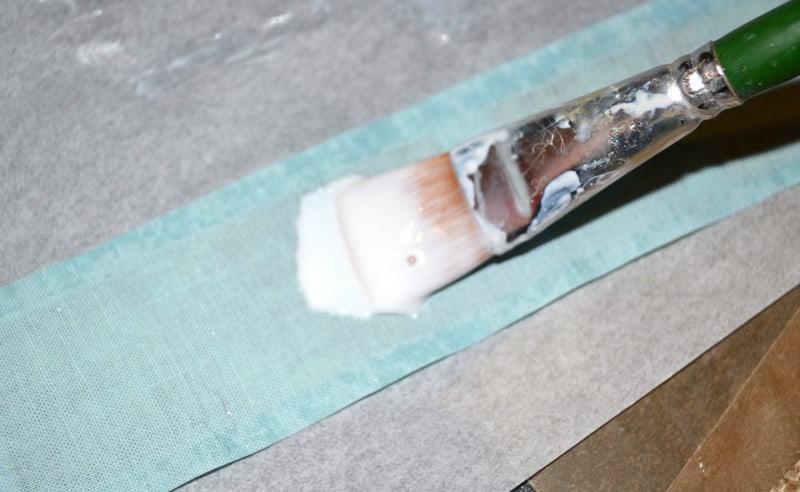
Add a medium layer of Mod Podge to the back of each fabric strip.
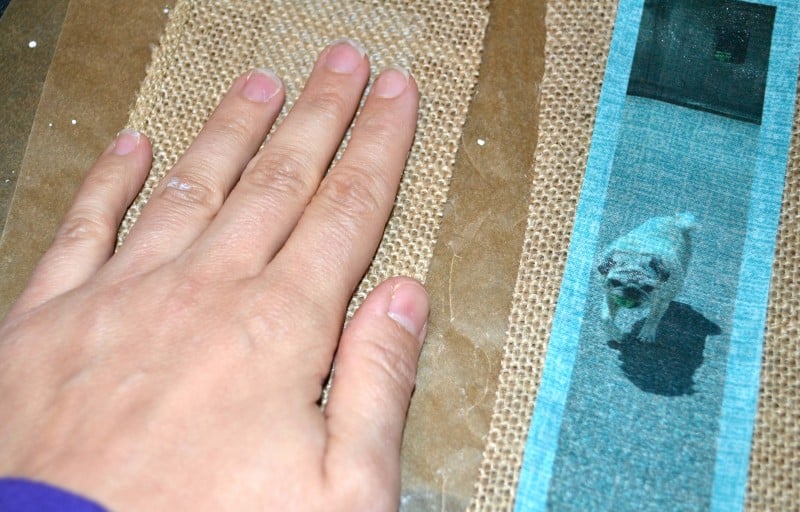
Place the photo strips, Mod Podge side down, onto strips of burlap and smooth. Let dry for 20 minutes and then trim, leaving about ½” of burlap around each edge. Leave a little bit more at the top.
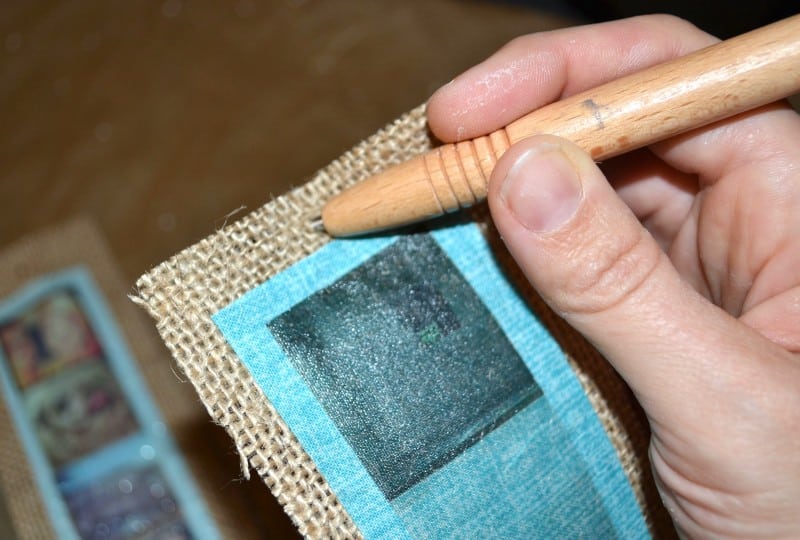
Use your awl to pierce a hole in the burlap – move it around slightly to make the hole wider.
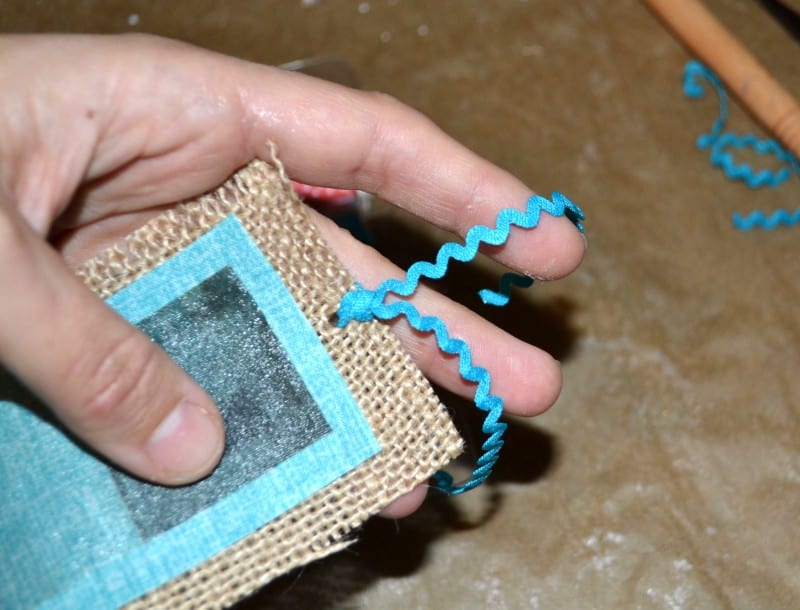
Push the middle of your ribbon or ric rac through the hole to make a loop; thread both ends of the ribbon or ric rac through the loop and cinch down.
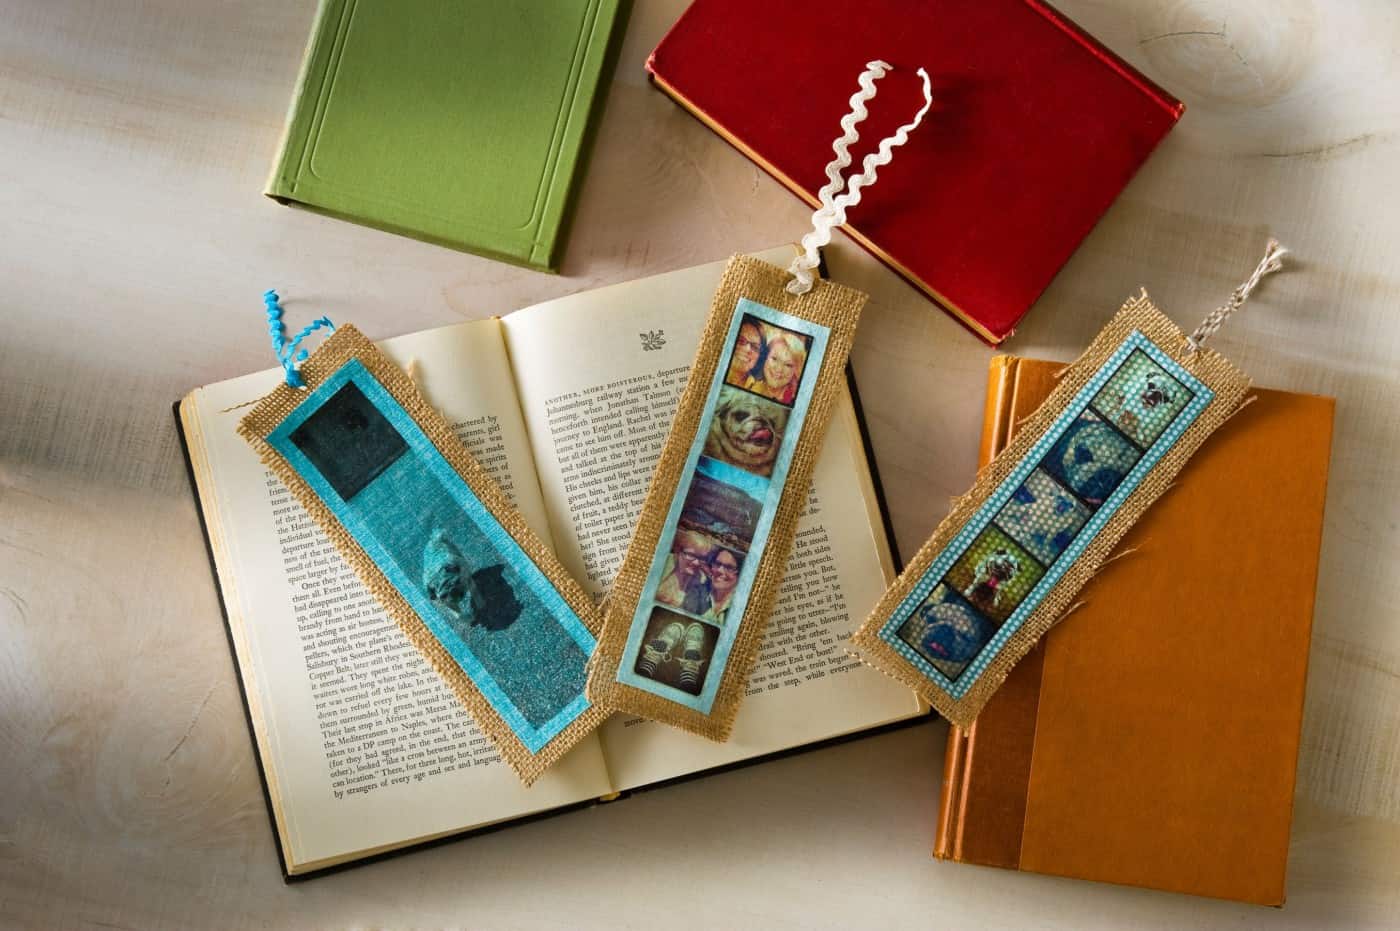
These personalized photo bookmarks make great gifts!
What pictures would you put on your personalized photo bookmarks? Who would you gift this project to? We’d love for you to make your own version of this project!
If you enjoy this idea, I’d love for you to check out these other projects: