Learn how to build a lamp of your very own by following this simple tutorial – use maps from your fave places to decorate the shade.

Man Podger David has totally hit the nail on the head with his map lamp for this week. It’s one of those great decoupage ideas that feels vintage-y (must be the maps, which always make me think vintage for some reason).
Yet it also could go very well in a modern home. David made it awesomely simple, and I know you will appreciate it. Yes, you too can build a map lamp! Read on, and don’t forget to check out these Mod Podge map crafts you’ll love.
DIY Vintage Map Lamp
I’ve long admired all the pipe-fitting shelving that’s been cropping up. But neither I nor my 1940 fixer-upper house can really pull off that cool, downtown, loft-chic look that I associate with such things.
However, I needed a lamp for my new office and I thought perhaps with a little Mod Podge I could marry my vintage obsession to the downtown style.
It turned out to be a kind of alarmingly simple project.
How to Build a Lamp
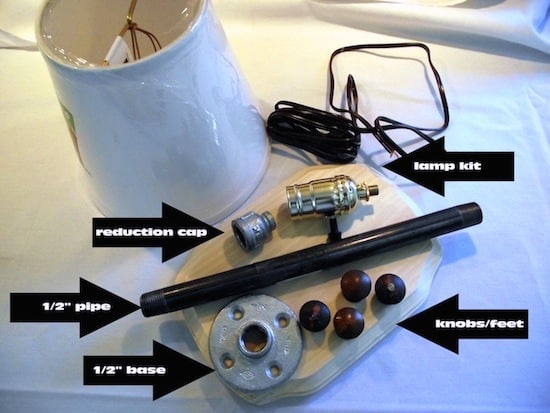
To make my map lamp, you will need:
- 1/2″ galvanized pipe (pick a length for your preferred lamp height)
- 1/2″ pipe base
- Reduction cap
- Lamp kit (available at any big box hardware store in the lighting area)
- Lamp shade
- Wooden base (I used a plaque)
- Felt feet
- Mod Podge Gloss
- Maps
- Drill
- Screwdriver
- Foam brushes

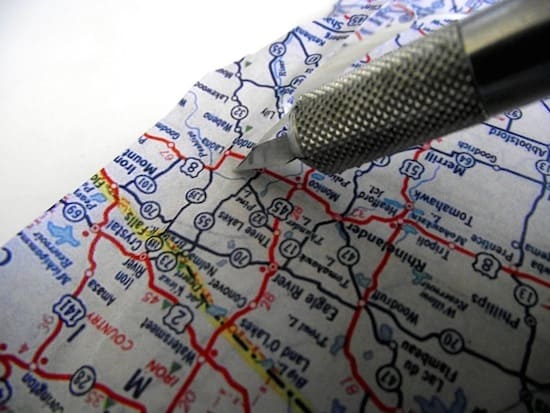
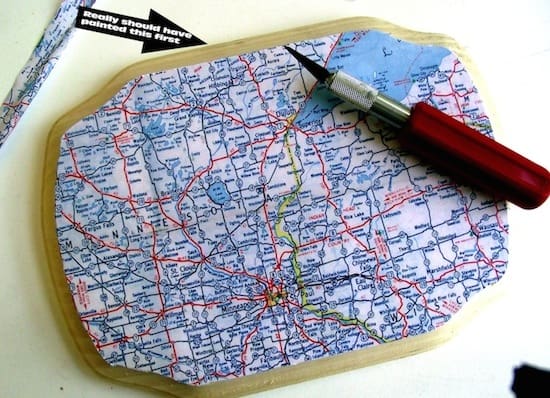
Cut the paper you’re using for decoupaging to the size of your base.
TIP #1 If you want to paint your base and you are smarter than I am you will paint it BEFORE you decoupage it. Foresight – not my strong suit.
Using a foam brush spread a layer of Mod Podge onto the base, carefully lay your paper on top and, with moistened fingers or a brayer, gently push out any bubbles that may appear.
TIP #2: My base had a raised, curved edge so I cut the paper to be a little bit bigger and attached it. After it was dry I added another coat of Mod Podge to really stiffen it up. When that dried it was easy to go in with a sharp knife and cut around the curves.
Set aside and allow to dry thoroughly. After it dries you can add a sealer coat of Mod Podge over the top and allow that to dry.

After the base is dry, drill a hole in the center just big enough for your lamp cord to pass through. Center your baseplate over the hole and screw it in place.
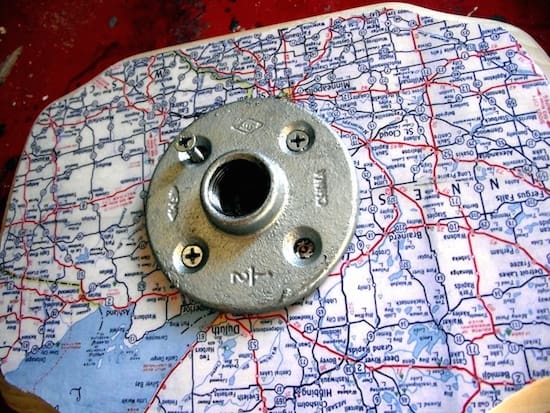

Now is a good time to glue on the feet – I used old knobs and Gorilla Glue but you could use anything that appealed.
Now, assemble the lamp. First, run the wire from the lamp kit up through the base and the ½ inch pipe. Connect the pipe to the base and pull the wire through the reduction cap and then attach the reduction cap to the pipe.

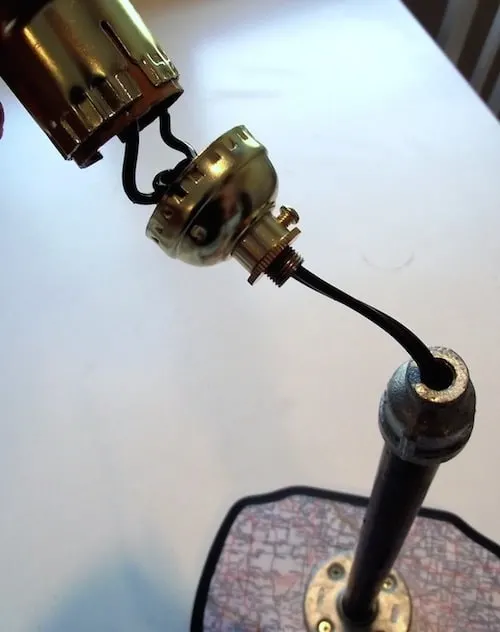
Next connect all the wiring as directed on the lamp box kit.

. . . this will leave you wondering (as it did me):
Really!? That’s all there is to wiring a lamp!? Why do they cost so much? Why wasn’t I told this before? Why am I just finding this out in my lamp-buying twilight years?
Anyway . . .
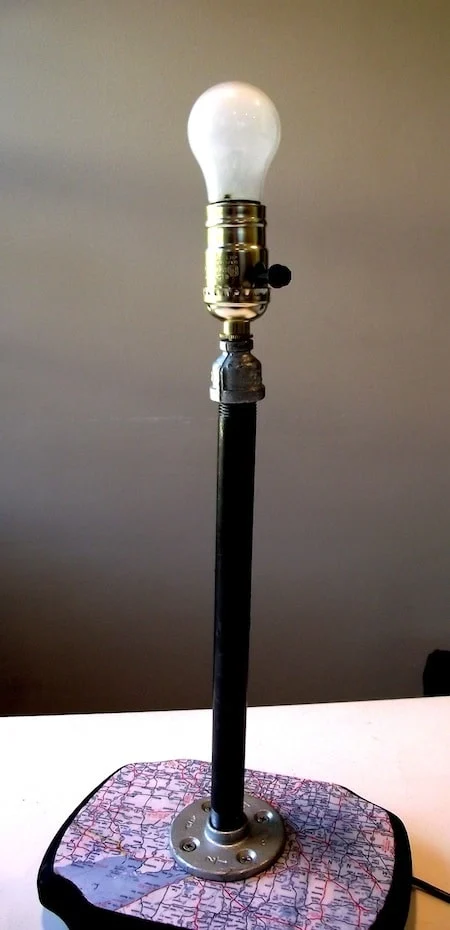
Your basic lamp is assembled.
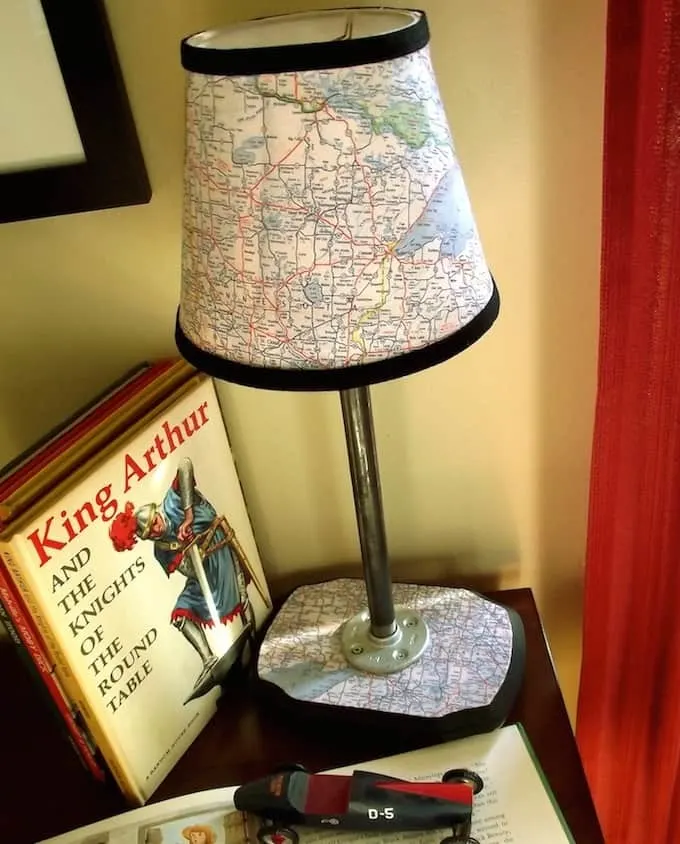
In keeping with my map theme, I used copies of a couple of vintage maps that I own to cover the shade. After making a template of the lamp shade, I cut out the shapes (a little bigger than the template) and decoupaged the map to the shade, carefully pushing out the bubbles with my fingers.
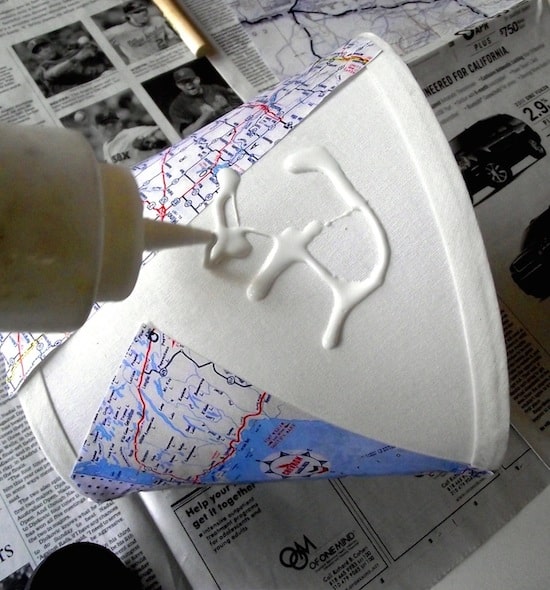
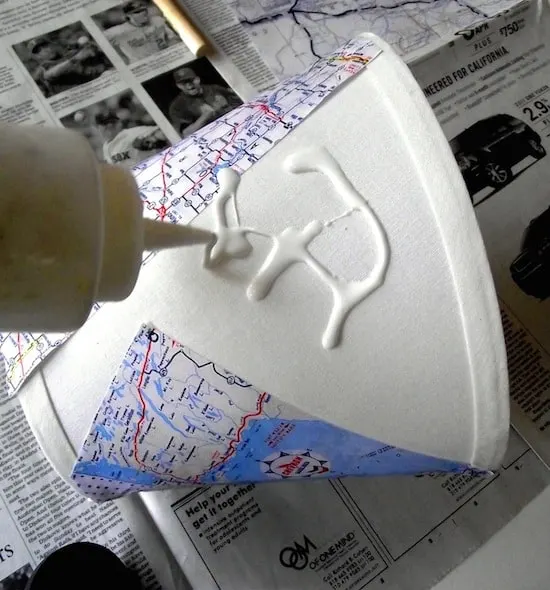
After it dried I trimmed the edges a little bit and then hot glued some ribbon around the top and bottom as a finishing touch.

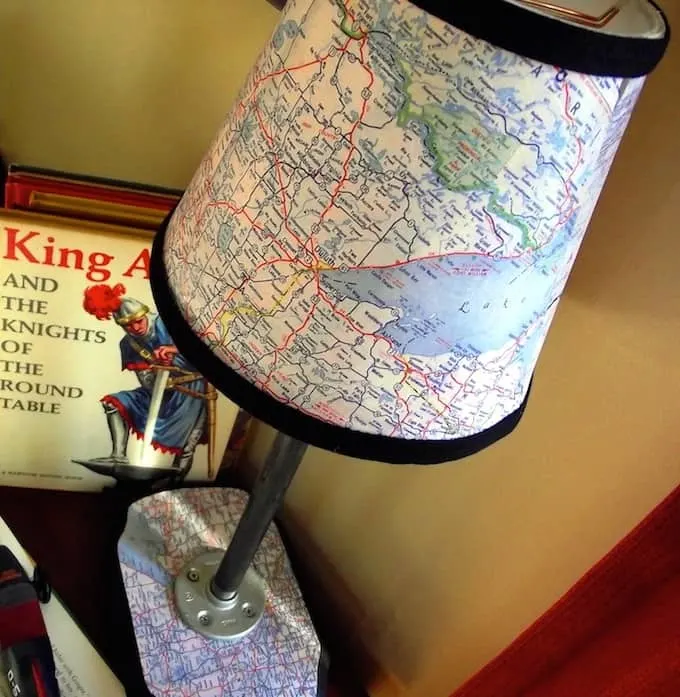
If you decide to build some vintage modern map lamps of your very own, consider grabbing some maps of areas that are special to you on eBay. Maybe your hometown, where you got married, etc. I think this would be a fun Father’s Day gift for an office, too.
If you have any questions about my map lamp, please don’t hesitate to ask. I will monitor the comments section and respond.


How to Build a Lamp
Equipment
- Screwdriver
Materials
- 1/2" galvanized pipe pick a length for your preferred lamp height
- 1/2" pipe base
- Reduction cap
- Lamp kit available at any big box hardware store in the lighting area
- Lamp shade
- Wood plaque(s) to use for a base
- Felt feet
- Mod Podge Gloss
- Maps
Instructions
- Cut the paper you’re using for decoupaging to the size of your base.
- Using a foam brush spread a layer of Mod Podge onto the base, carefully lay your paper on top and, with moistened fingers or a brayer, gently push out any bubbles that may appear.
- Set aside and allow to dry thoroughly. After it dries you can add a sealer coat of Mod Podge over the top and allow that to dry.
- After the base is dry, drill a hole in the center just big enough for your lamp cord to pass through. Center your baseplate over the hole and screw it in place.
- Now is a good time to glue on the feet – I used old knobs and Gorilla Glue, but you can use anything.
- Now assemble the lamp. First, run the wire from the lamp kit up through the base and the ½ inch pipe.
- Connect the pipe to the base and pull the wire through the reduction cap and then attach the reduction cap to the pipe.
- Connect all the wiring as directed on the lamp box kit.
- Use copies of maps to cover the shade. After making a template of the lamp shade, cut out the shapes (a little bigger than the template) and decoupage the map to the shade, carefully pushing out the bubbles with your fingers.
- Let dry for 15 – 20 minutes, and then apply a top coat. Let dry.
- Trim the edges and apply ribbon or another accent around the top and bottom of the shade with hot glue.
Video
Now that you know how to build a lamp, you need to check out these other tutorials:
Cindy
Tuesday 9th of August 2011
I really like this idea. Hubby loves globes and this would be less expensive!
Amanda
Monday 8th of August 2011
Hey bud! I featured you today :) https://homeandgarden.craftgossip.com/make-a-mod-podge-map-lamp/
Mod Podge Amy
Friday 29th of July 2011
Hi Mandy! I've tried a few methods for doing the rainbow template you are talking about. Here's the most successful. Hold the lampshade on a piece of paper and roll it along with a pencil and trace. Do it with the top, then the bottom. I would double-check when you are done by taping it around the frame and trimming where necessary.
So glad you found me by the way!!
Mandy
Friday 29th of July 2011
Just wondering your trick to covering cylinder/cone shapes like lampshades and flower pots. I can't seem to get it in once piece. I saw someone in a tutorial make a template shaped like a rainbow, but wasn't sure how she measured for it. Any tips? Just got your fb page info from my cashier at Michaels. Couldn't wait home to see it all!
Heather
Thursday 14th of July 2011
I love this!!!!!! Would make a great gift with a larger map of a favorite vacation spot...