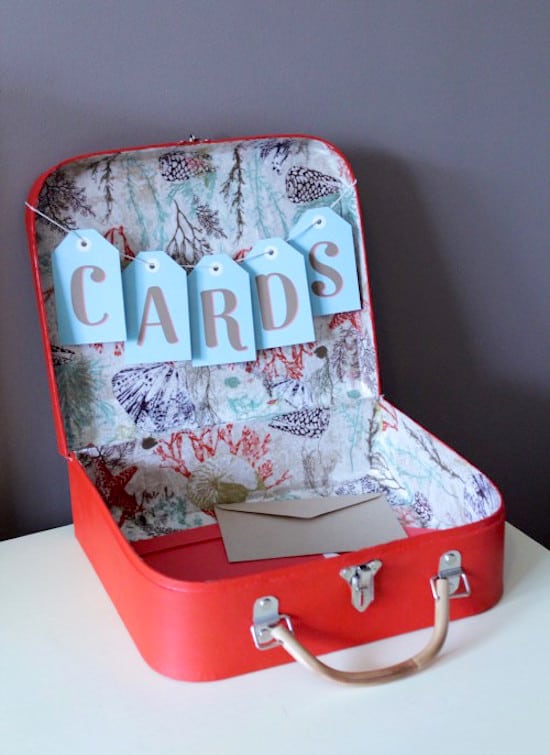
Collect cards at your wedding in style. This DIY wedding card box from a small paper mache suitcase is trendy and easy to make . . . and easy to pack after the party.
Skills Required: Beginner. It helps to have some experience with Mod Podge so that you can avoid wrinkles in the napkins as much as possible. Having said that, the wrinkles (if any) give the piece character.

I love handmade weddings. It’s the little touches that make them special – people love to DIY centerpieces, table numbers, favors, bouquets, food labels, and more. And they also love cute touches like this DIY wedding card box.
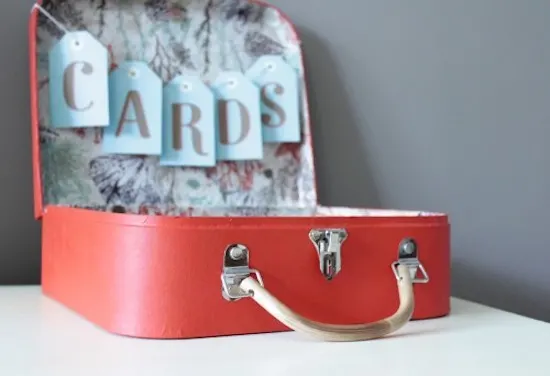
It’s hard to believe this wedding card box started out as a homely cardboard suitcase! But with a little paint, Mod Podge and napkins it was transformed into something worthy of a wedding day.
The great thing about this post box is that it can be customized with ANY theme you like. Just choose the colors and napkins that work with your theme. I can see this looking cute with a rustic or farmhouse wedding theme, but it’s so versatile because the idea is basic.
I especially love the tag banner, which you can make say anything you like (I like “Thank You” or “Welcome”). You’ll find the step-by-step for this wedding card box below.
Suitcase card box at Polka Dot Made
Wedding Card Box
Learn how to make a wedding post box using an item from the craft store and Mod Podge.
Materials
- Cardboard suitcase
- Paper napkins
- Tags
- Acrylic paint
- Mod Podge Matte
- String or ribbon
Tools
- Foam brush
- Large flat paintbrush
- Small flat paintbrush
- Sandpaper
- Hole punch (optional)
Instructions

 Apply two coats of paint to the exterior of the suitcase, using the foam brush for the large areas and the small brush for around the buckles. Allow to dry. If the napkins have a border, trim if off
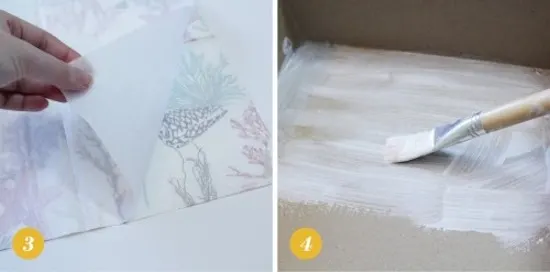 Peel the back layer of napkin off to leave only the printed layer. Apply a layer of Mod Podge to the inside of the suitcase
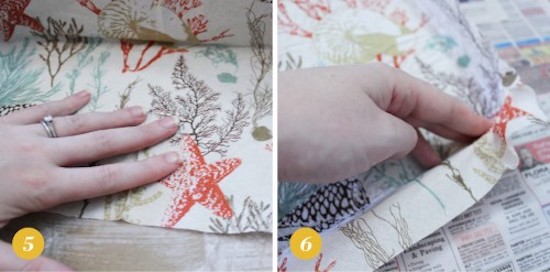
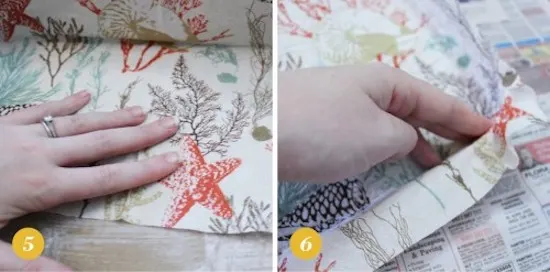 Lay the napkin over the glued surface and smooth down flat. Repeat until all inside surface is covered, tearing the napkin edges to avoid obvious seams.
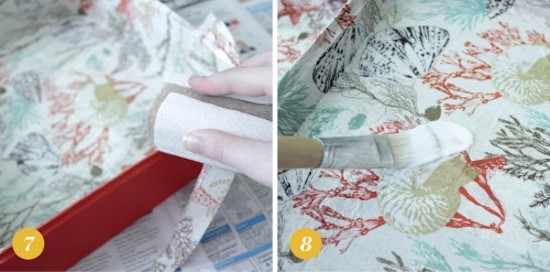
 Gently rub the edges of the suitcase with a sanding block to trim off excess napkin. Wipe off dust with a dry cloth. Finish with two or three coats of Mod Podge. Allow to dry thoroughly.
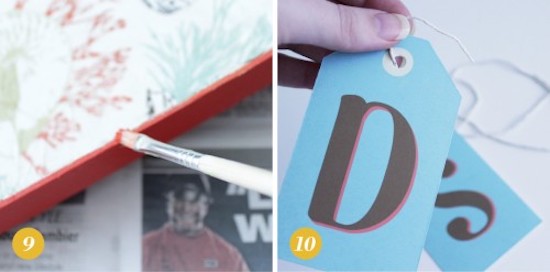
 Touch up any spots on the rim that are missing paint after being sanded. Write on your tags and punch holes if necessary.
 Thread onto string and tie around top of suitcase.
Notes
You can use alphabet stickers on the tags if you don't feel comfortable writing the letters.
If you enjoyed this wedding craft idea, I’d love for you to check out these other projects:
Highland Monkey's
Friday 27th of April 2012
Brilliant idea. I thought it was a real suitcase - suitcase if you know what I mean! Will have to look out for funky napkins to mod podge.
Kara Antrim
Friday 27th of April 2012
I LOVE this idea! I would have never known that wasn't a real suitcase.