Wood Star Decor
Make this wooden star decor with a Fourth of July theme! You can customize this idea for any holiday.
Yield: 1 star
Cost: $7
Equipment
- Awl or sharp object for smoothing paper into corners (optional)
Materials
- Wood star(s)
- Craft paint white, red
- Scrapbook paper
- Mod Podge Satin
- Scrabble tile letters saying of your choice
- 2 sheets Printer paper
- Painter's tape
- Craft glue
- Wax candle
- Sandpaper
- Ribbon optional for hanging
Instructions
- Tape two pieces of printer paper together to cover the front of the star, using painter's tape. You can use scrap paper or anything that works.
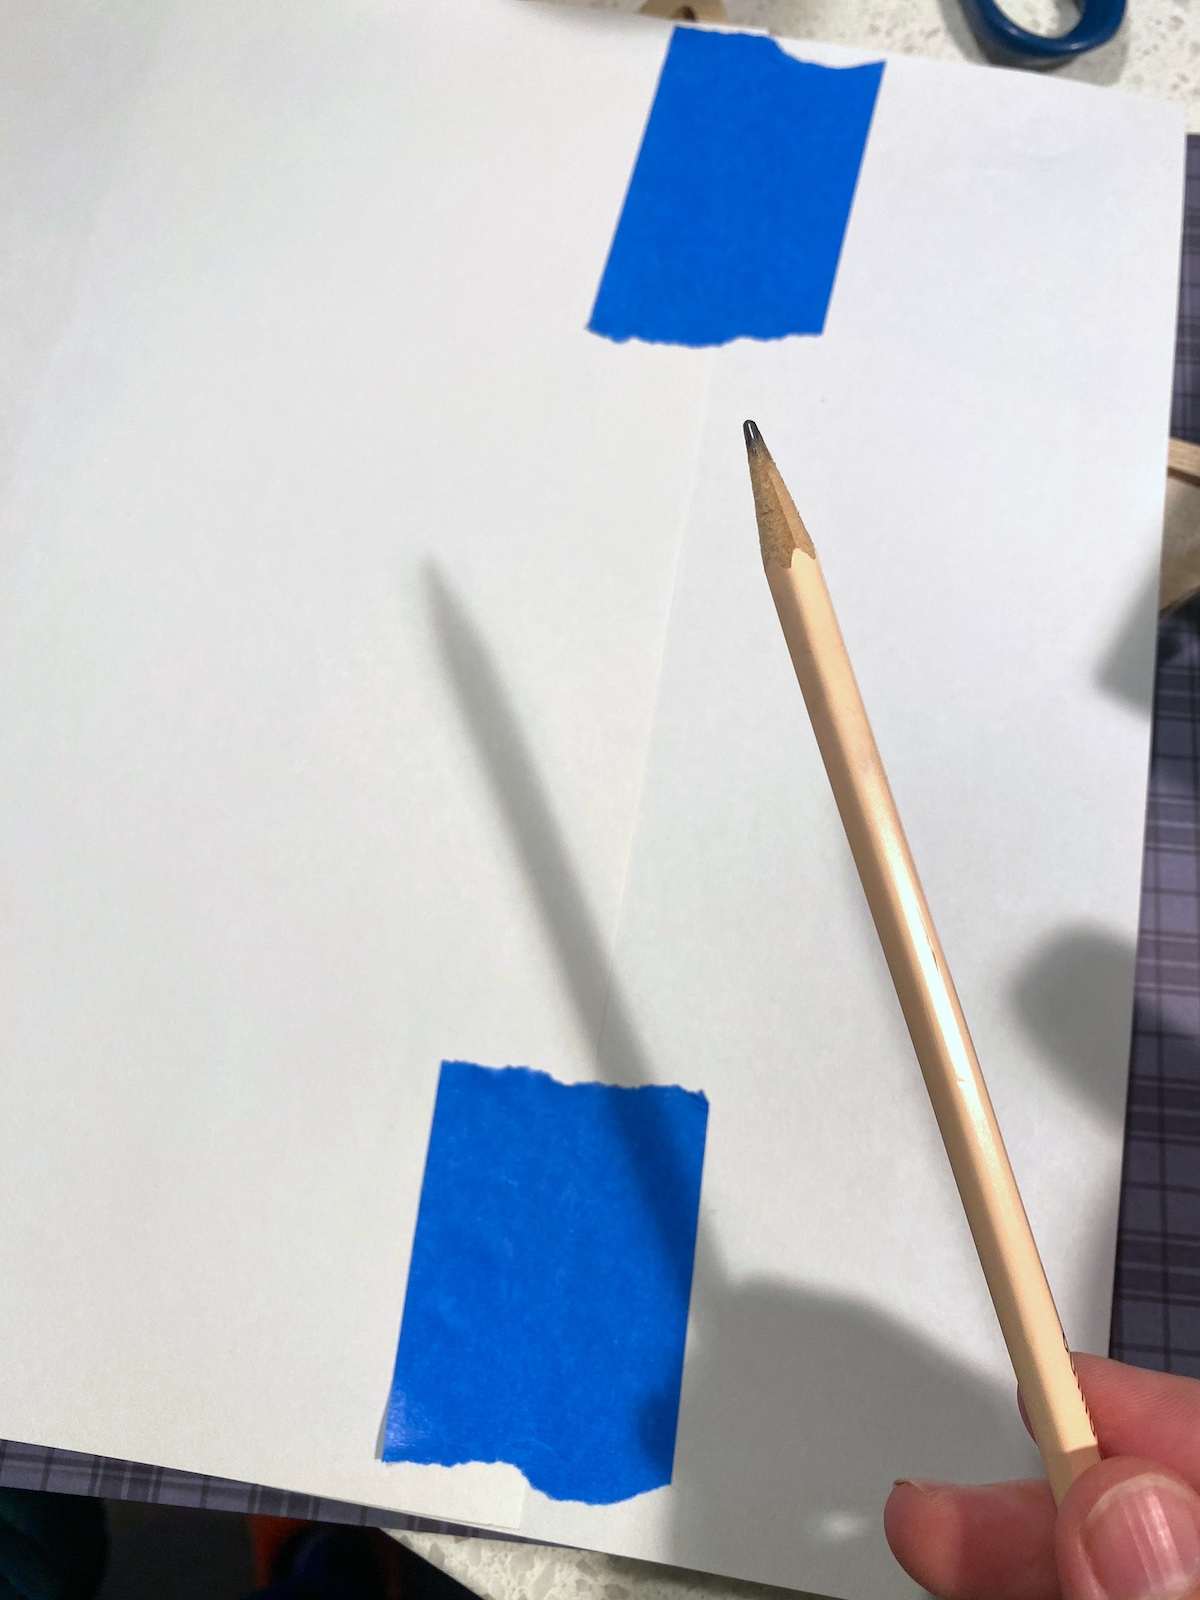
- Hold the taped paper down and rub the pencil led on the inside edges of the star. The lead will make a line that you can cut on, making your paper the same size as the inside!
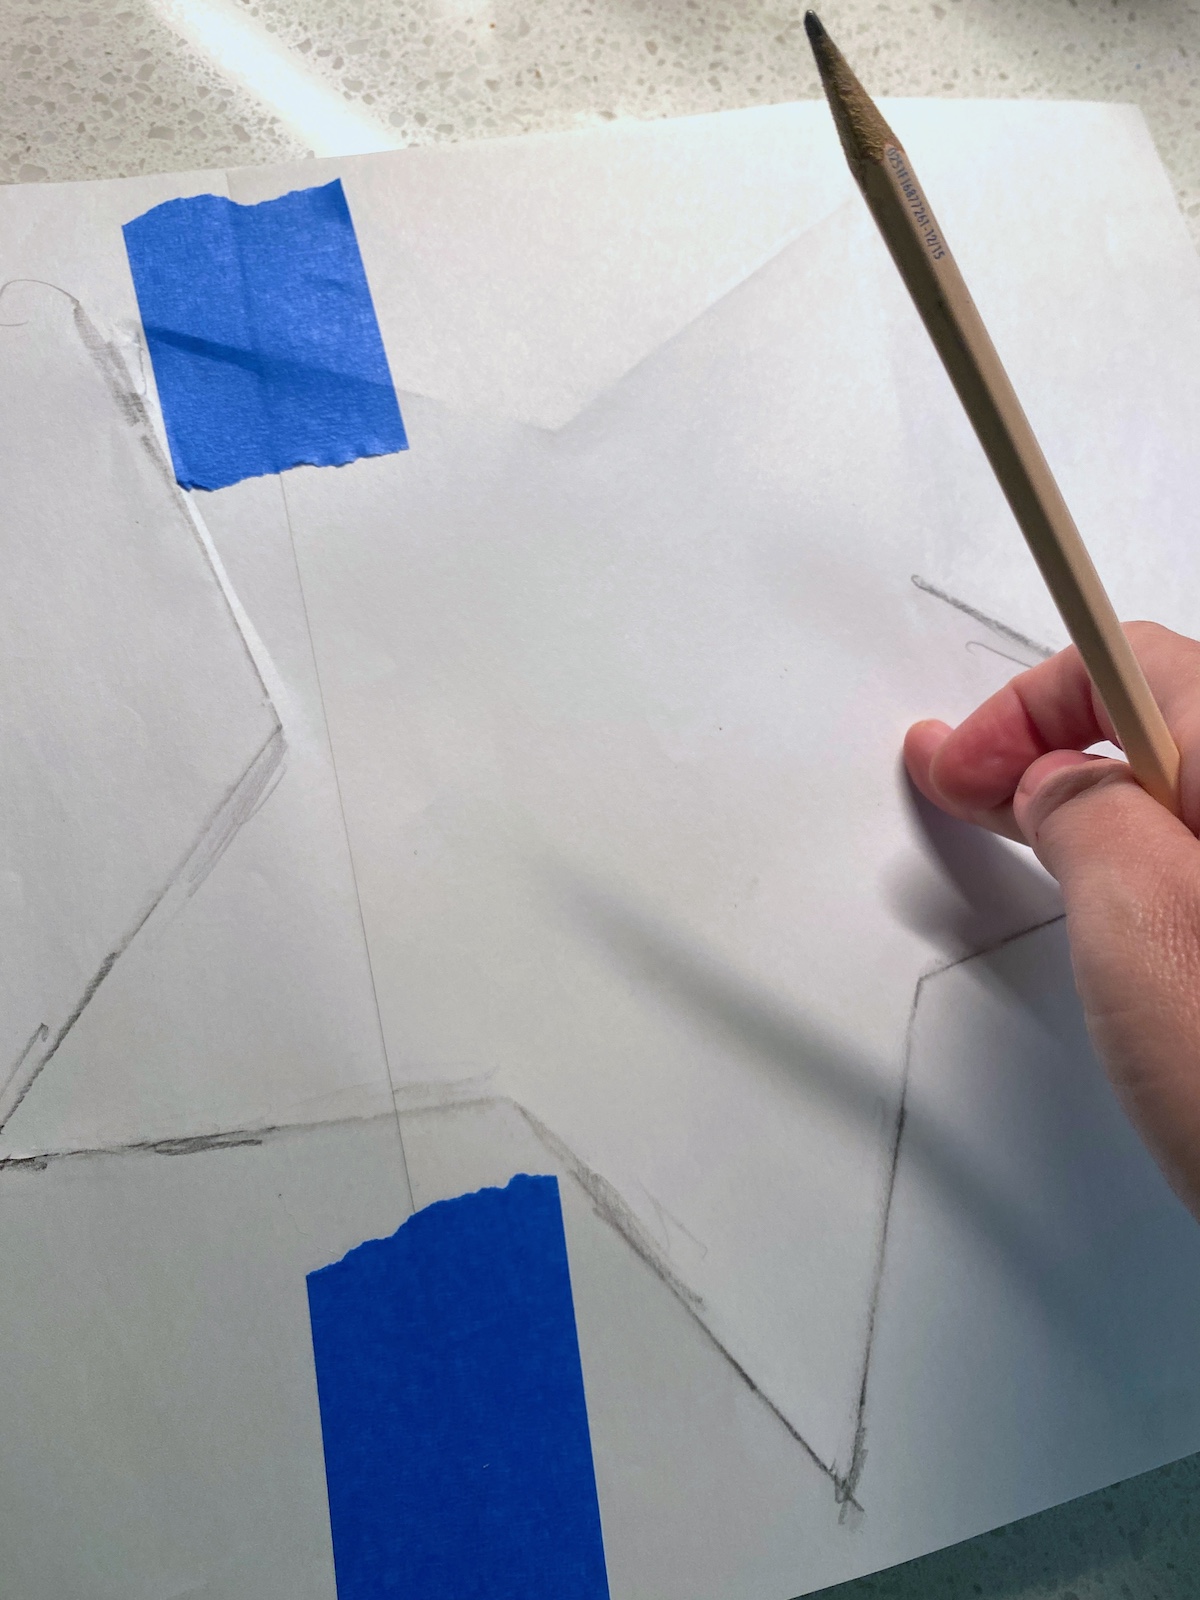
- Tape the template to the scrapbook paper. Use the scissors to cut on the lines.
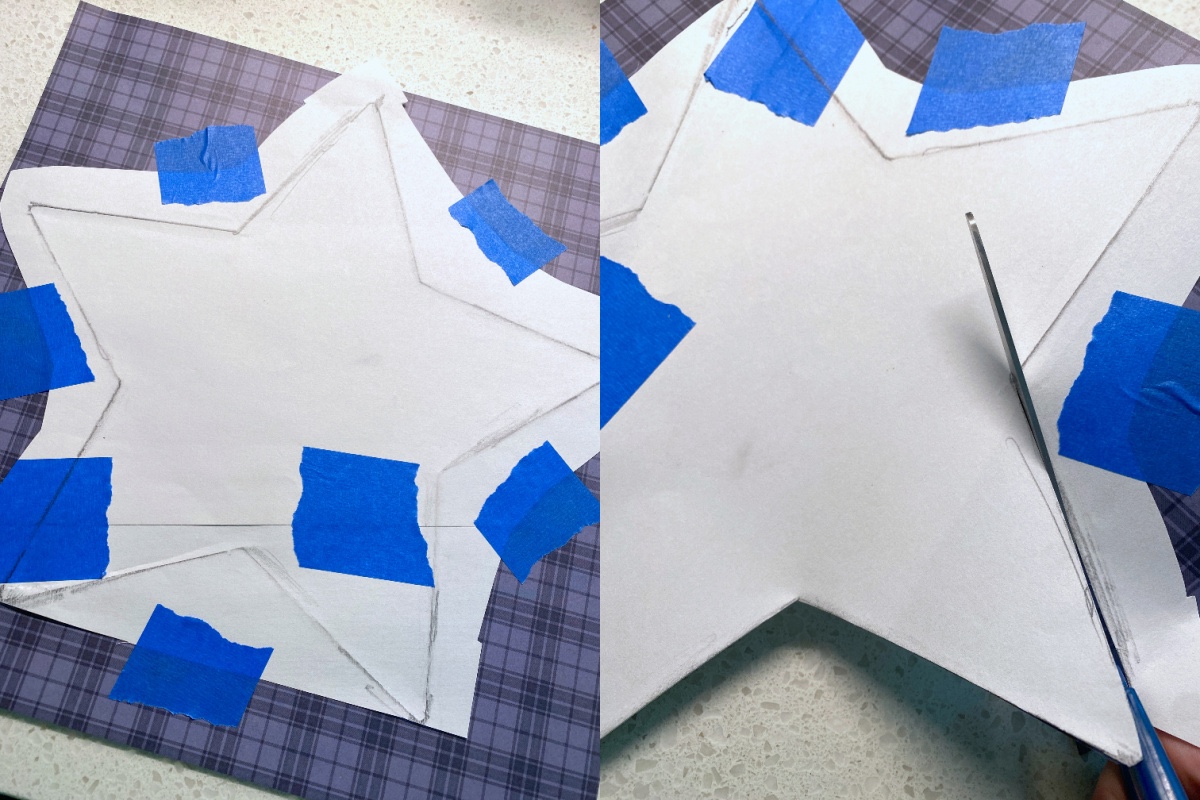
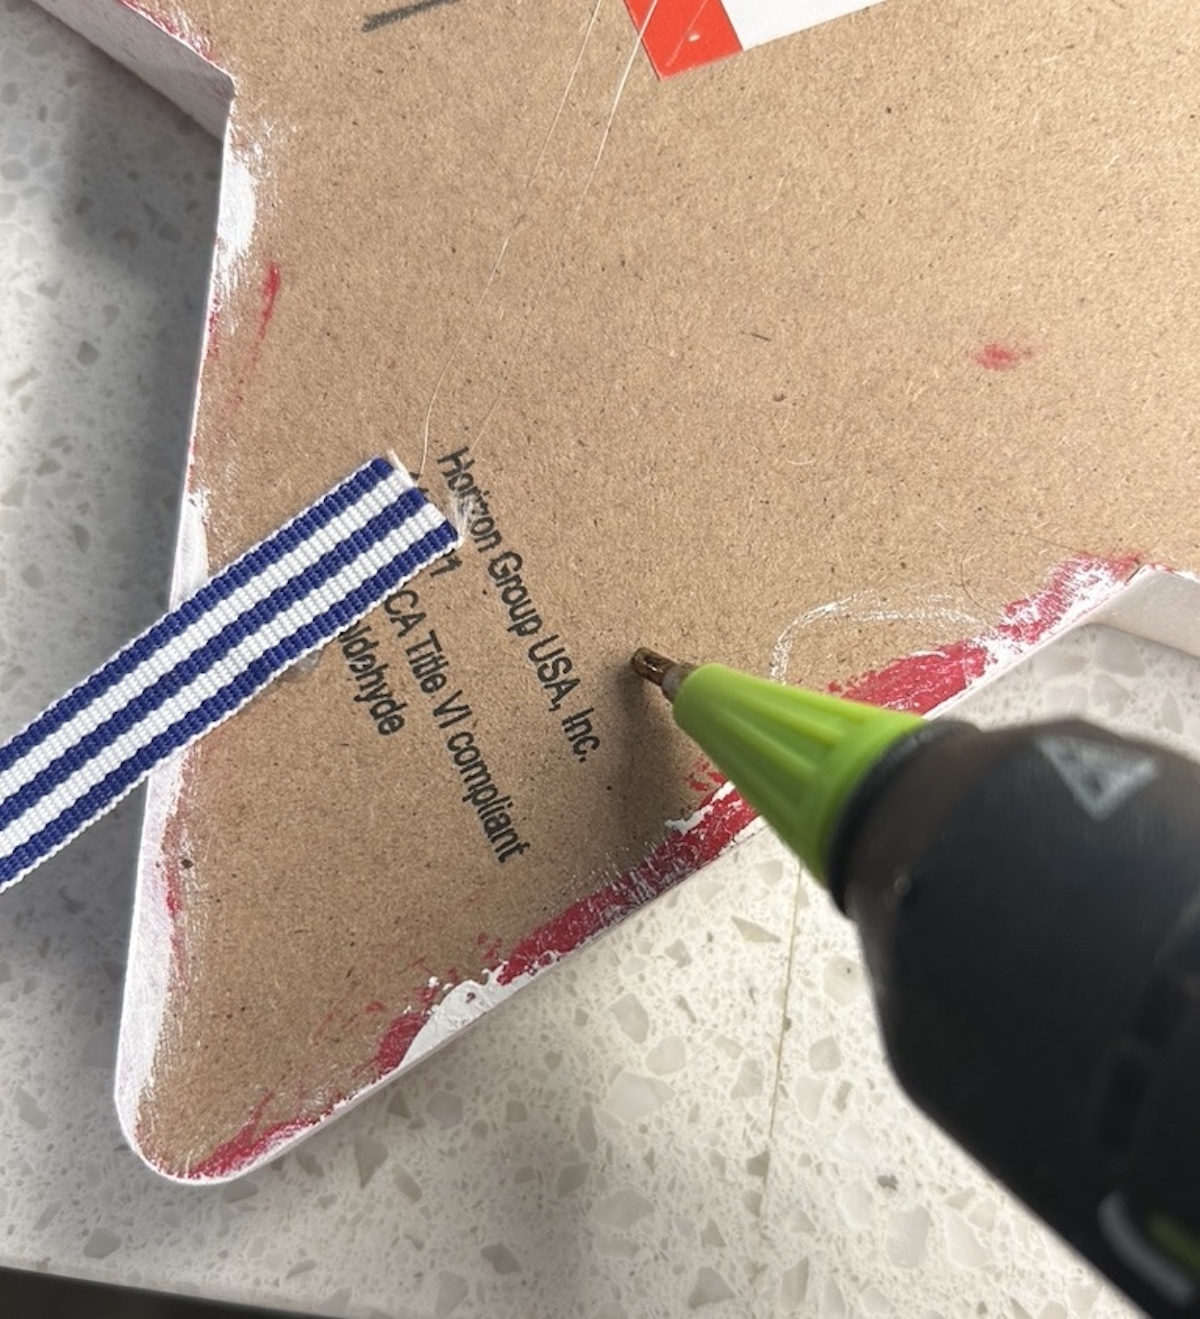
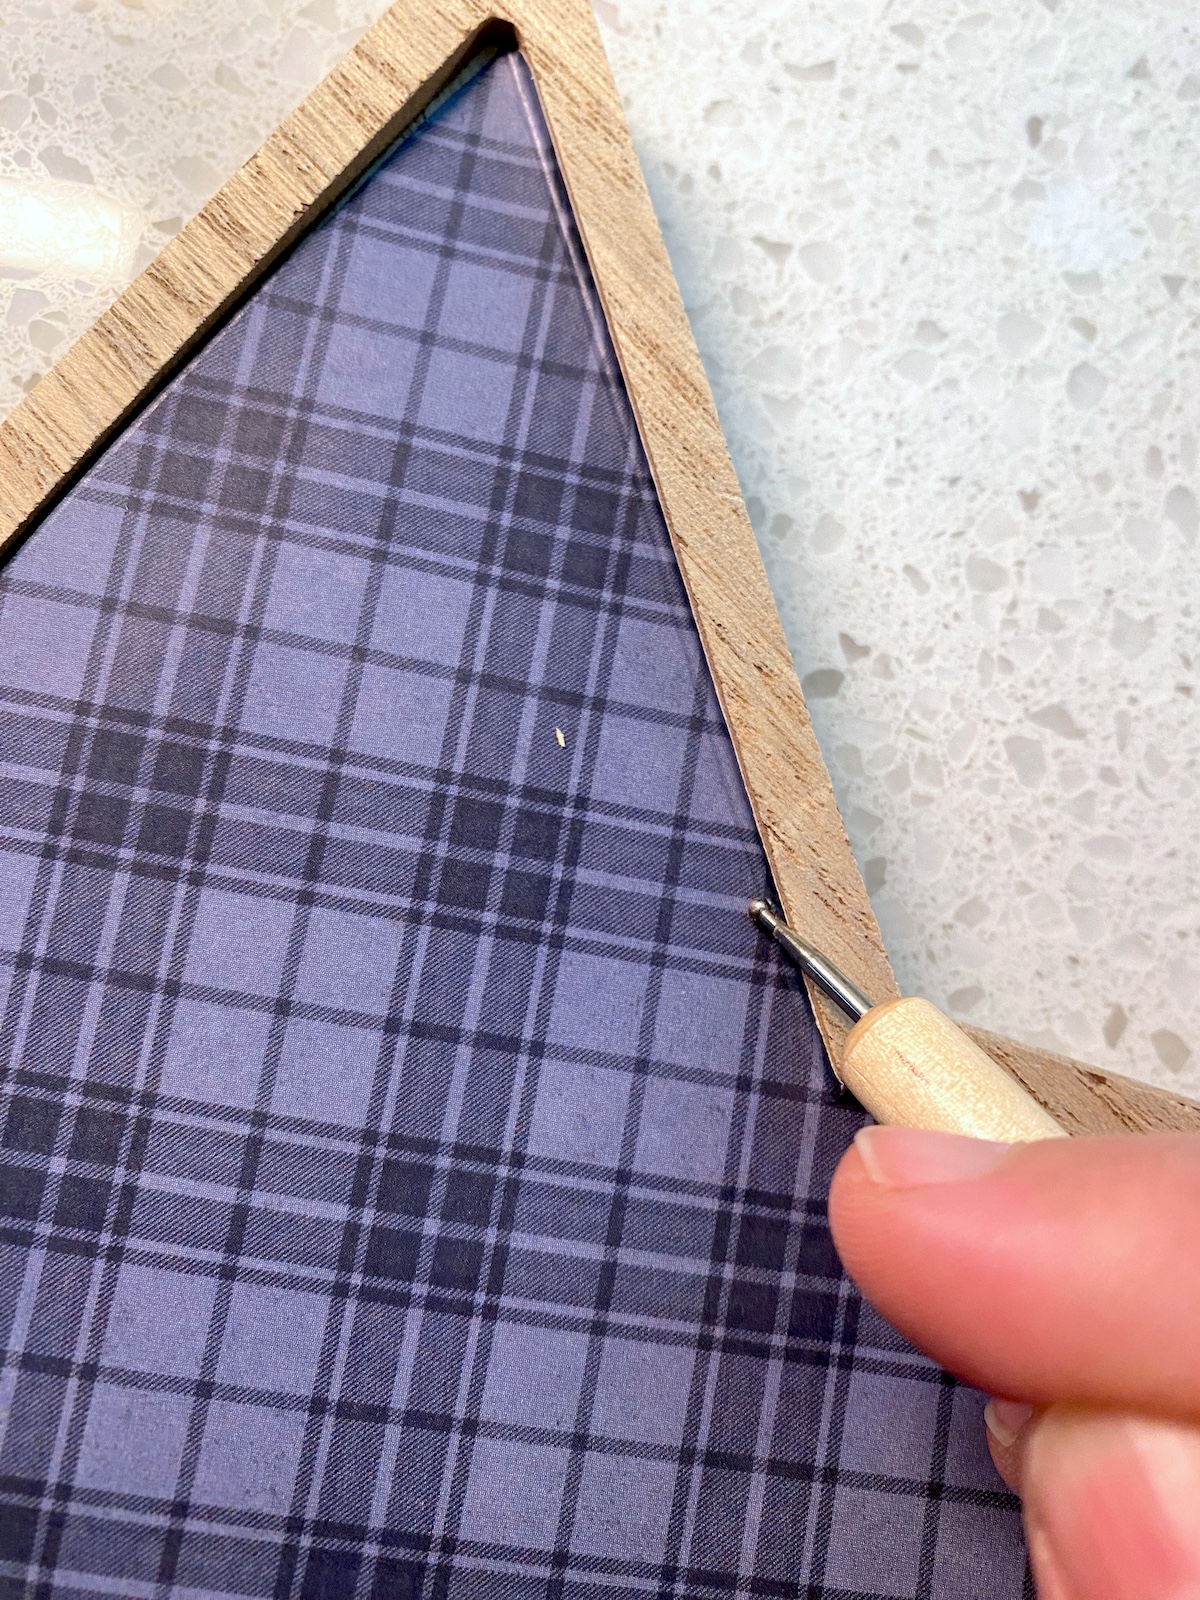
- Check the fit of the paper on the top of the plaque and do any gentle trimming as needed. You can also use an awl or sharp object to help smooth the paper into the edges for fitment. Set the paper aside for the moment.
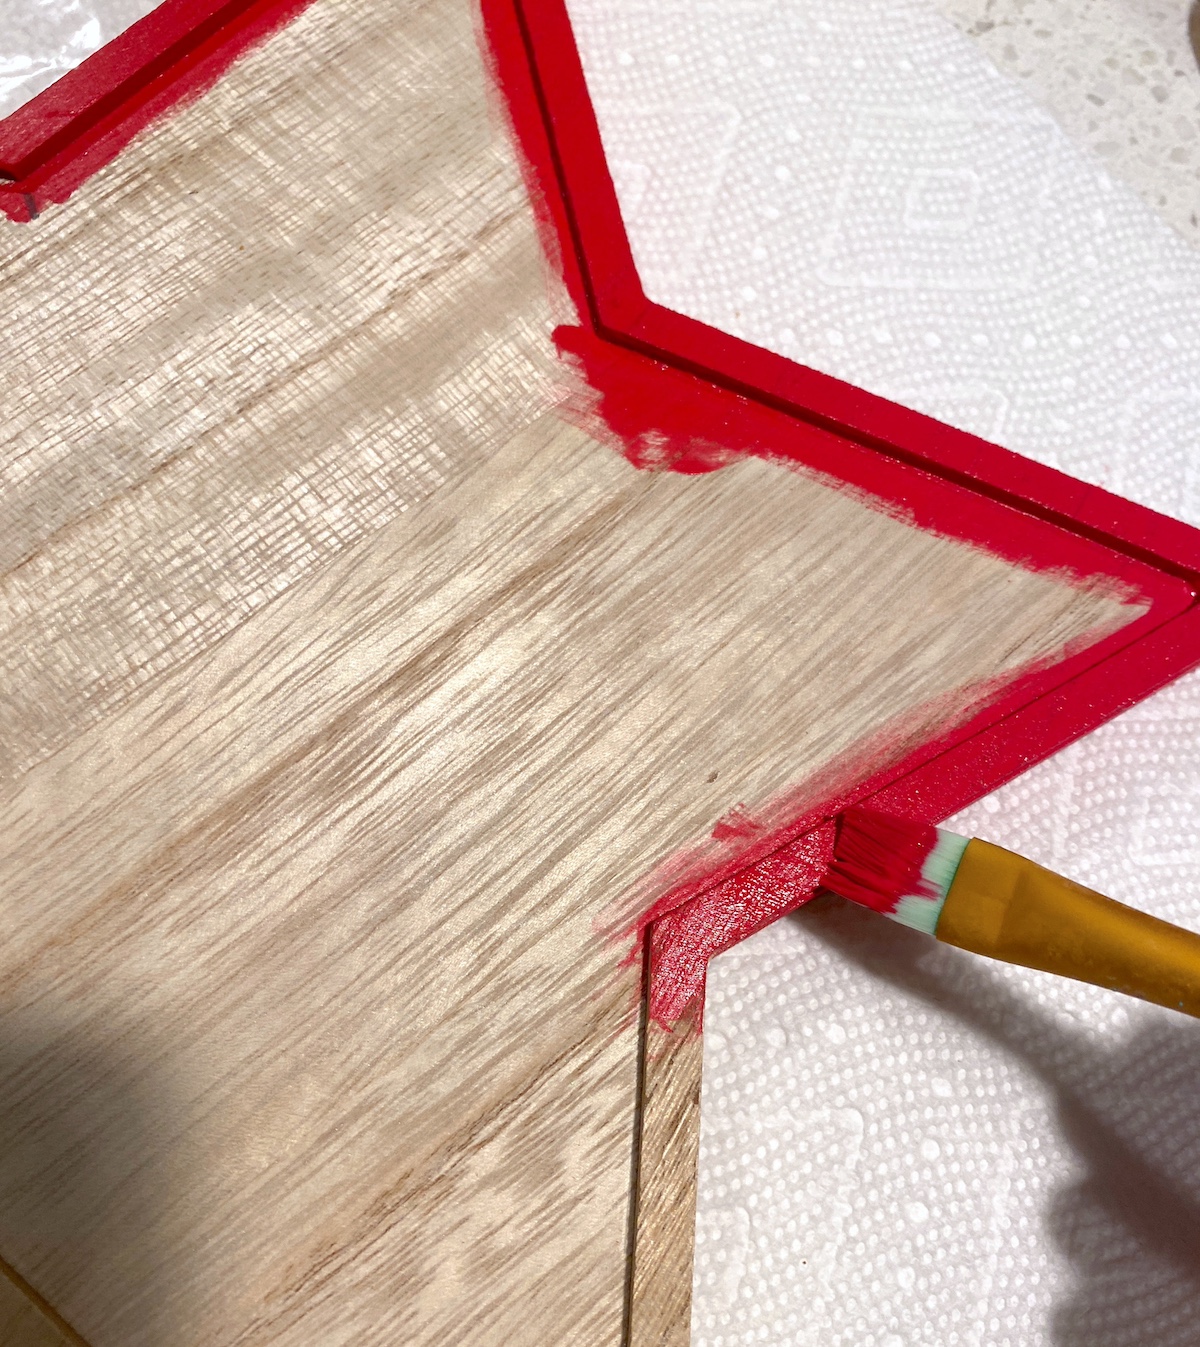
- Paint the edge all the way around the wood star with red paint. Let dry.
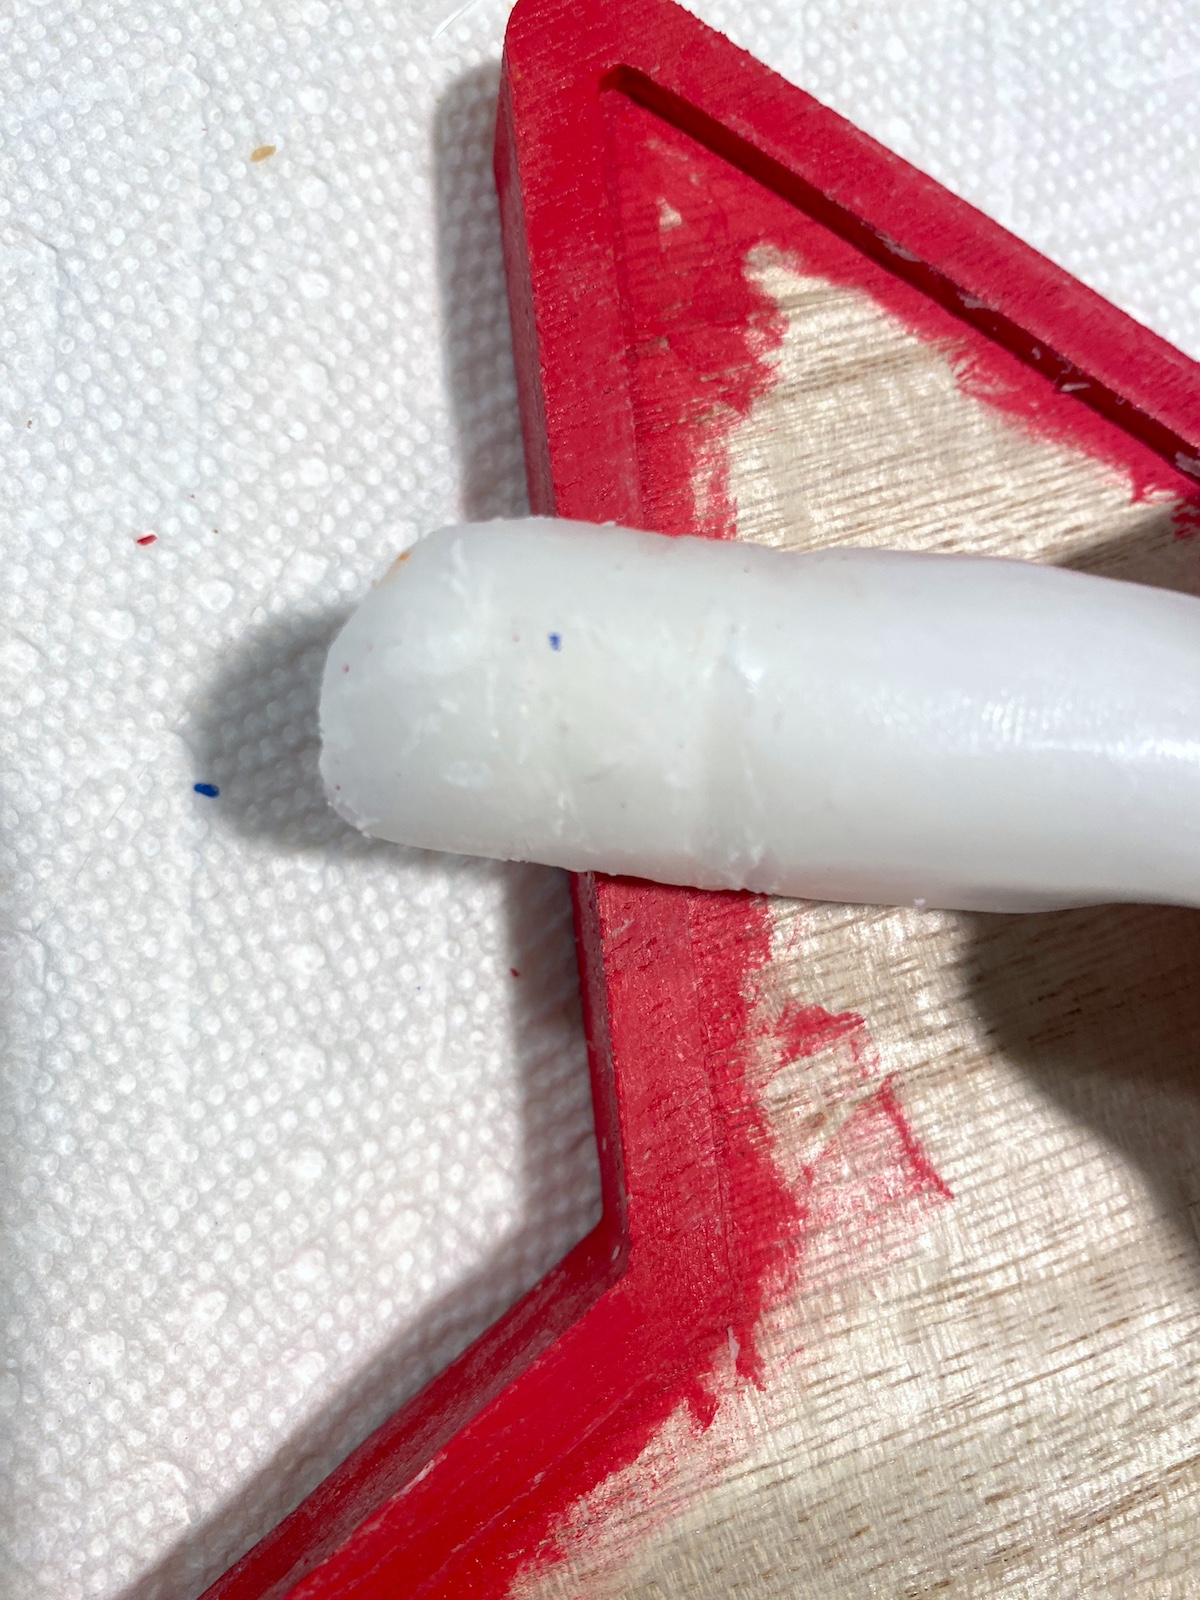
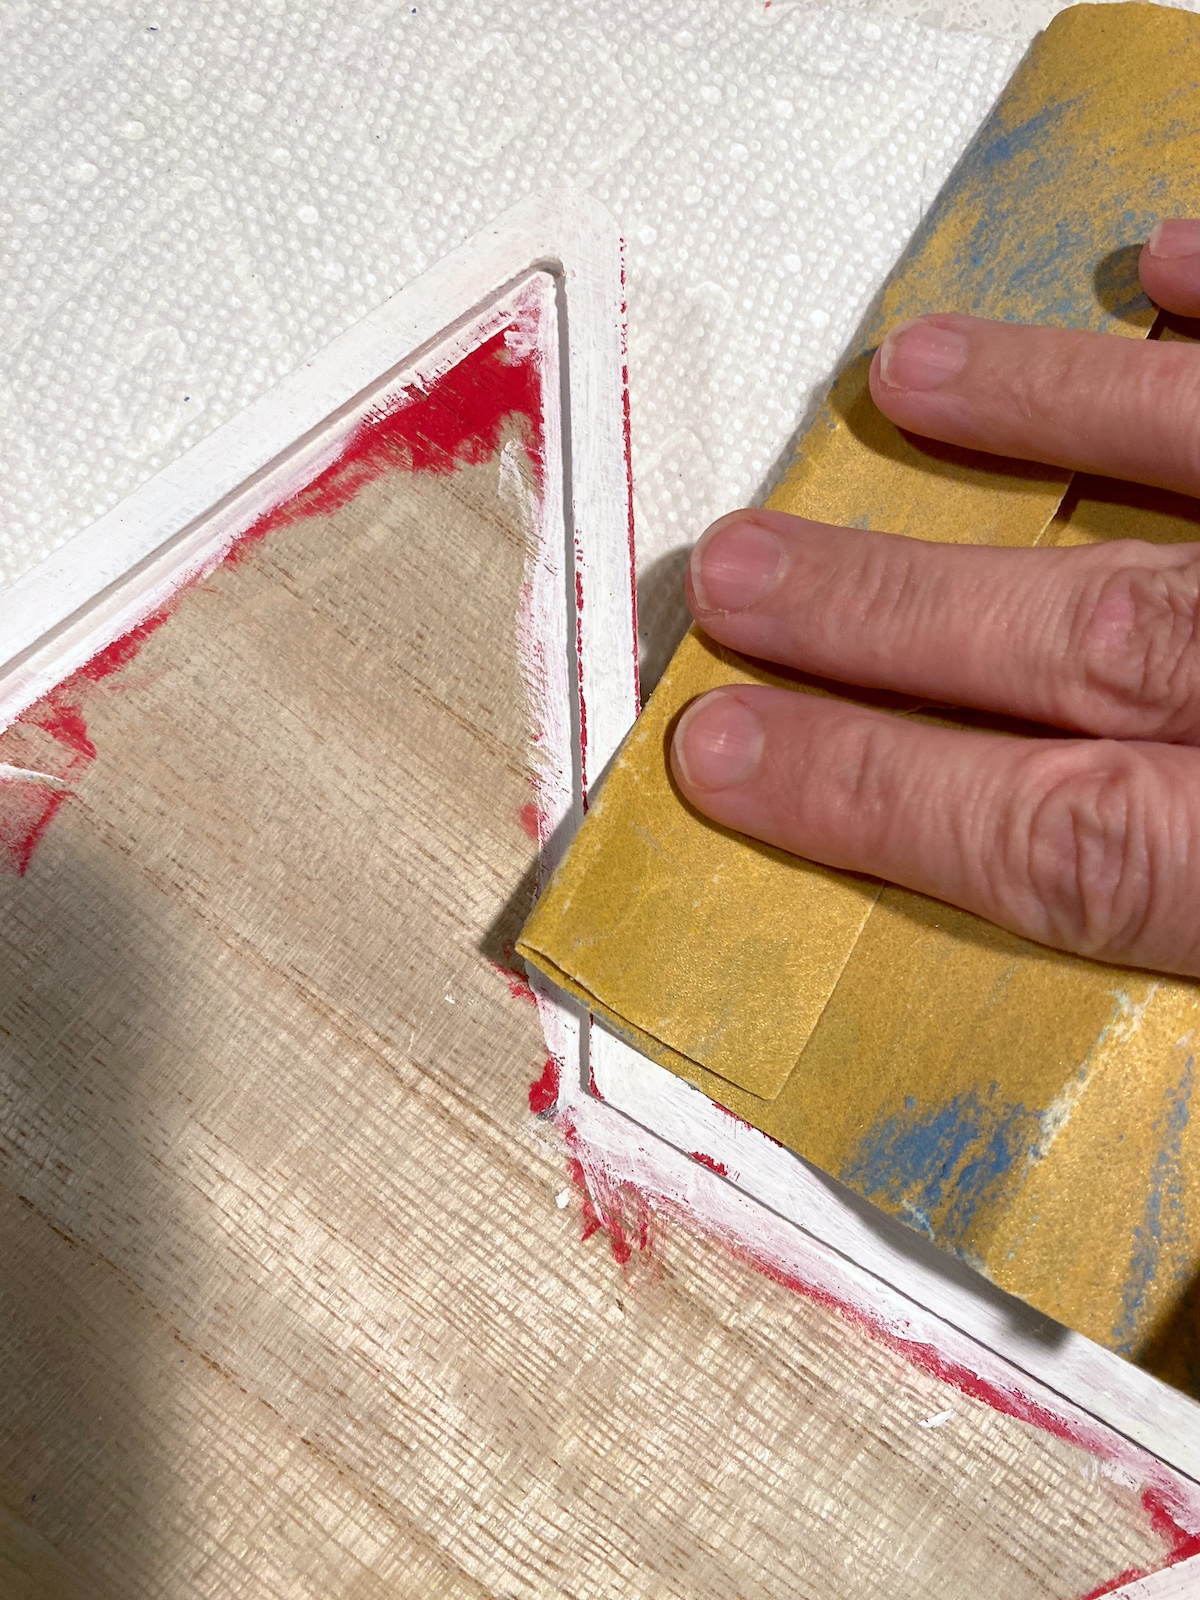
- Use a piece of wax from a candle to add wax to the edges of the star. You don't need to rub too hard. Be firm and add wax where you want any distressing.
- Paint over the top of the wax and red paint with white. Do two coats, letting dry after each.
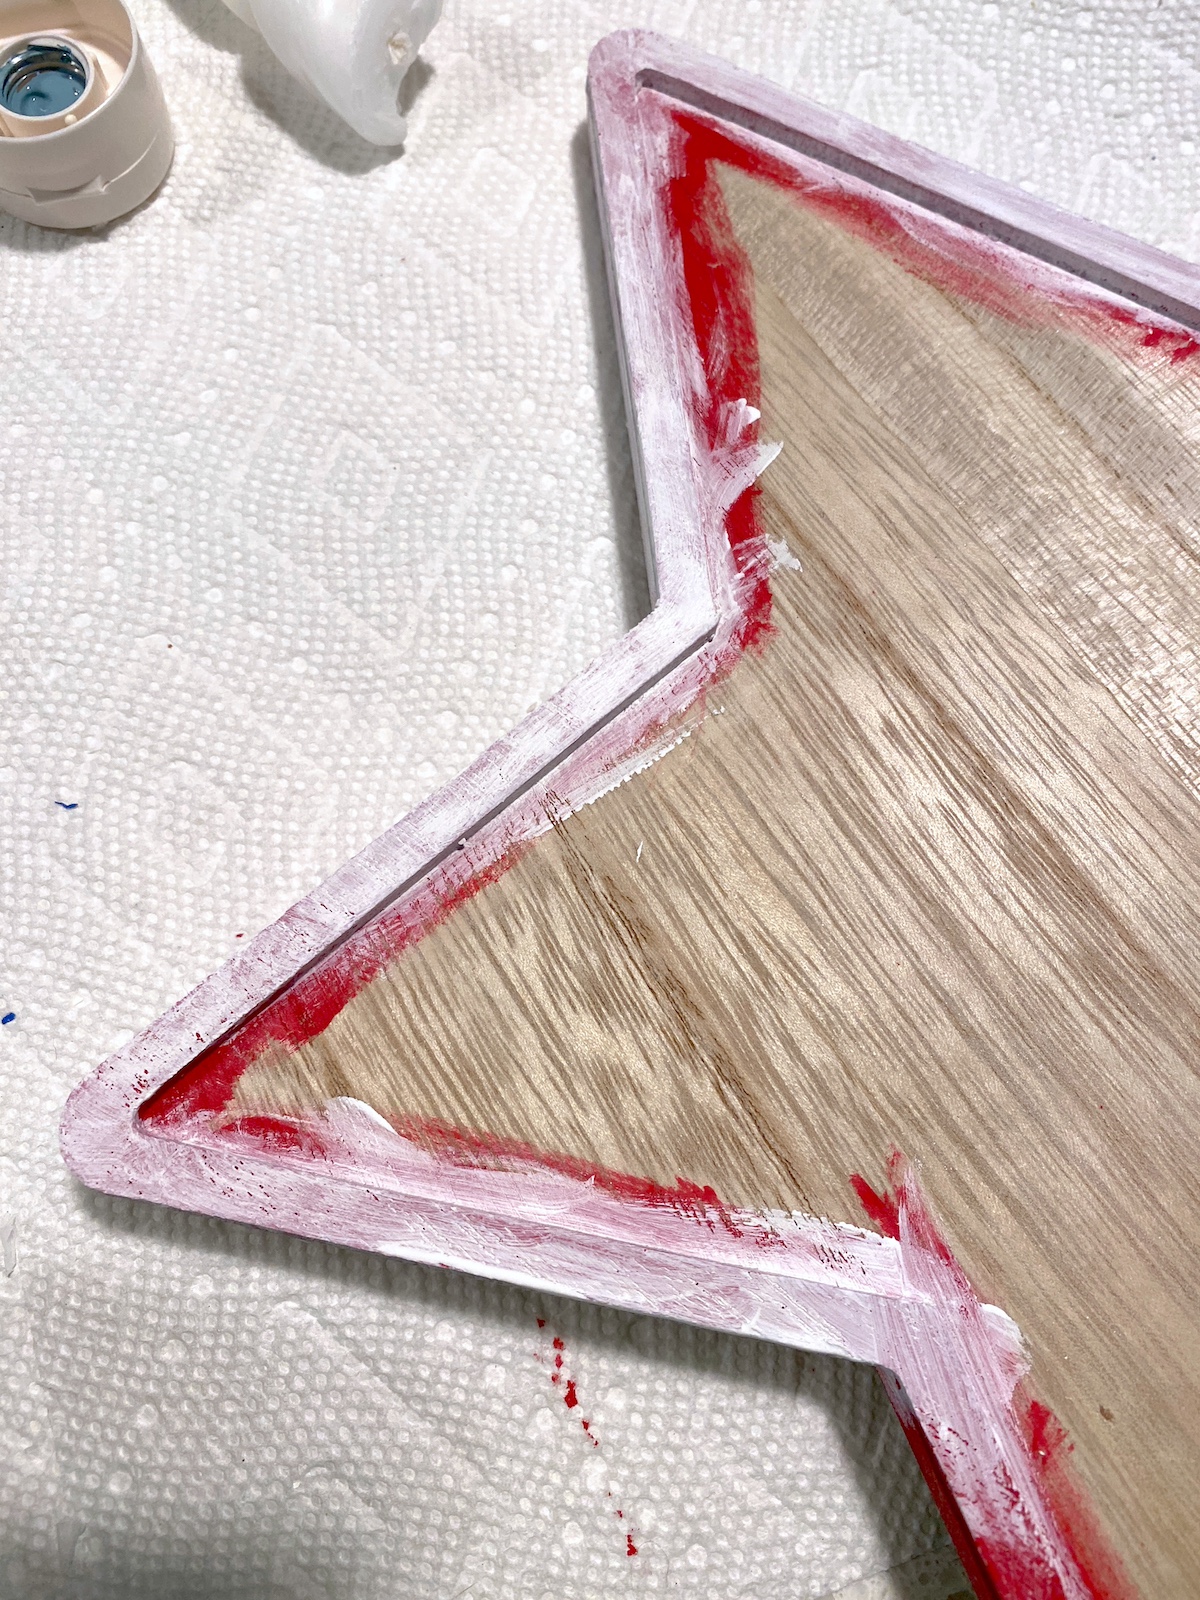
- Use sandpaper to gently remove white paint and reveal the paint below. If you lightly sand, the paint will come off easily where you applied wax. Continue until the desired amount of distressing is achieved.
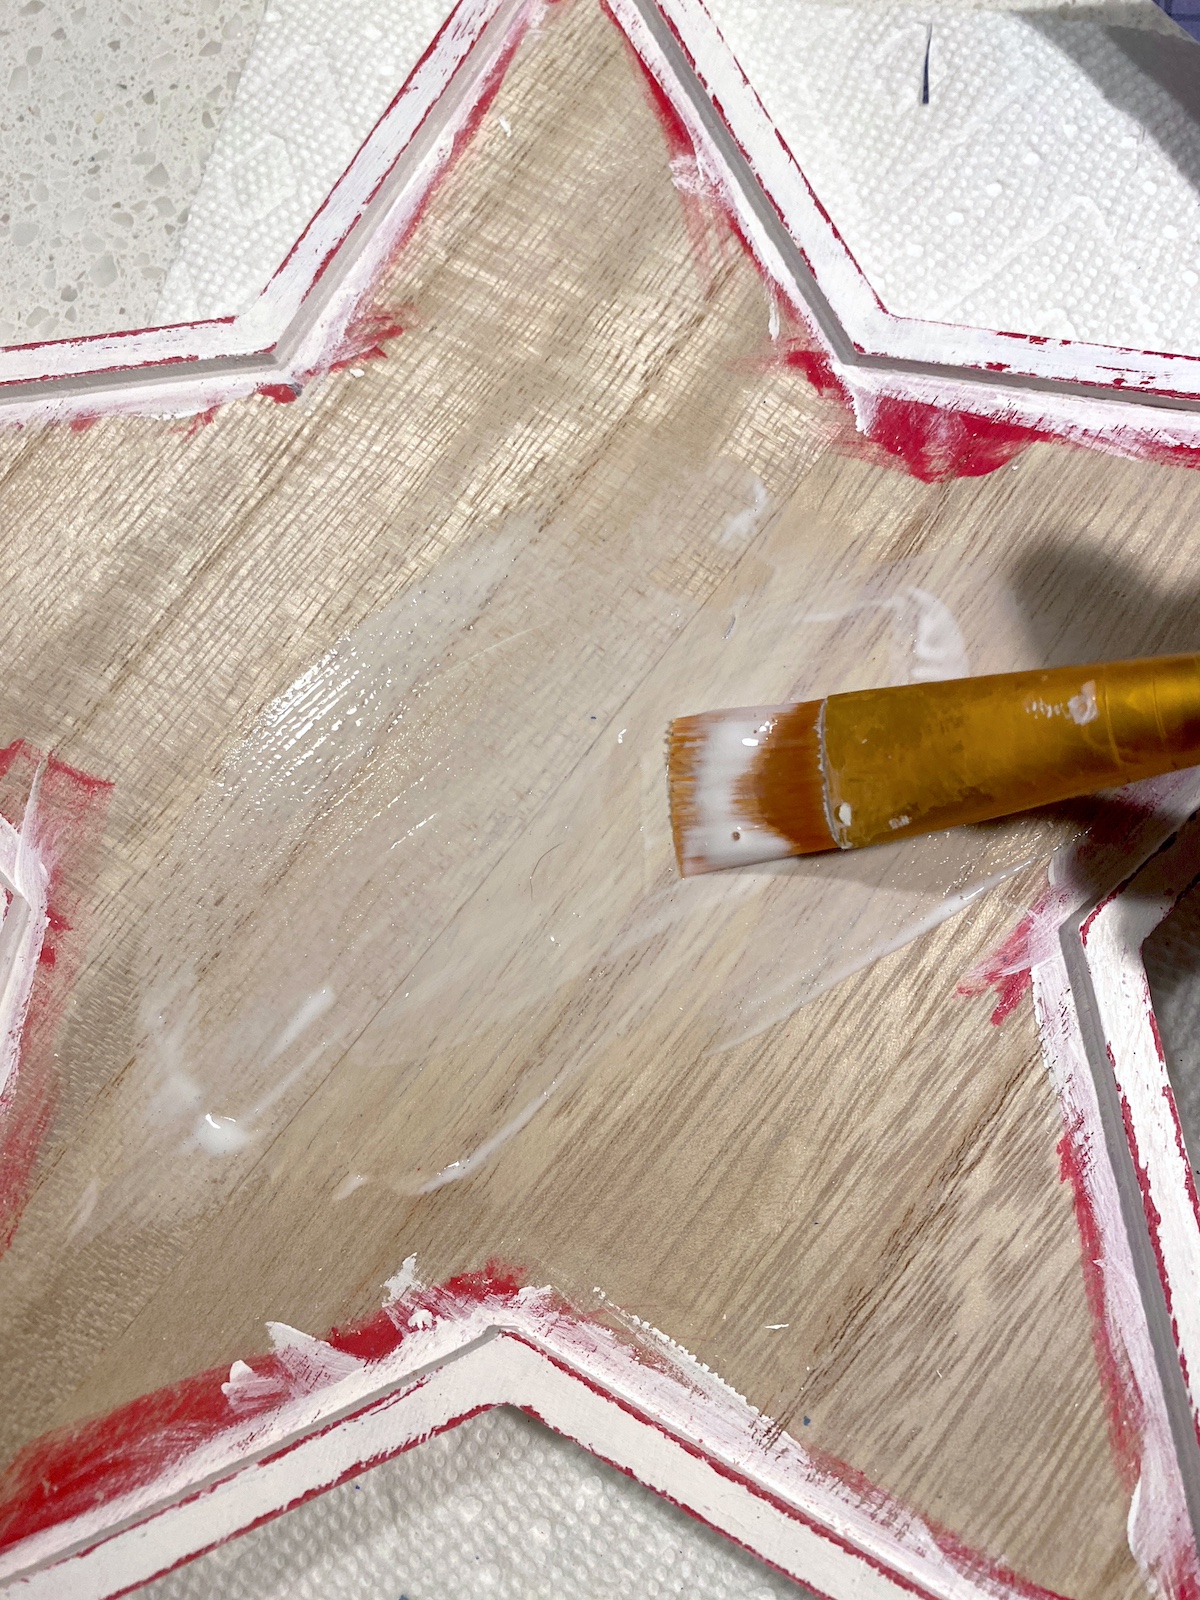
- Paint a medium layer of Mod Podge on the inside of the star with a brush, making sure to get all the edges. Work quickly.
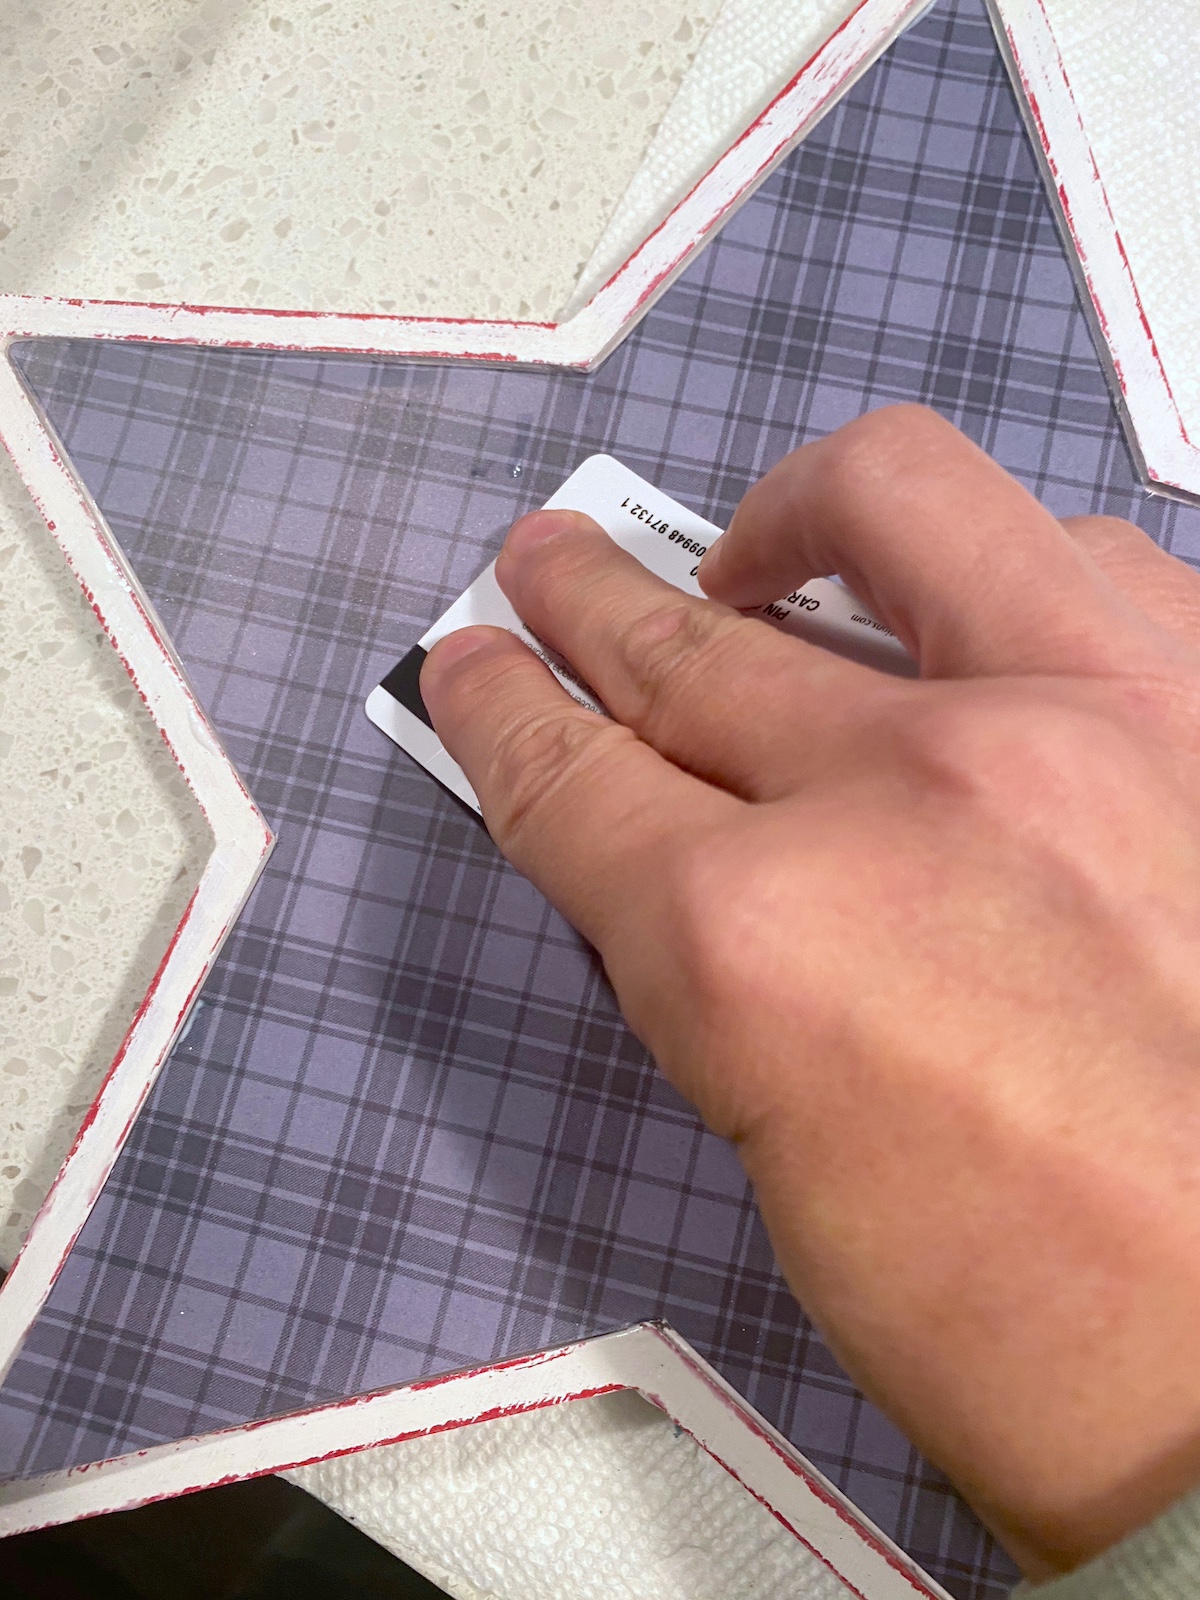
- Smooth down the paper thoroughly on top of the Mod Podge. You can use a credit card to press down slightly and get into the corners. Wipe away excess Mod Podge that comes out from under the paper with a brush. Let dry for 15-20 minutes.
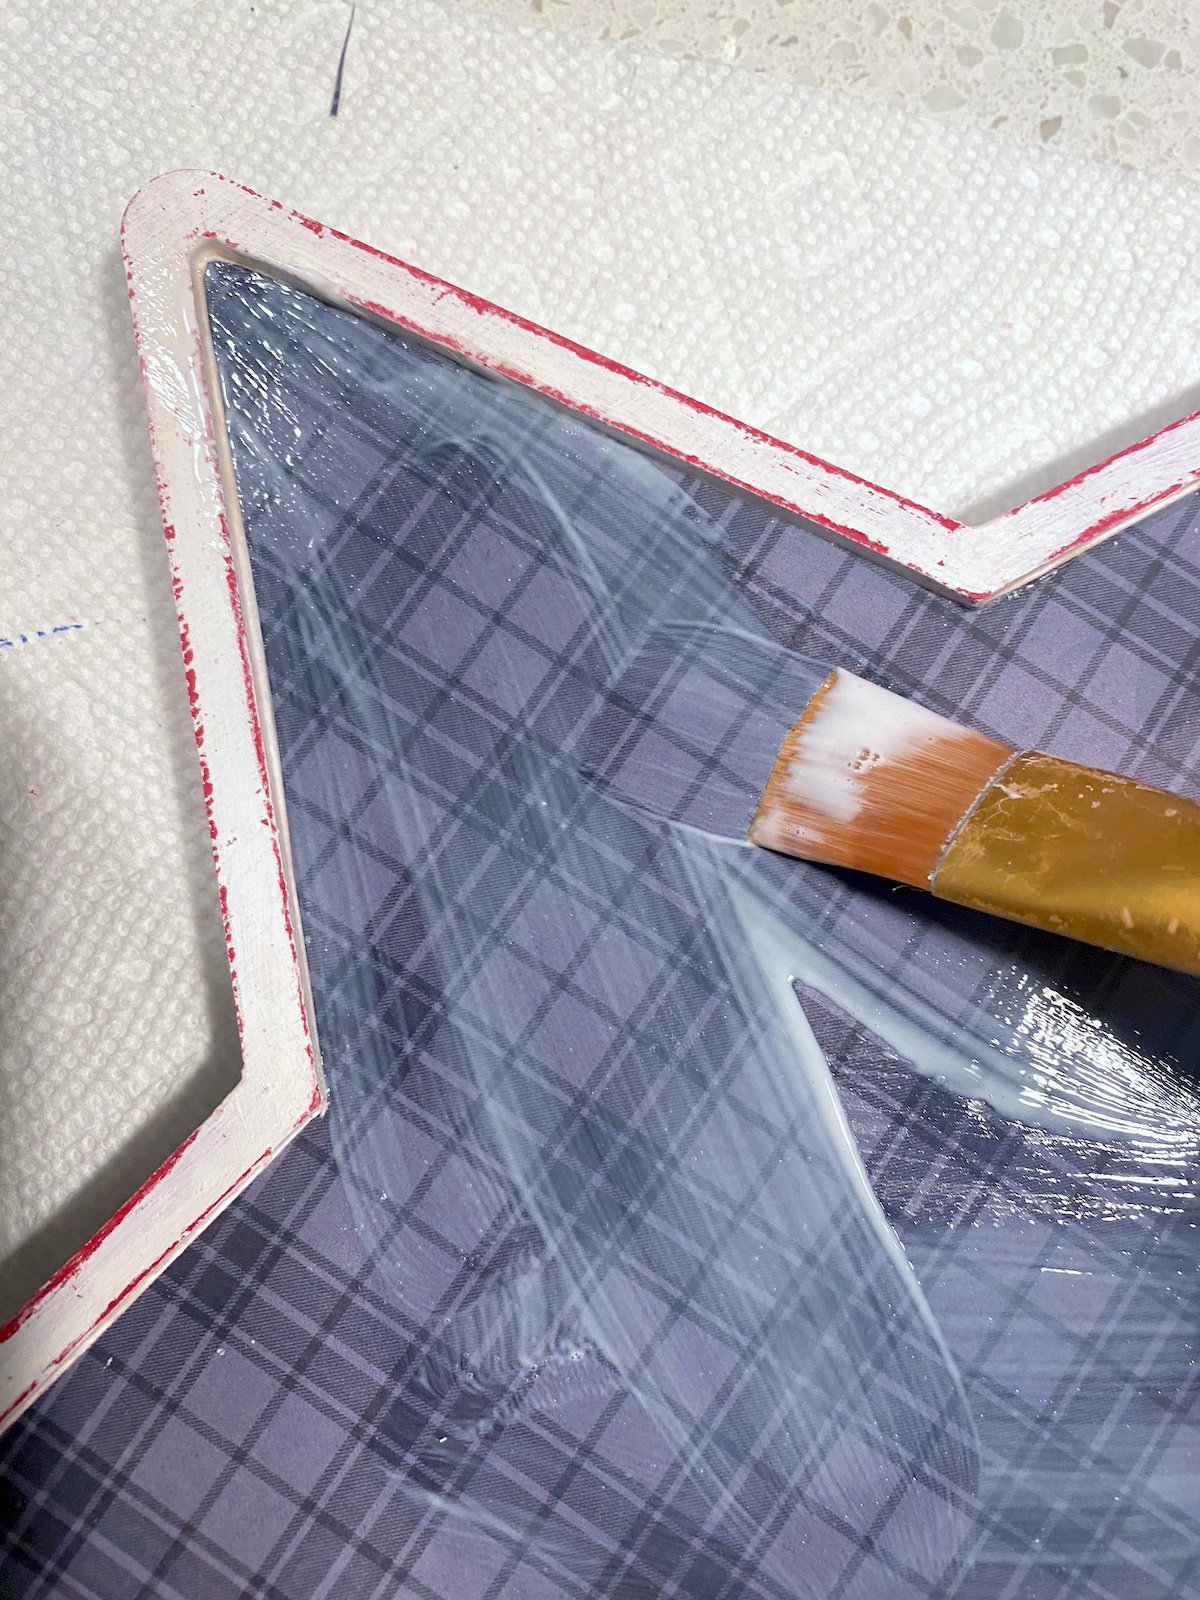
- Top coat the paper with Mod Podge. Let dry, then coat the entire star with Mod Podge, including the edges, to seal.
- Glue down the tile letters spelling the saying of your choice, using craft glue. Use a ruler to help align the letters if needed.

- If desired, attach a ribbon on the back. This gives you the option to hang. Let set before displaying.