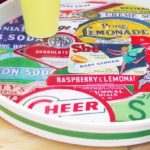
Homemade Lazy Susan
Learn how to make a lazy susan with a planter tray from Home Depot! You can use any graphics to customize.
Yield: 1 tray
Cost: $10
Equipment
Materials
- Metal planter saucer
- Mod Podge Gloss
- Envirotex Lite
- Plastic straw
- Lazy Susan mechanism
- Sandpaper
- E-6000
- Spray paint optional
- Painters tape optional
Instructions
- Clean your tray with mild soap and water and let dry.
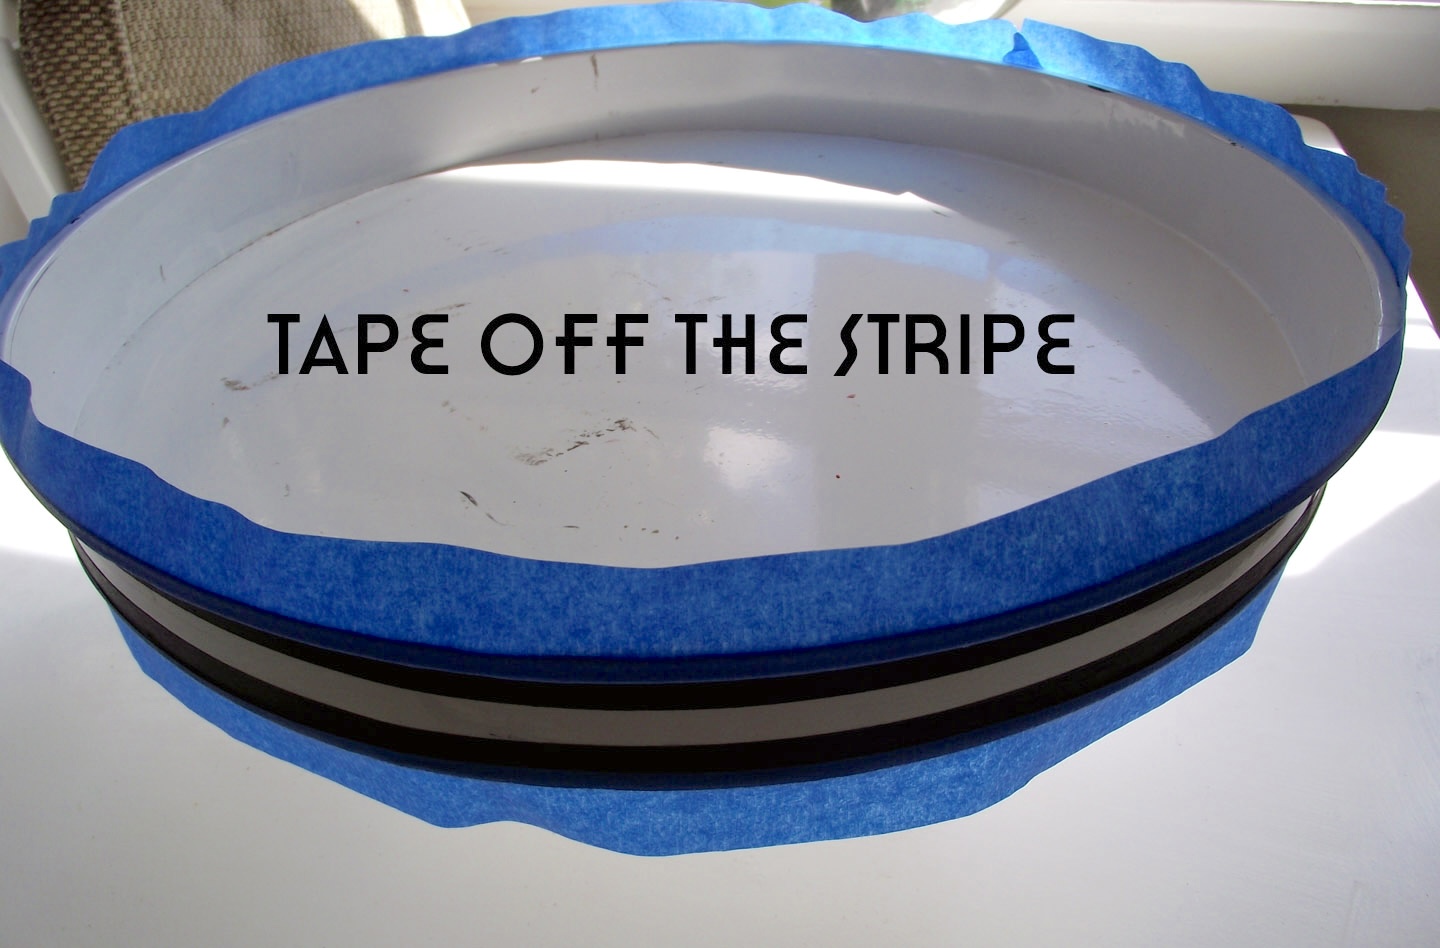
- Use painter's tape to section off a line to make a stripe (optional). Spray with several coats of spray paint, remove tape, and let dry.
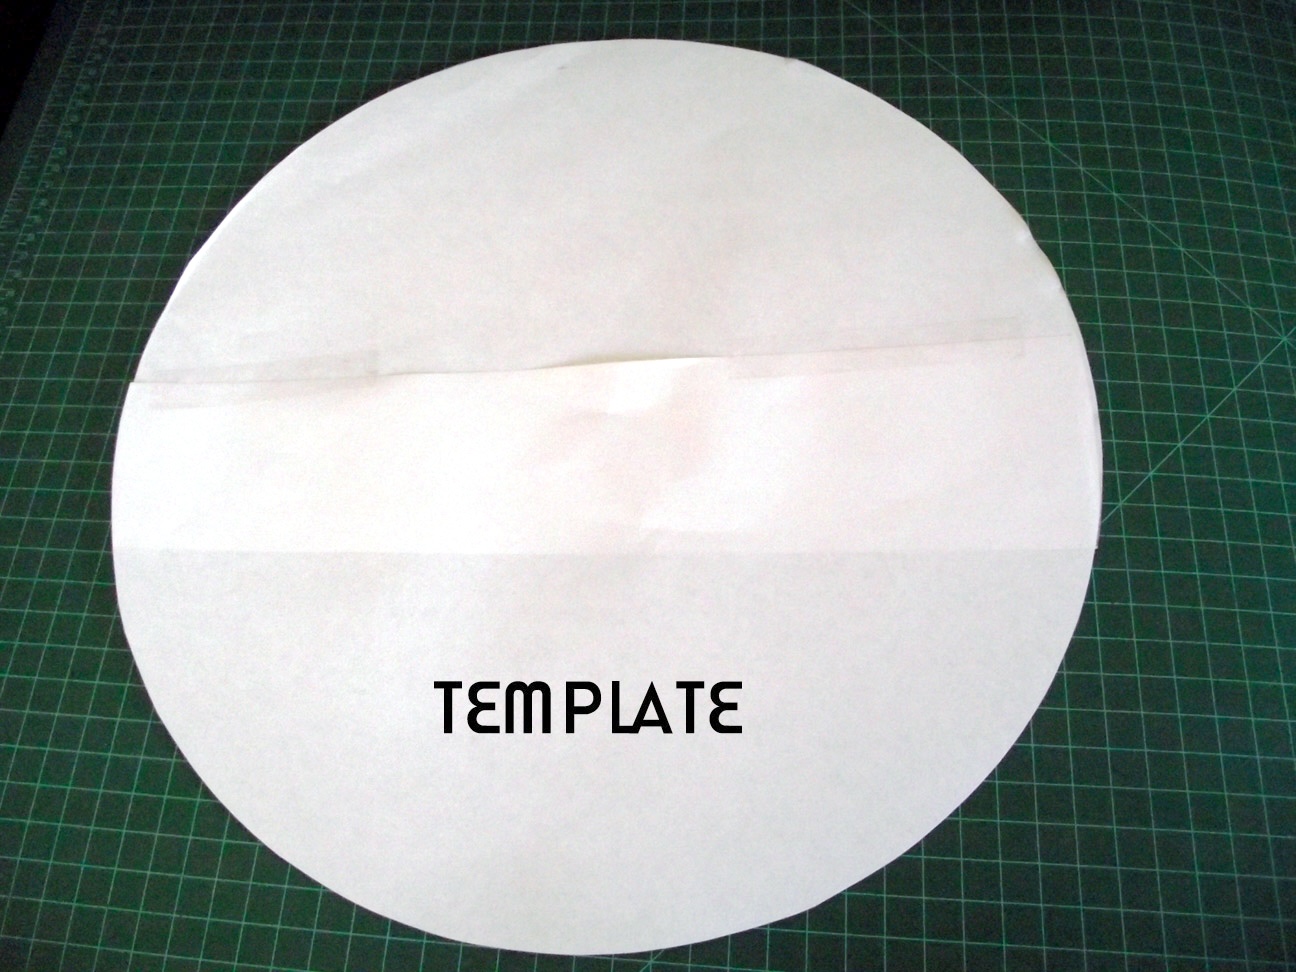
- Make a template for the inside of the tray using newspaper or paper and a pencil. Cut out with the scissors and set aside.
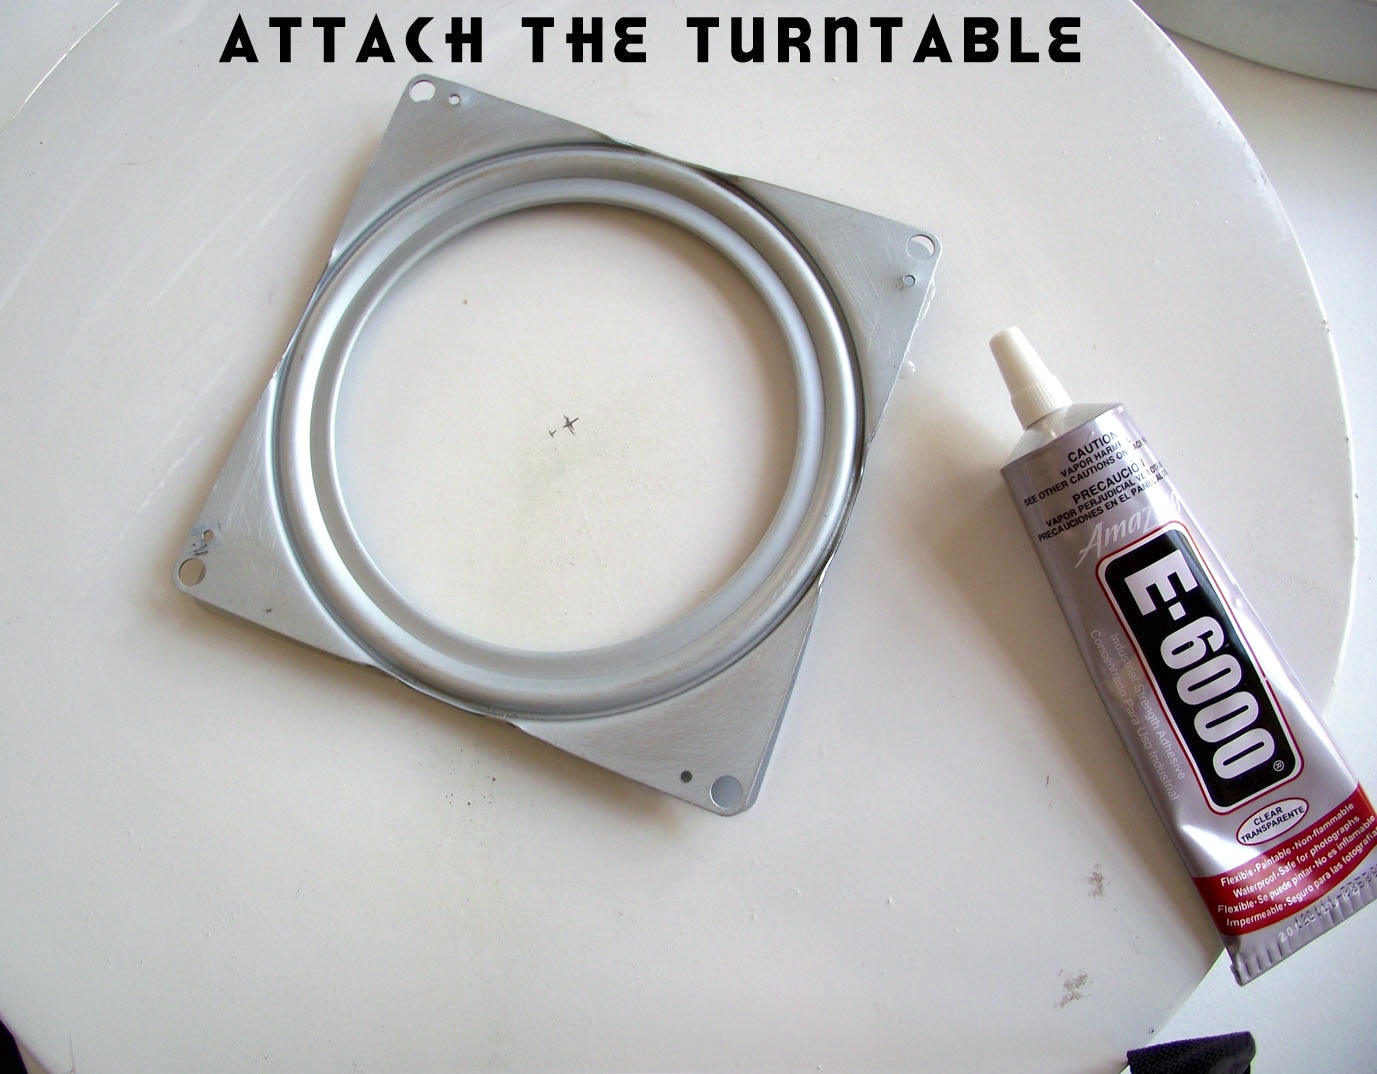
- Attach the lazy susan mechanism to the bottom center of the tray with E-6000; let dry.
- Print out all images you would like to use on a laserjet printer. Cut out and assemble them into a collage (you can tape if needed).
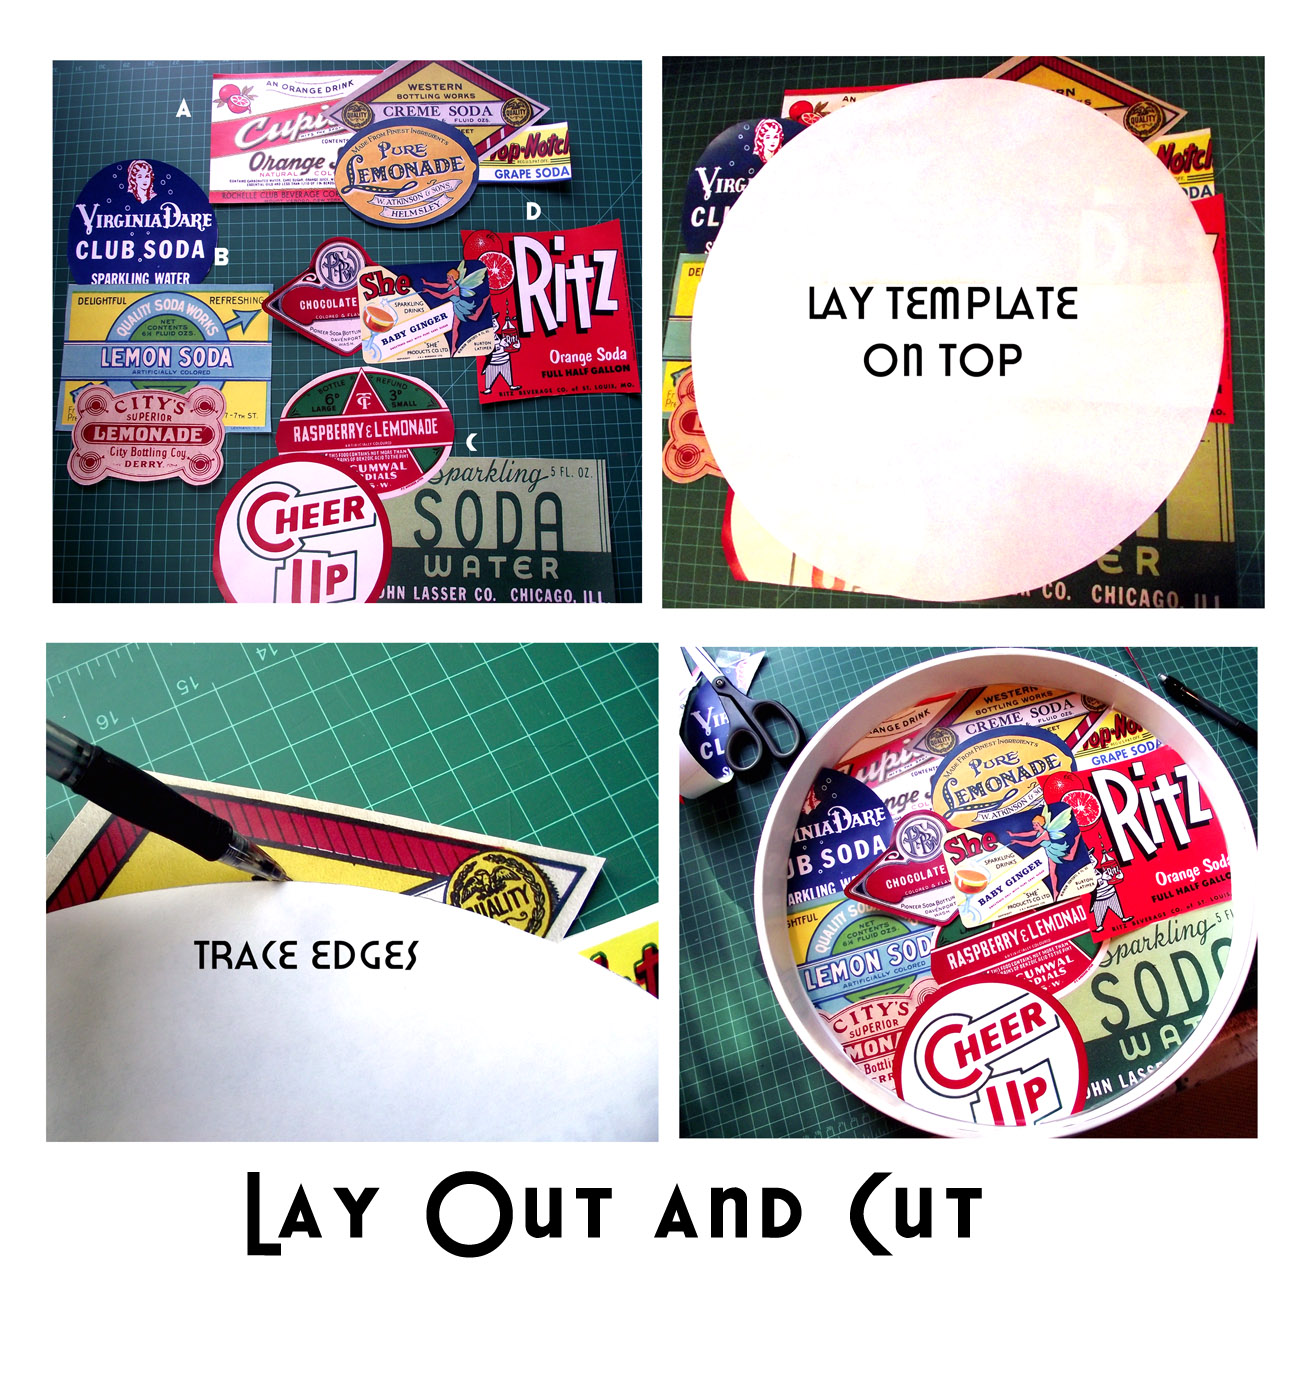
- Place the template on top and trace the outline of the circle. Cut out with scissors. Fit in the tray and trim if necessary.
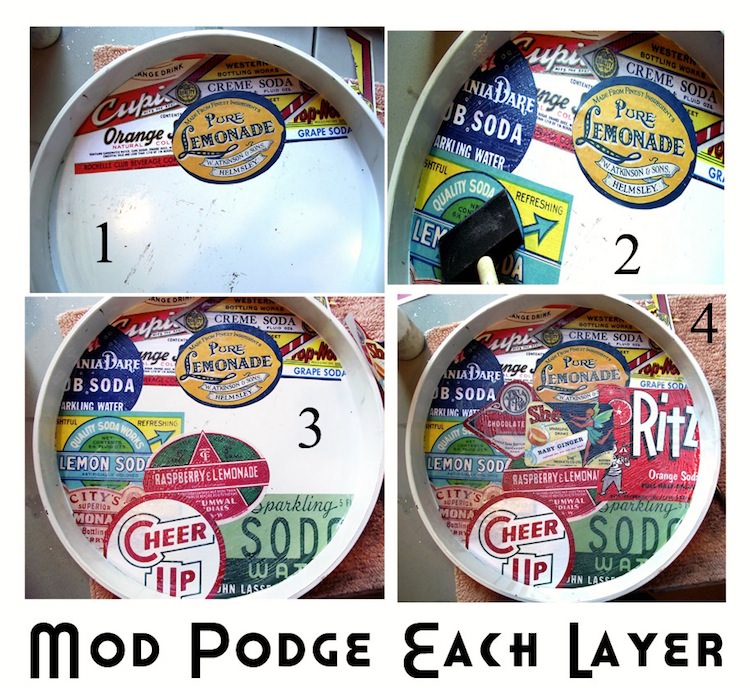
- Mod Podge the images into the tray, layering as necessary. Seal thoroughly, making sure to get all edges. Let dry overnight.
- Mix the Envirotex Lite according to package instructions. Pour into the tray. Allow tray to fully cure for approximately 24 hours before using.
Notes
Step 2: My tray was BIG (16” wide). To make a template for the inside, I traced the edges of the tray onto two large sheets of paper and then taped them together. You could also use newspaper.
Step 5: I used graphics I had on hand, but you could easily use scrapbook paper or wrapping paper or anything that appeals – just test it to make sure it holds up to the Mod Podge.
I laid out the design in MS Word, but I didn’t want to have to cut out and paste each image. Instead I printed them out in sections on 11 x 14” legal paper and then cut each section out.
If you only have an inkjet printer, I'd try to get laserjet images printed to make sure you have no bleeding. If you don't have that option available, be sure to spray the inkjet images on both sides with clear spray sealer and let dry before using.
Step 7: You don't want the resin getting to the images as it can discolor them. Seal the images well if they are printed at home.
Step 8: Pop air bubbles by blowing on the surface of the resin with a plastic straw (don't touch the straw to the surface).