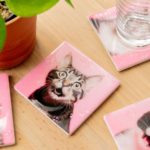
DIY Tile Coasters
Learn to make coasters out of tiles, Mod Podge, your favorite images, and resin. Easy, fun, and perfect for gifts or home decor!
Yield: 4 coasters
Cost: $12
Equipment
- Craft knife or box cutter
- Steel ruler
- Mixing cup and stick
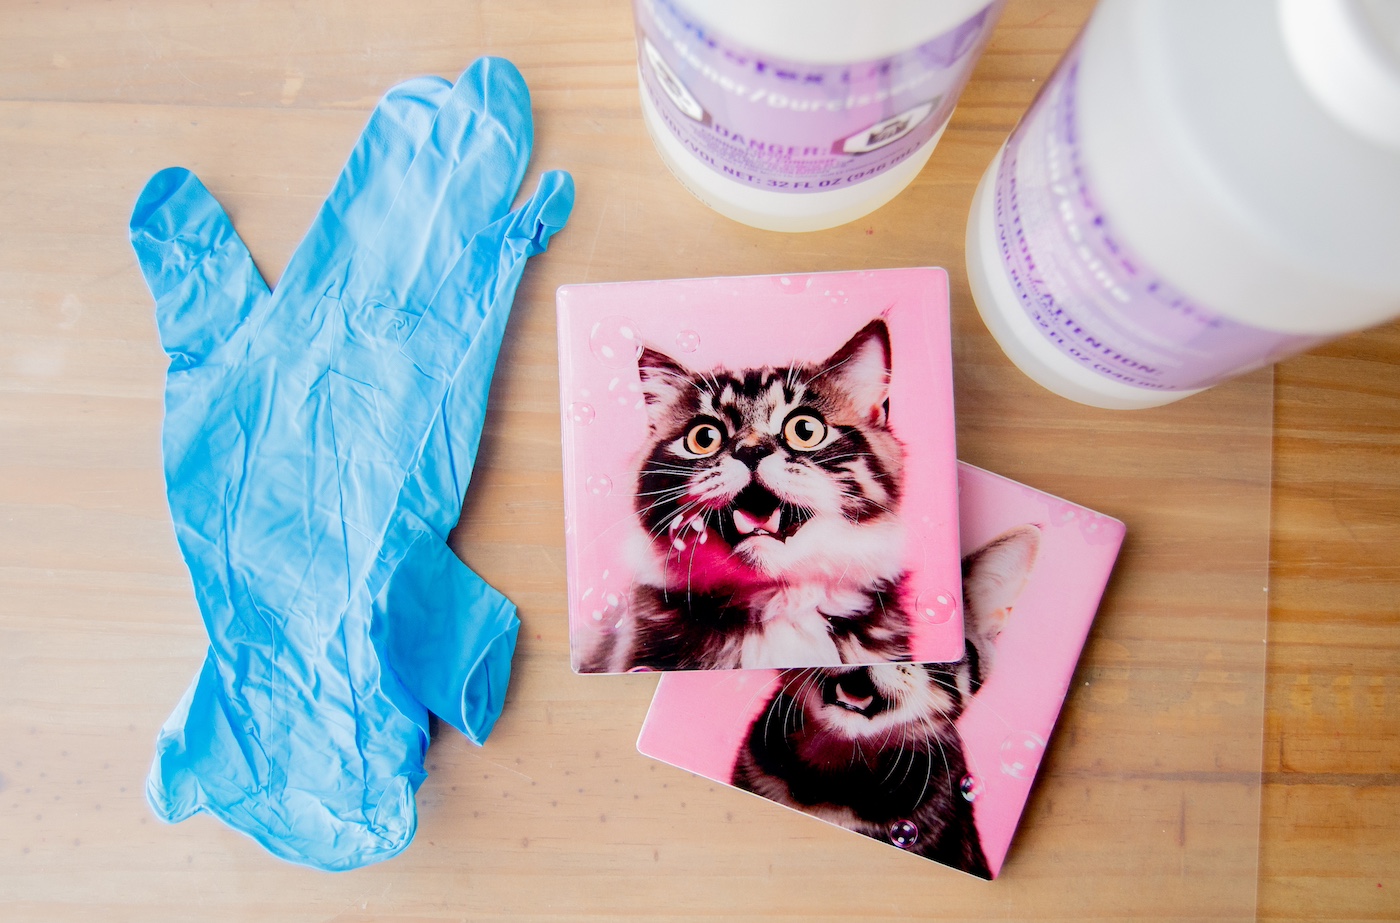
- Gloves and PPE
Materials
- 4 Ceramic tiles
- Scrapbook paper or photos
- Mod Podge
- Felt
- Epoxy resin
- Sandpaper optional
Instructions
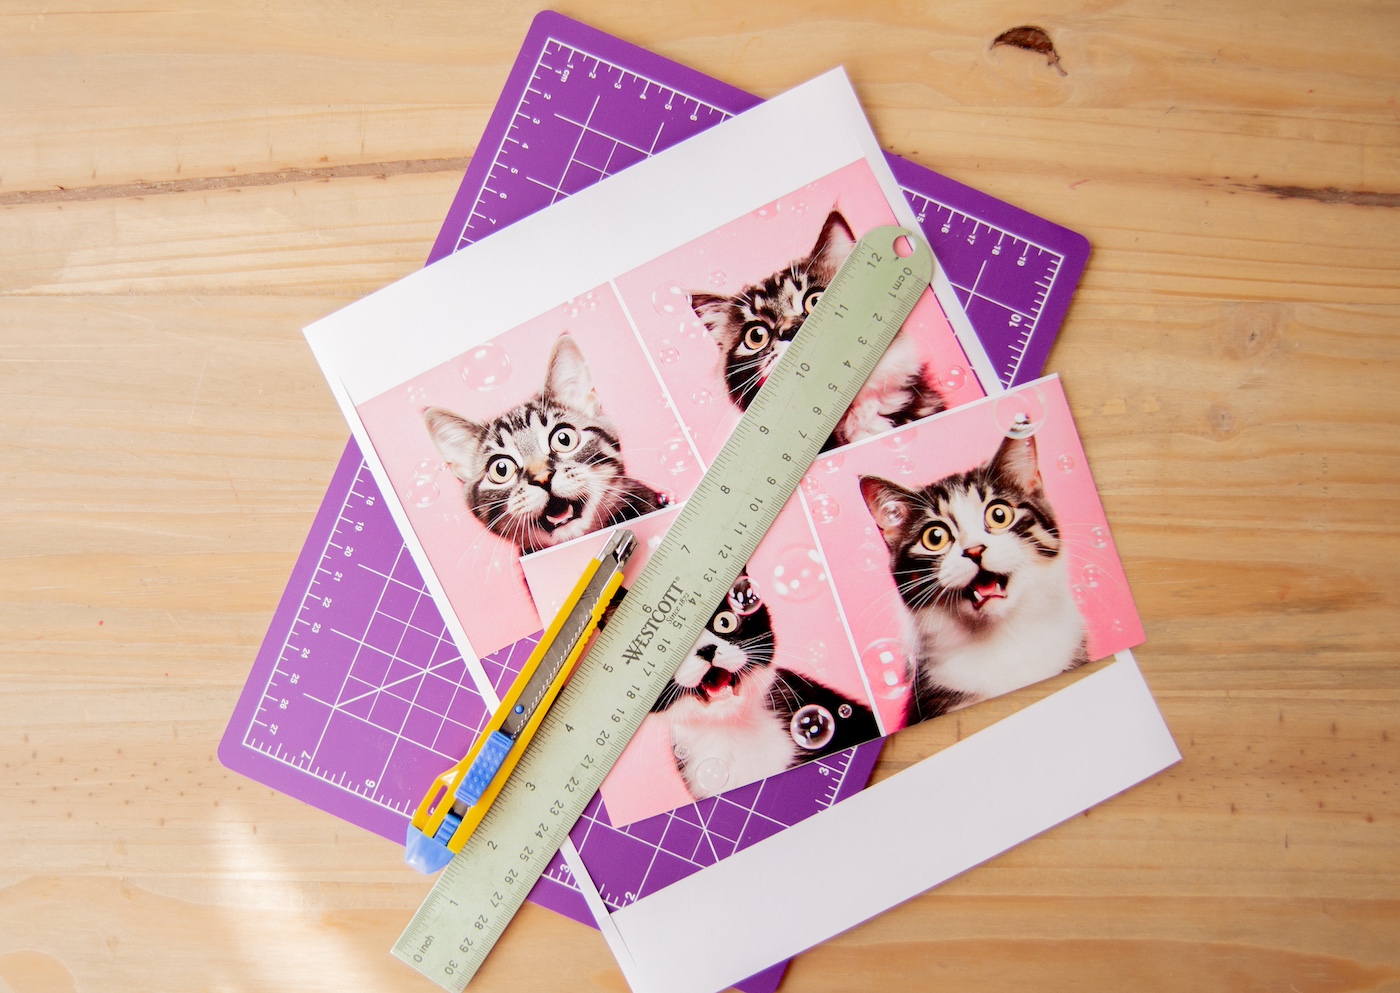
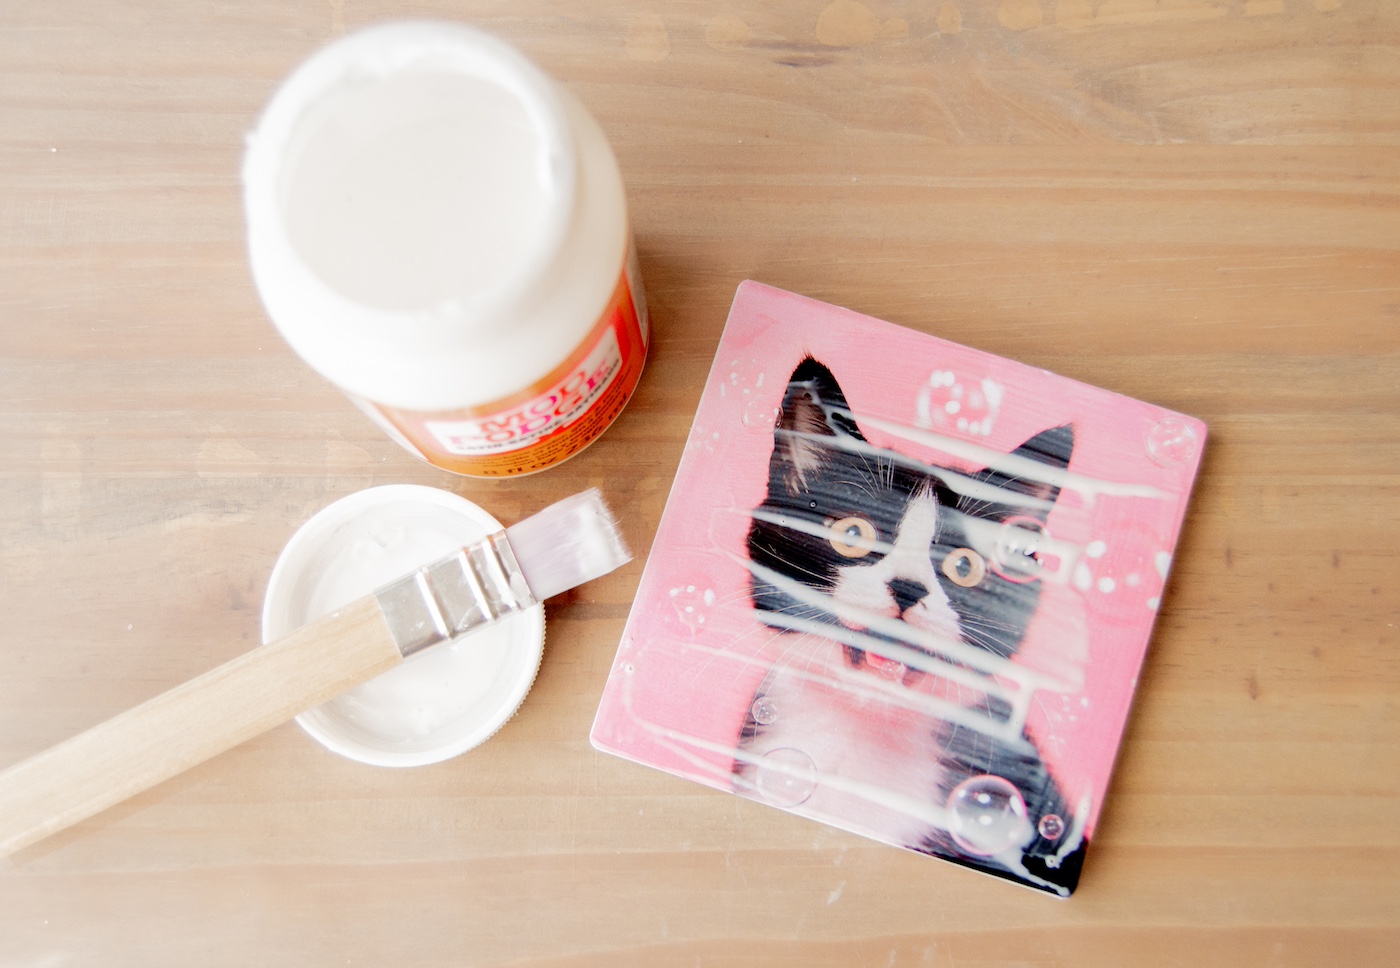
- Cut your scrapbook paper or print and cut chosen images to size. I used images of cats that I printed onto copy paper with a laser printer.
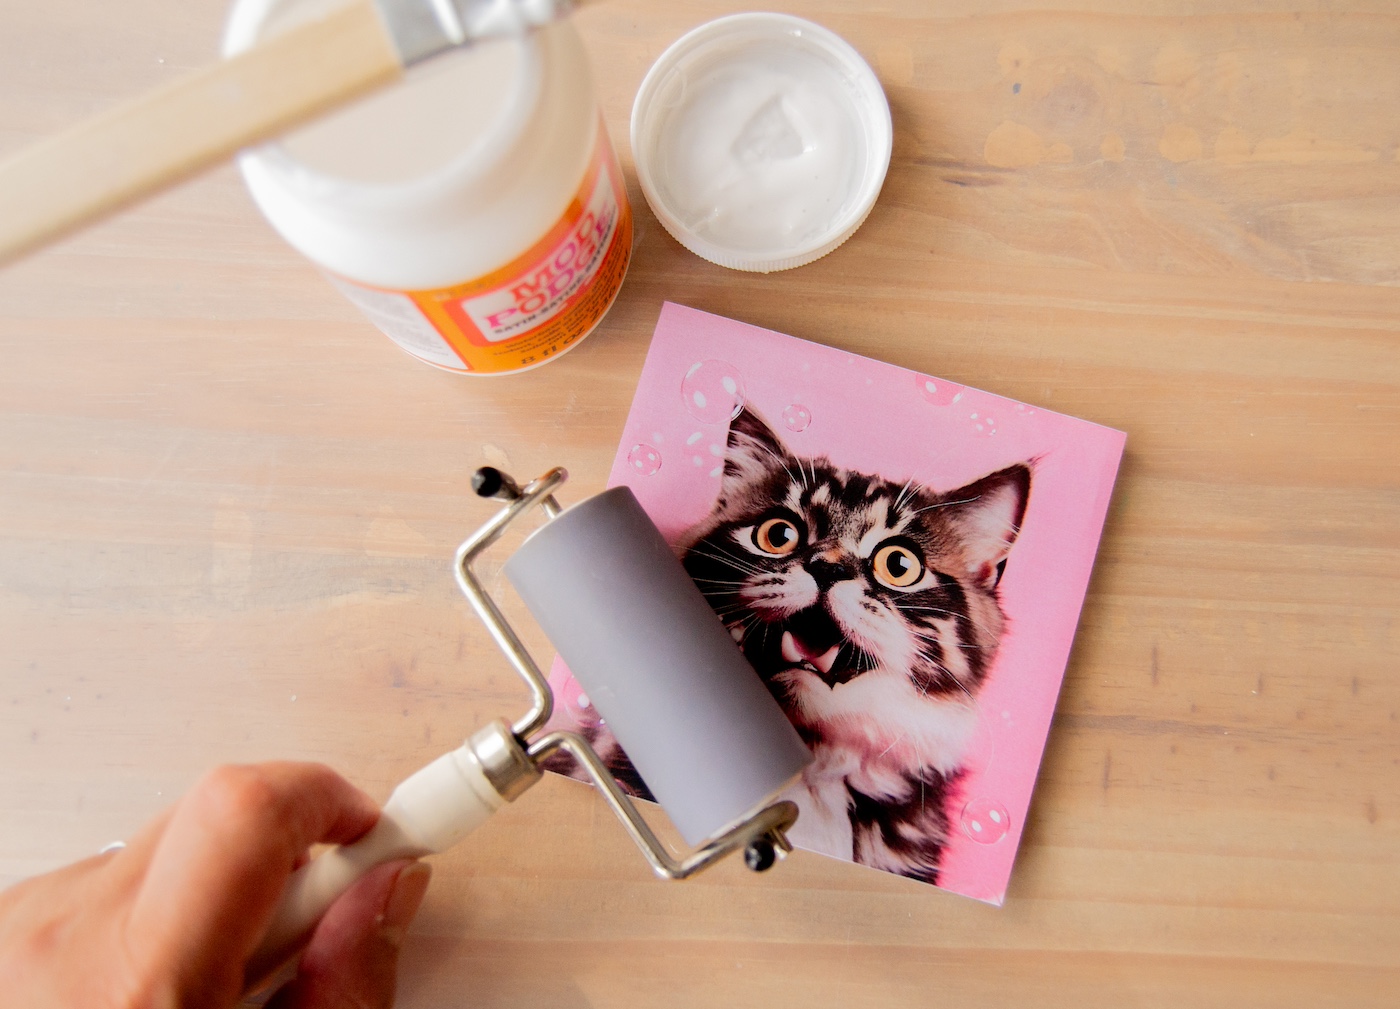
- Apply an even amount of Mod Podge onto the surface of your tile, and adhere your image, making sure it is centered. Use a brayer or a felt scraping tool to flatten your image onto the tile. Wait 15-20 minutes for this to dry (that’s how you avoid wrinkles!).
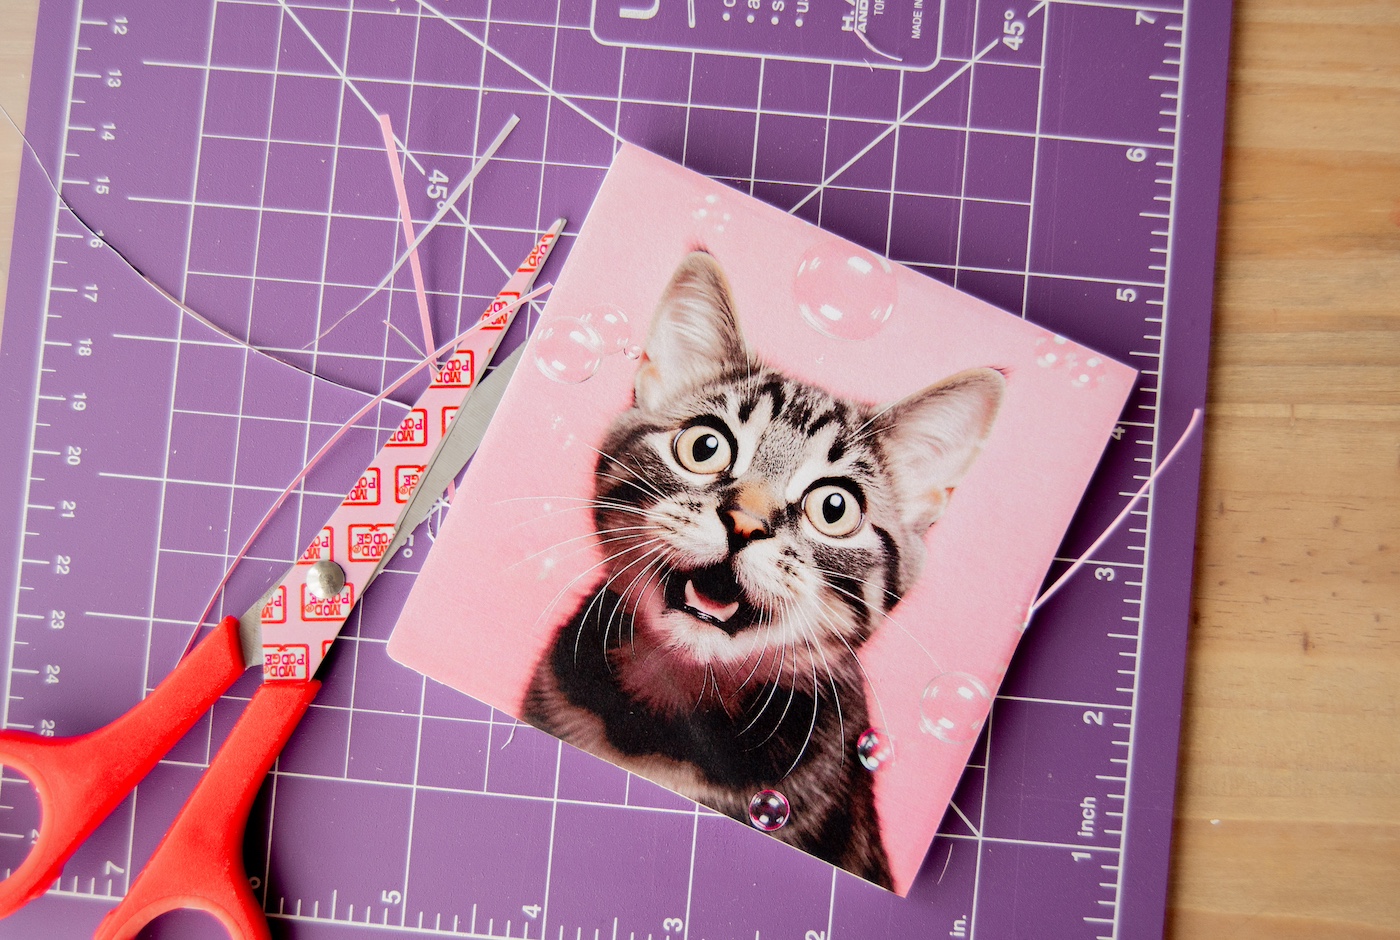
- Clean up the edges by trimming the excess paper once dry.
- Brush on a layer of Mod Podge onto your image. Wait for that to dry (15 - 20 minutes) and apply another layer. Make sure to get the edges of the image to seal it thoroughly. Let dry completely before applying resin.
- Mix the resin according to the instructions on the bottle. Make sure you are in a well ventilated area and that you are using gloves and proper PPE. Apply to the coasters. Wait for the resin to dry completely, or overnight.
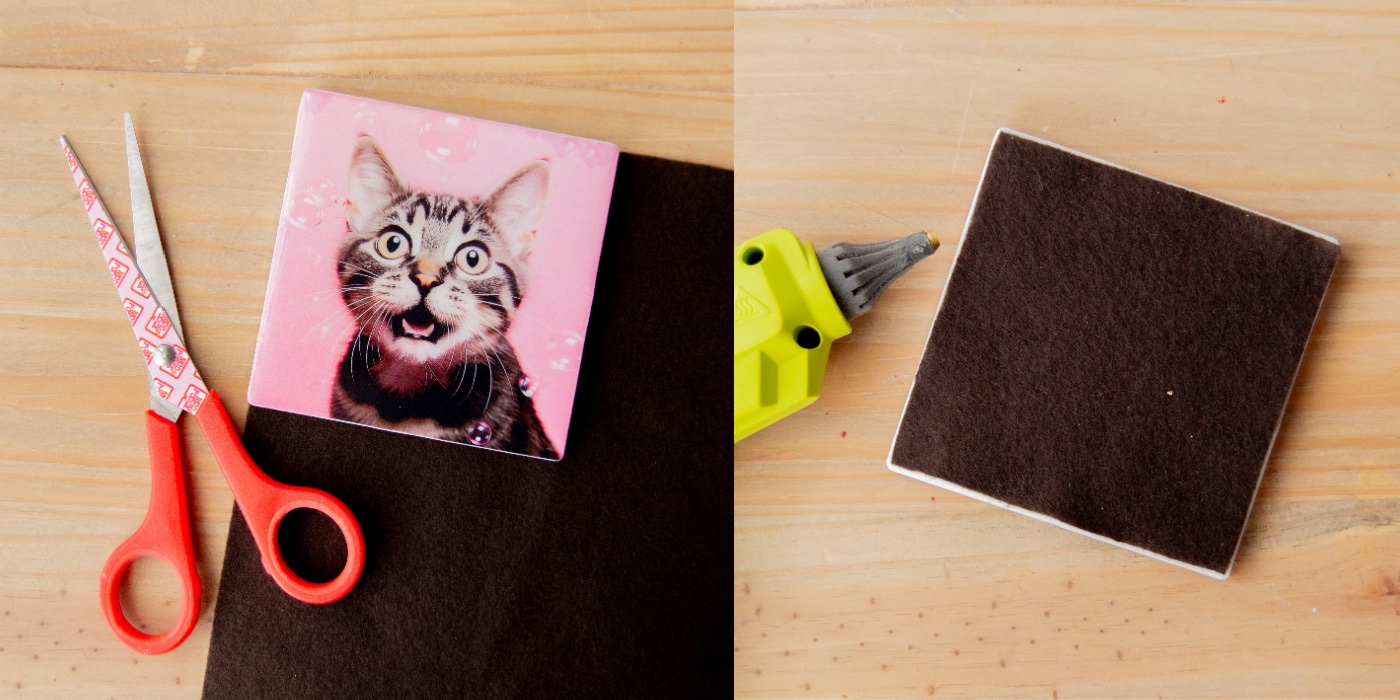
- Cut some felt to size, and glue it to the back of your coaster to avoid scratching your table surface.
Notes
RESIN APPLICATION TIPS: Make sure the surface you are leaving your coasters to dry are flat and level. Elevate your coasters (I used bottle caps for mine) so that they are not in contact with the surface - this will ensure that any drips will not pool on the bottom of your coaster and make your coaster stick to the surface). Finally, use a popsicle stick to help spread the resin around easier.