Wood Christmas Centerpiece
Create a chic and contemporary wooden Christmas centerpiece to elevate your holiday decorations!
Yield: 2 trees
Cost: $10
Equipment
- Cutting mat
- Steel ruler
- Box cutter
Materials
- 1 piece 1/8” MDF board
- Paper tree template or paper to make your own
- Christmas cardstock
- Mod Podge Gloss
- Jenga blocks - Dollar Tree or other small wood blocks
- Acrylic paint brown
Instructions
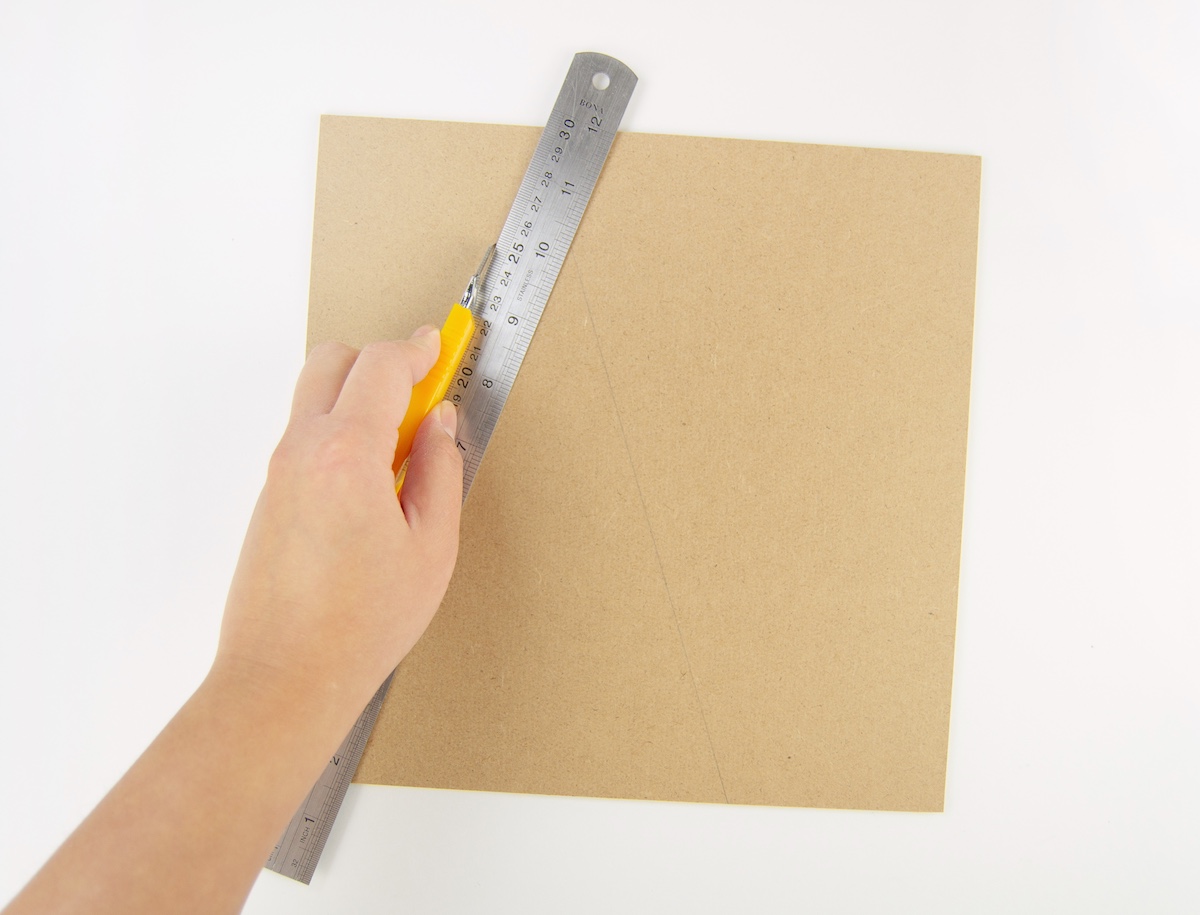
- Create a template that you will use to cut your MDF. I folded white paper in half lengthwise and cut a triangle shape with my box cutter. You can also use the provided template.

- Unfold the paper template and then trace it on the MDF board with a pencil.

- Cut your MDF board. Using a box cutter (with a sharp blade) and a steel rule, cut your MDF piece.
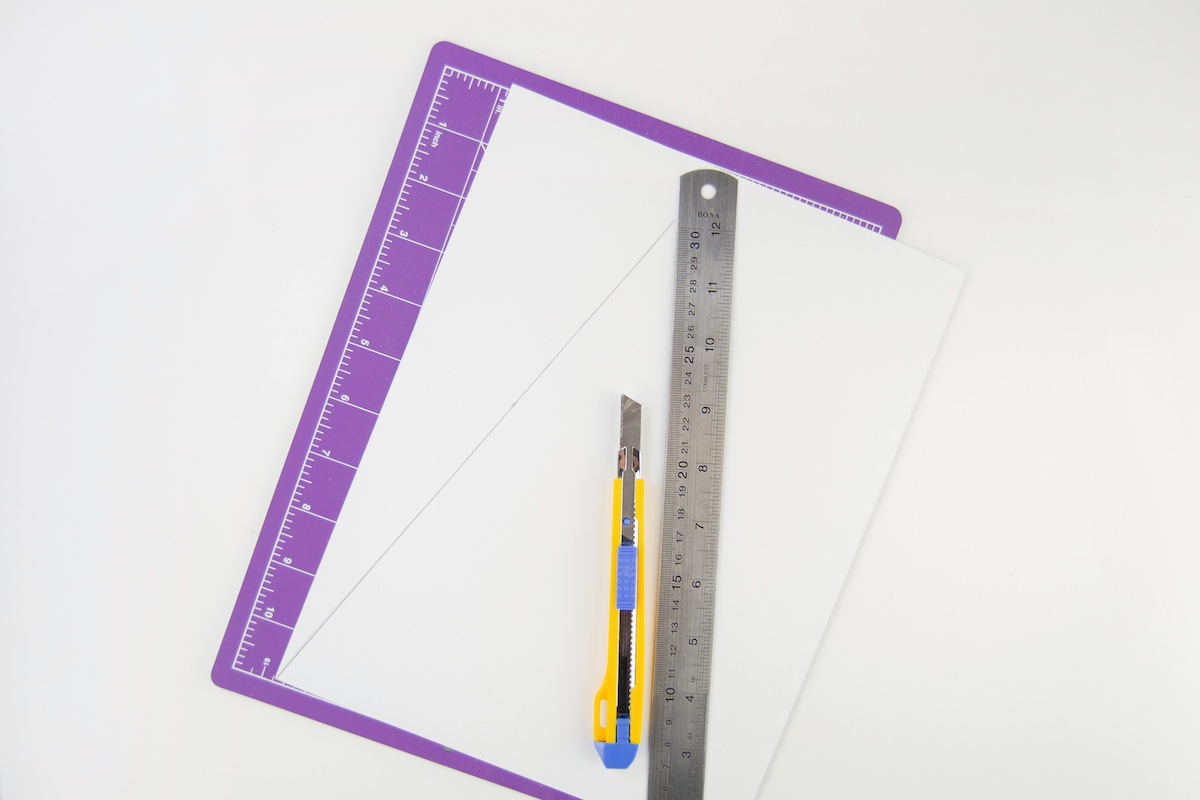
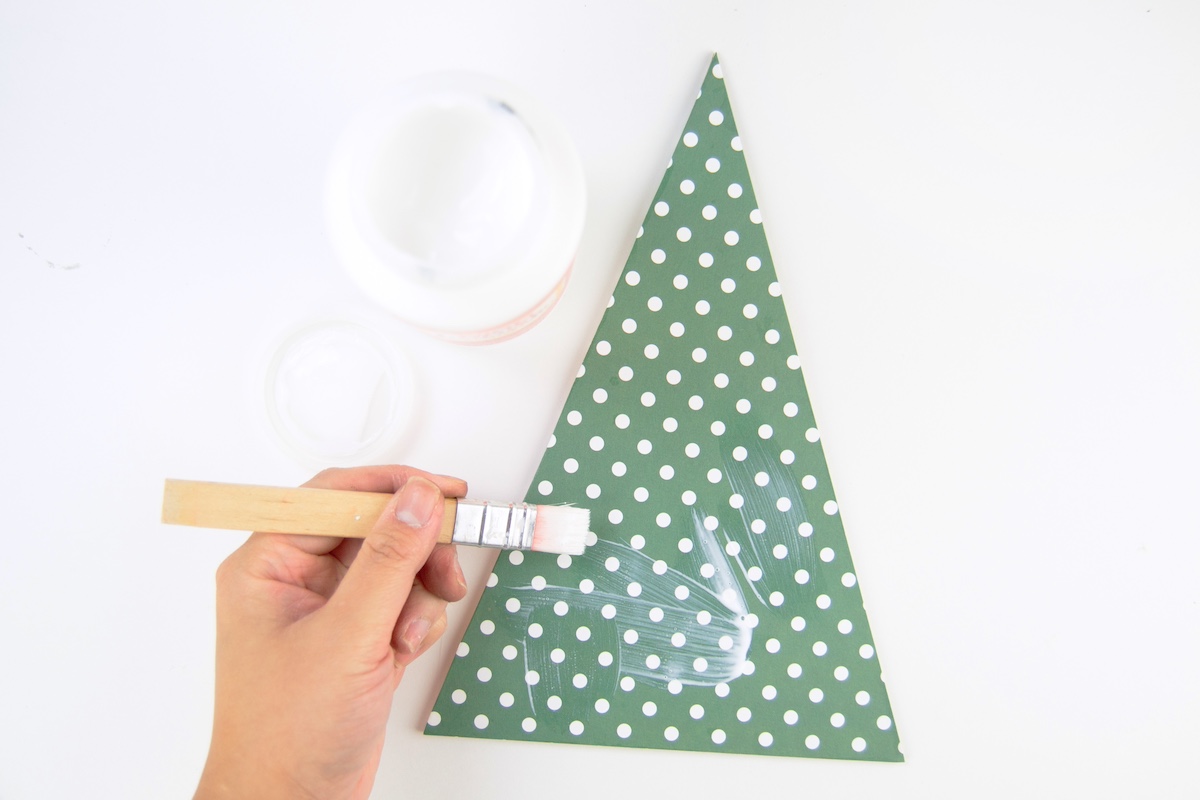
- Use the cut MDF tree as a template for the cardstock of your choice.

- Cut the cardstock to size. Make sure to cut two pieces - one for the front and backside of the MDF tree shape.
- Use Mod Podge to decoupage the cardstock onto the MDF shape. Apply the Mod Podge onto the cardstock (not the MDF, as it would just absorb the Mod Podge very quickly) before centering and adhering it onto the MDF shape. Repeat with the other side and leave it to dry.
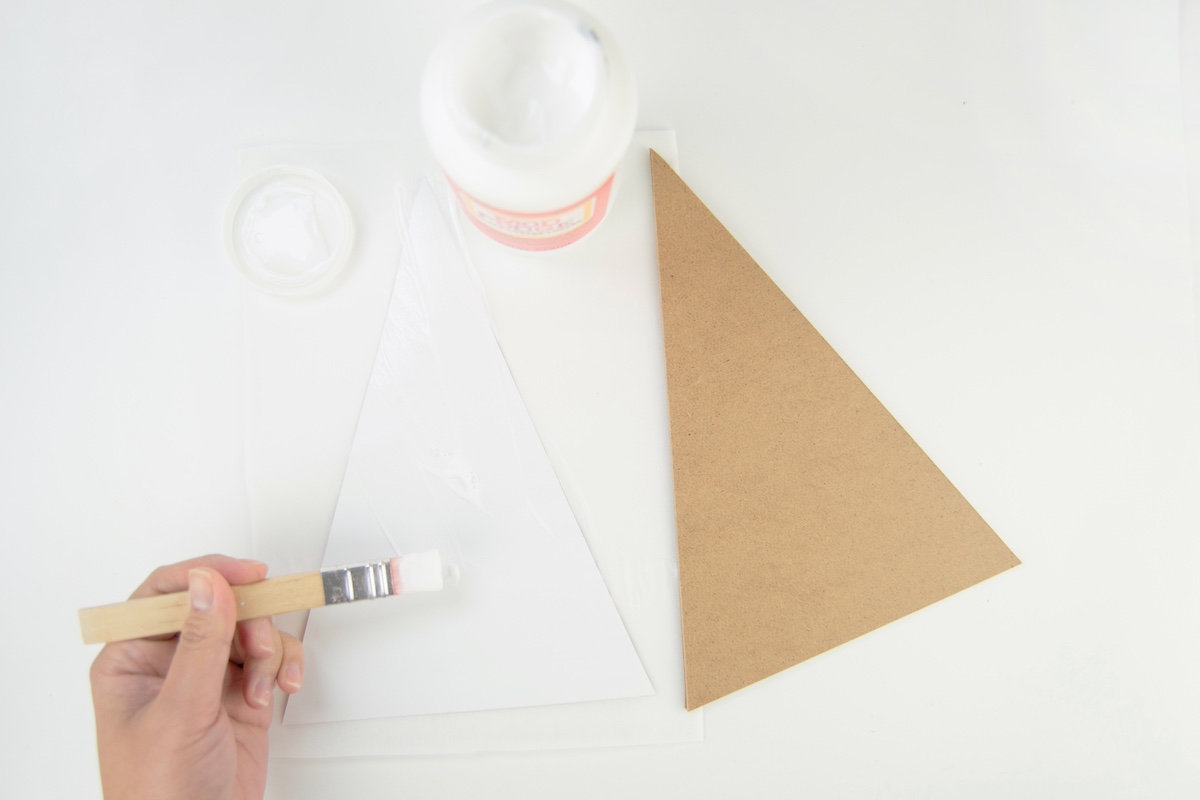
- Apply a few coats of Mod Podge to protect the cardstock from wear. Let that dry and repeat the process on the other side.
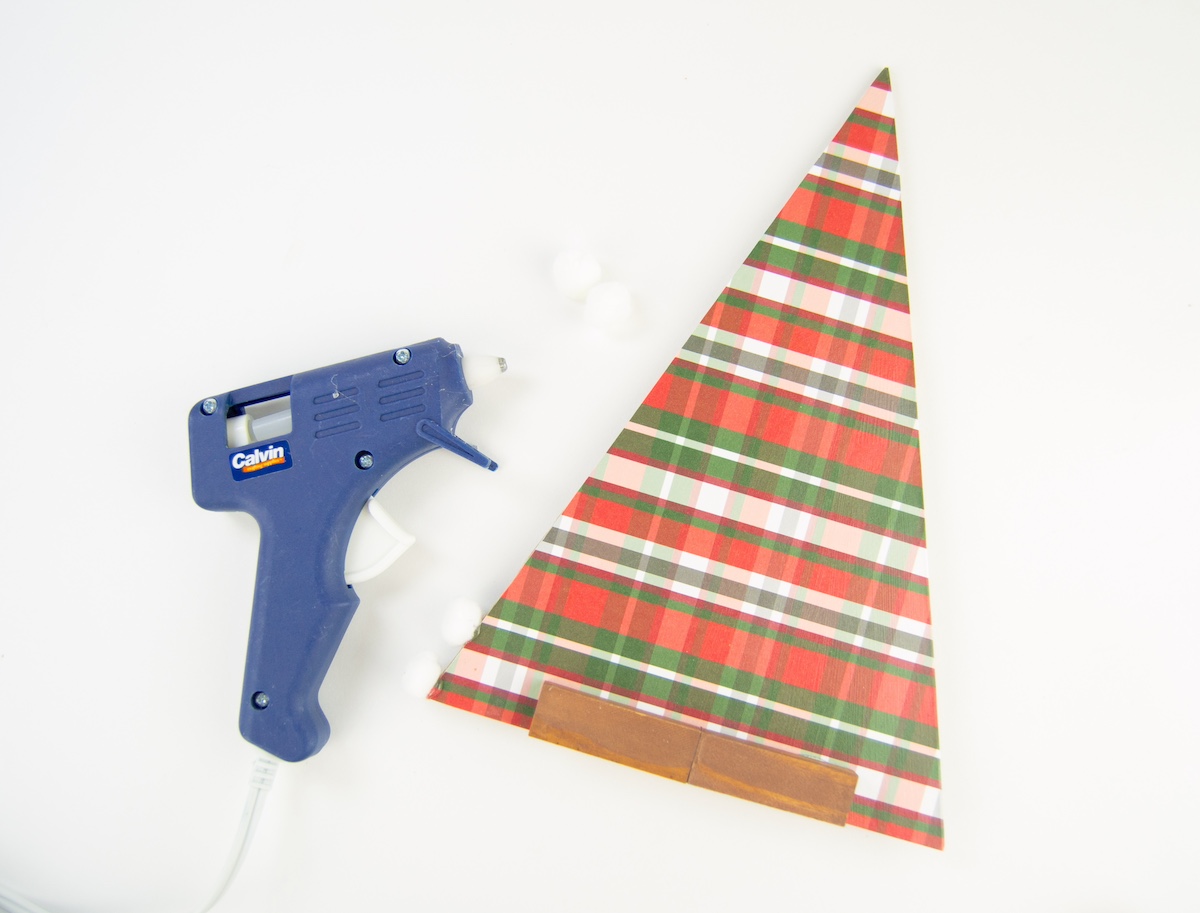
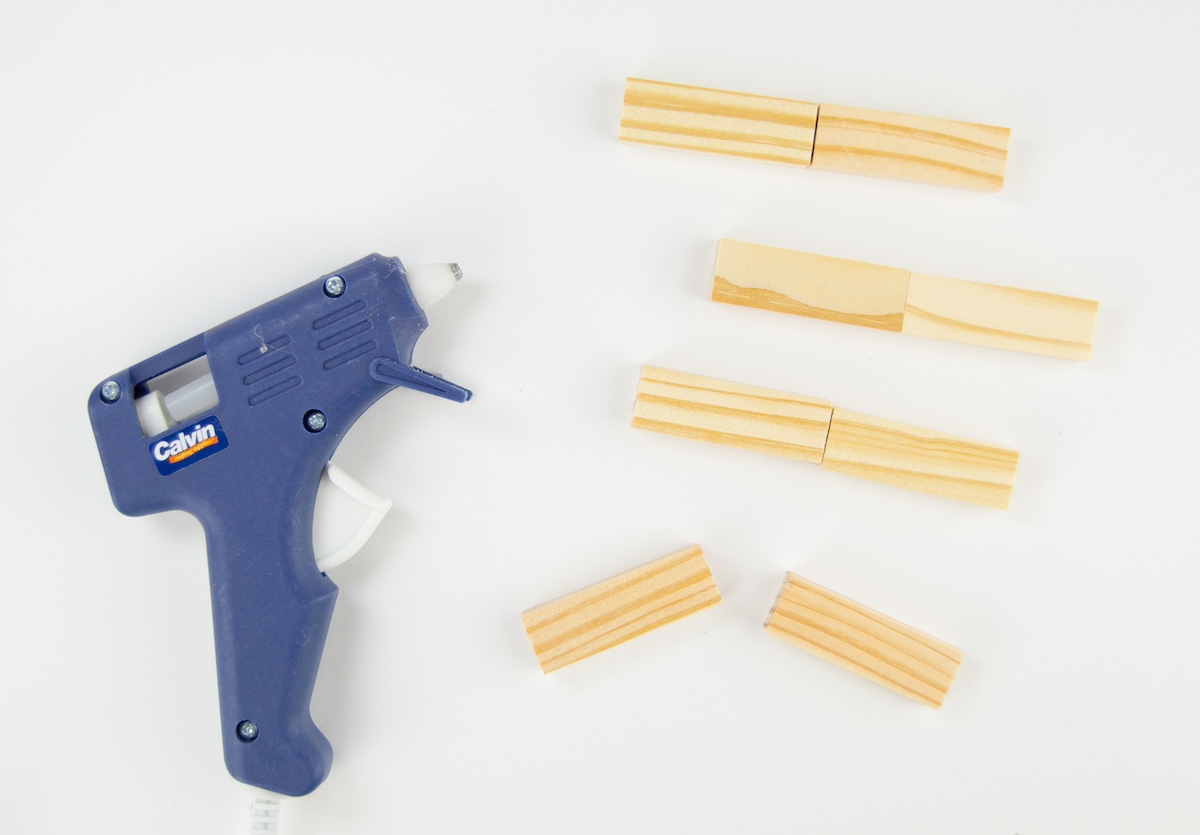
- Use wood blocks for the base of your tree to stand. I used tower block pieces from the dollar store - glue two together using hot glue to create a long piece. I made four pieces, two for each tree.
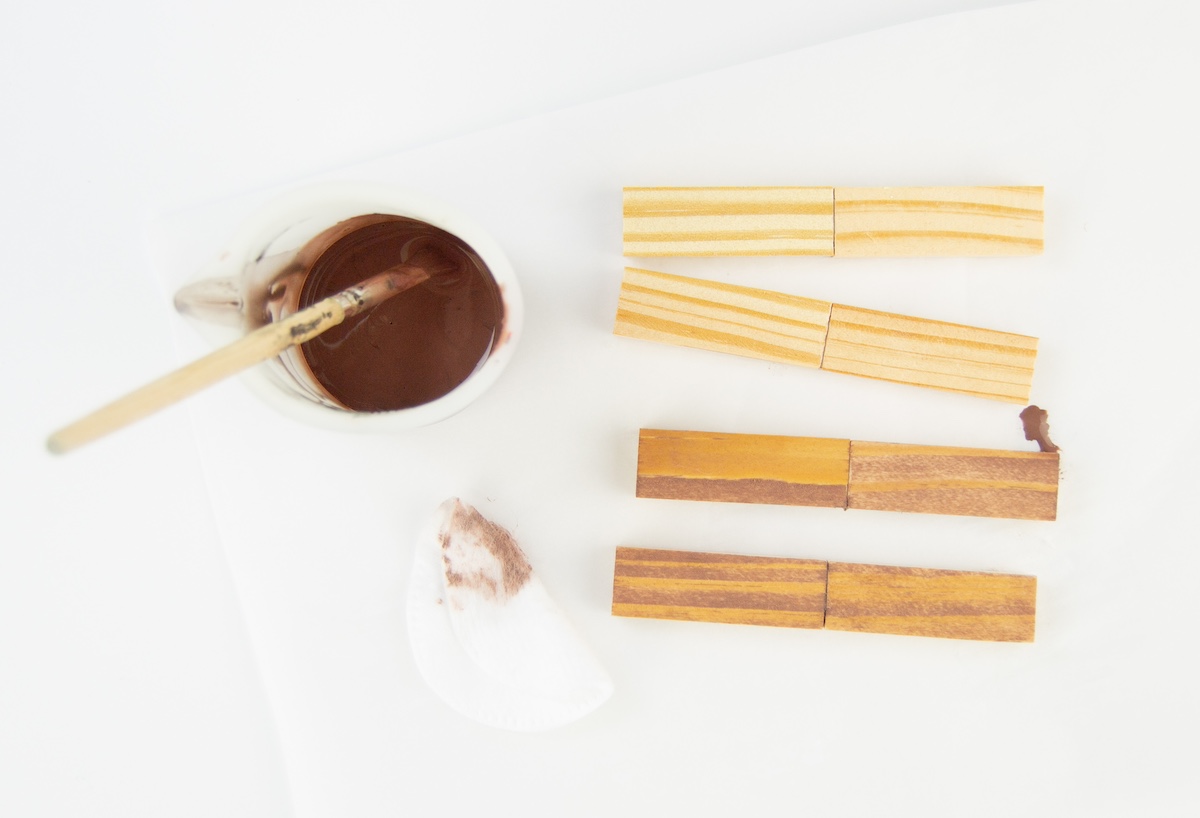
- Use watered down brown paint and brush it onto the wood base pieces to achieve a stained look. Coat with Mod Podge to seal the wood and give it a more finished look.
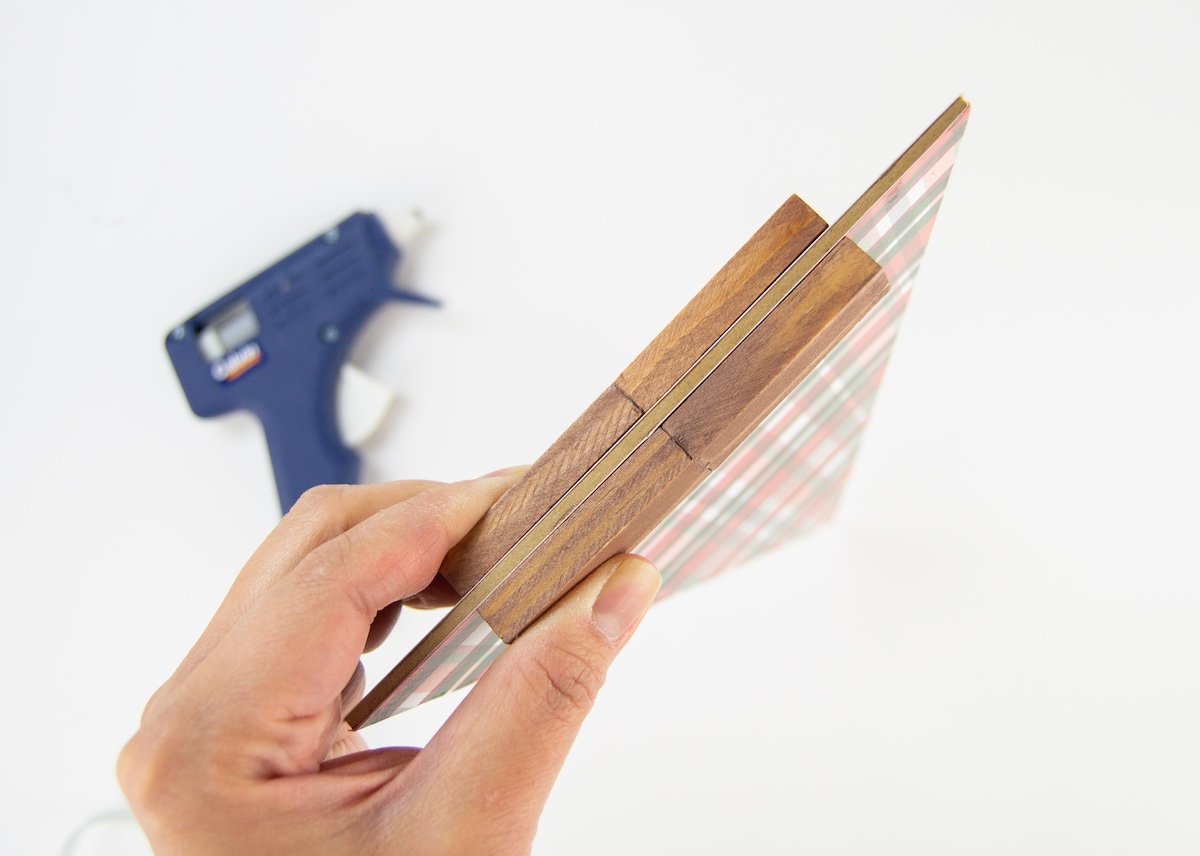
- Mark the center of the base of your tree, and use hot glue to attach the wood base - one on each side, centered - to your tree. Make sure they are aligned on the bottom so it stands without wobbling.
- Glue pom pom trim or small white pom poms onto the edge of the tree for a cute and fun feel.