Owl Painted Rocks
Learn how to make decor with rocks painted like owls! This is a cute and easy craft idea for fall.
Yield: 1 plaque
Cost: $12
Equipment
- Garden shears or other pruners to cut the twigs
Materials
- Wood plaque
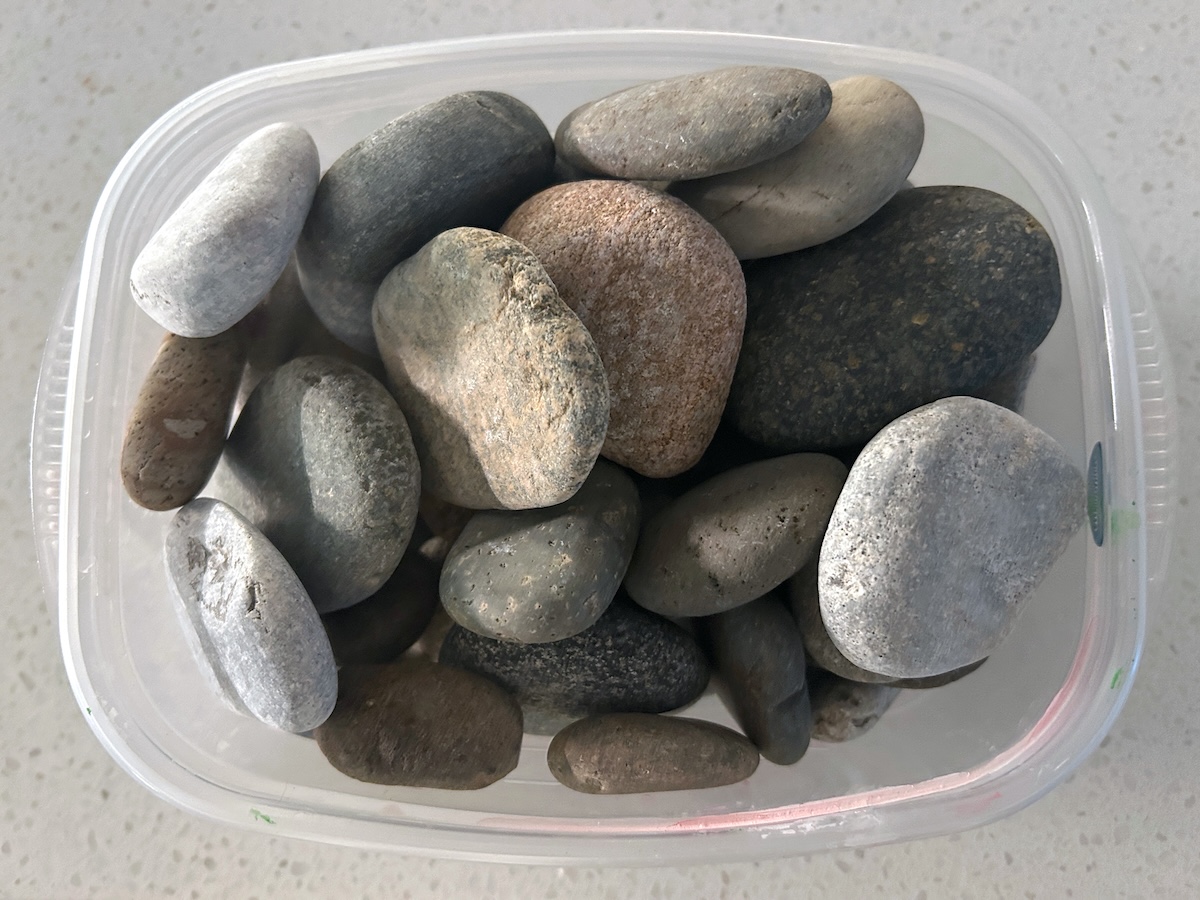
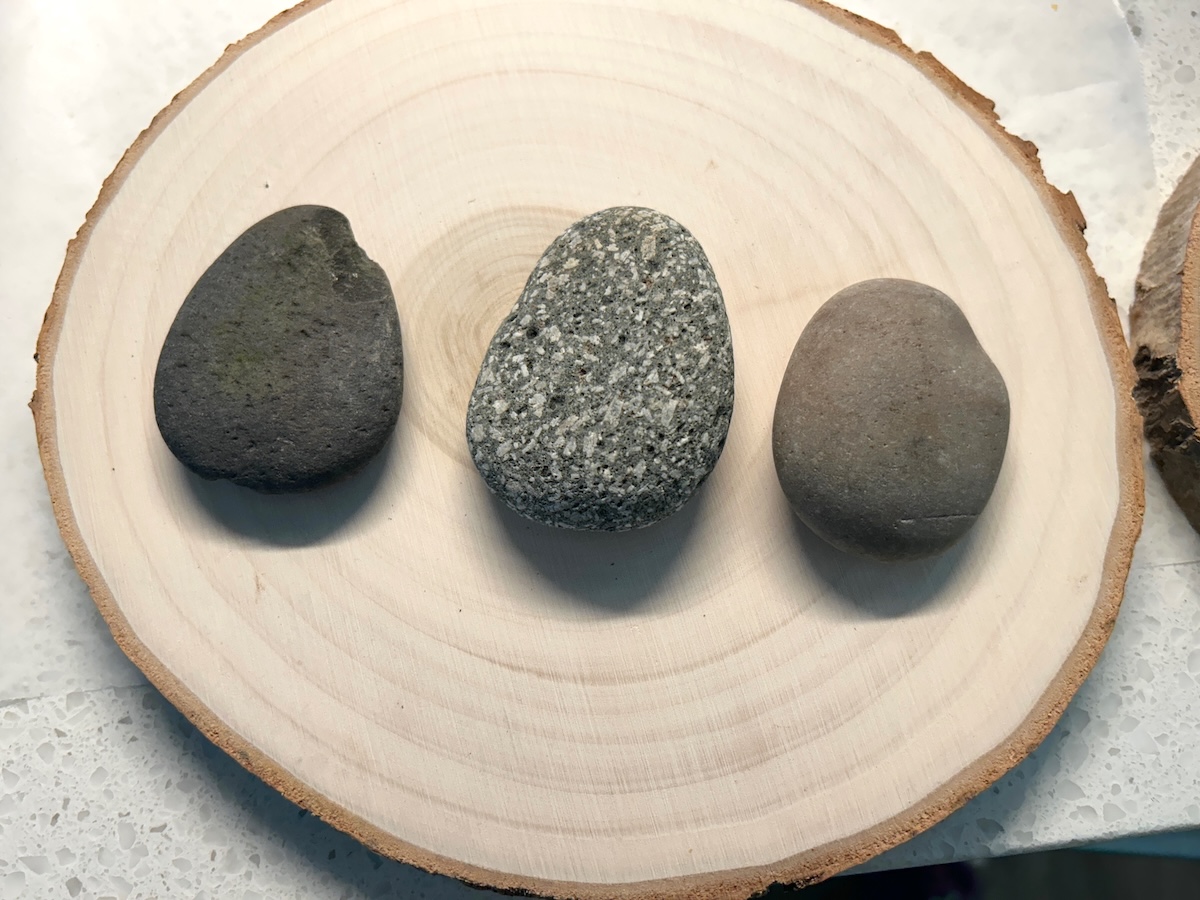
- 3 Rocks small, flat, so you can glue them to the plaque
- Mod Podge Satin
- Spray primer white
- Acrylic paint colors of your choice
- Paint pens I prefer Posca or Sharpie
- Twigs bits and pieces
- E-6000
- Craft glue
- 1 piece Printer paper
- Eraser optional, for any pencil lines
Instructions
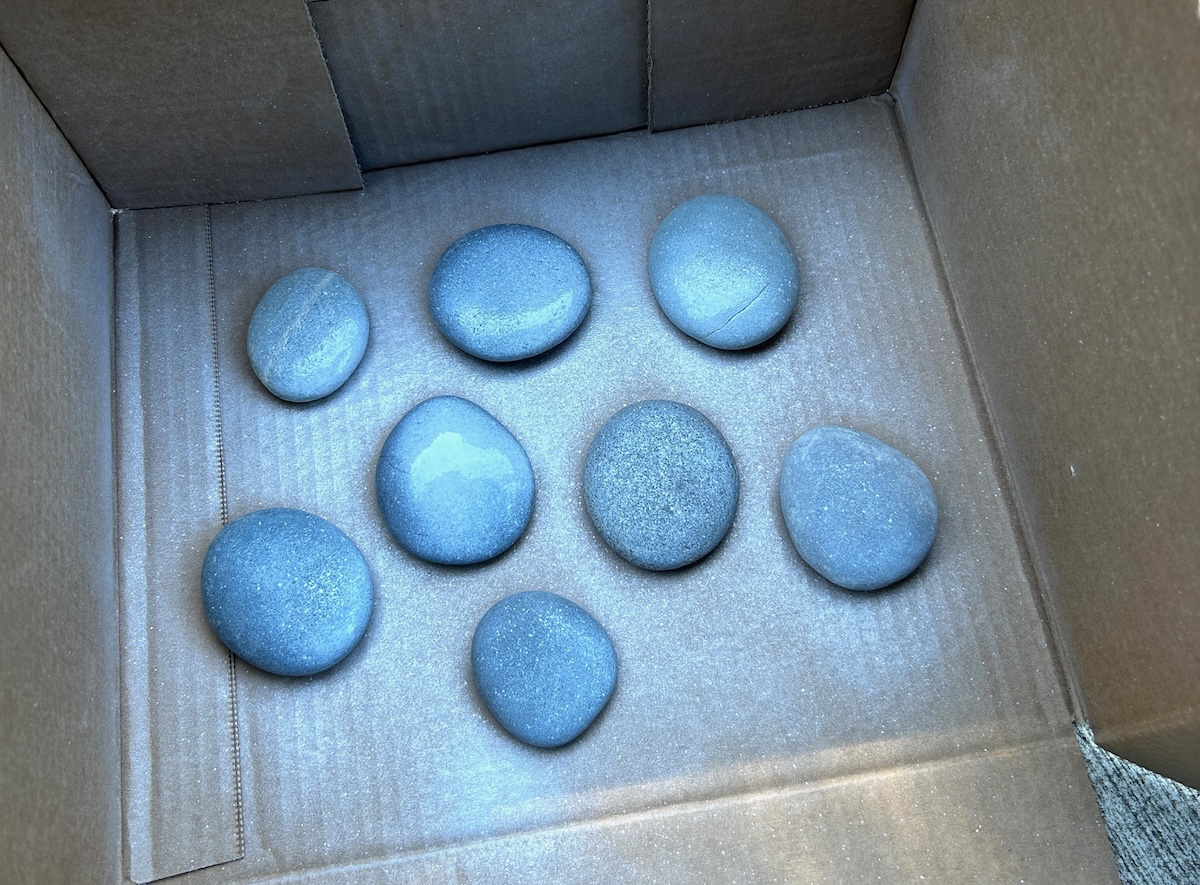
- Wash your rocks with soap and water to remove dirt and dust. Let them dry completely. If your rocks are rough, lightly sand them or brush off loose bits for a smoother painting surface.
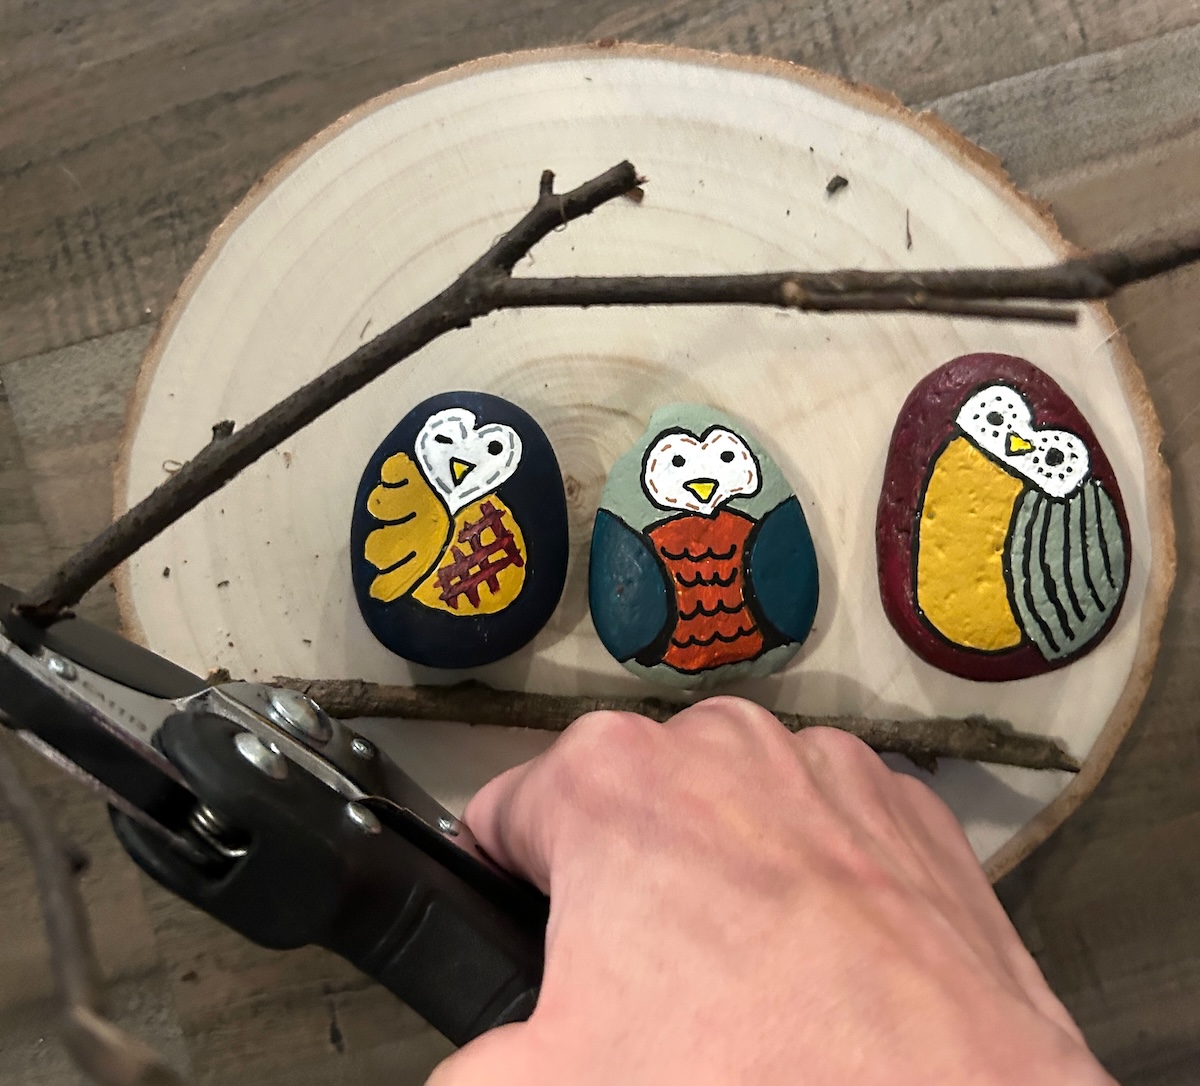
- Lay your stones out on your wood plaque. This is the time when you begin to visual your design and how you want to situate the rocks. You want to make sure everything fits before you start painting.
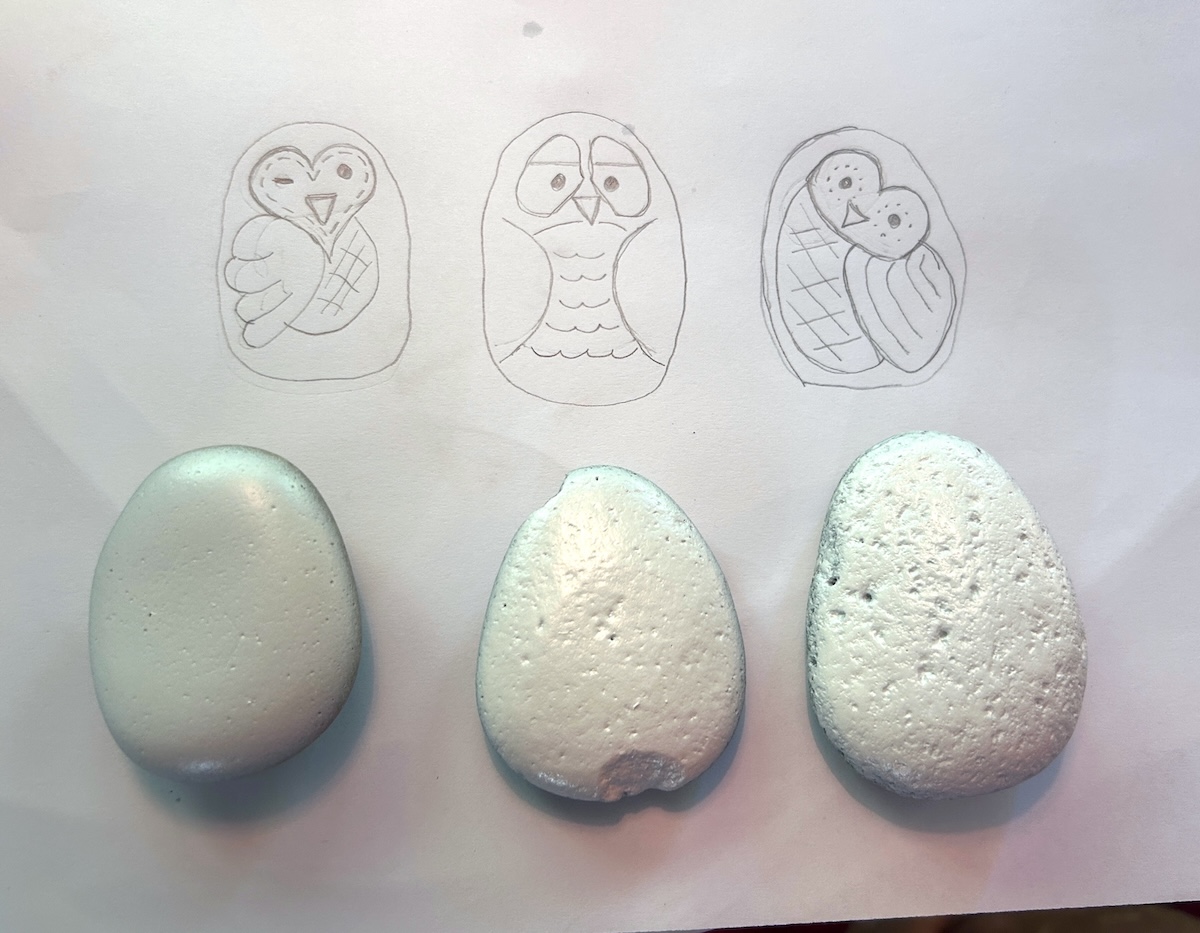
- Use the spray primer to coat the rocks in white. Technically you don't have to, but it will help the paint colors look brighter and less dingy.
- Use the pencil and paper to generally sketch out your design for the owls. You're welcome to use my design(s) or create your own. You'll want a face with eyes and a beak, wing(s), and feathers on the chest.Use a pencil to lightly draw the designs onto the rocks. Don’t worry about perfection. You'll be painting over the top.
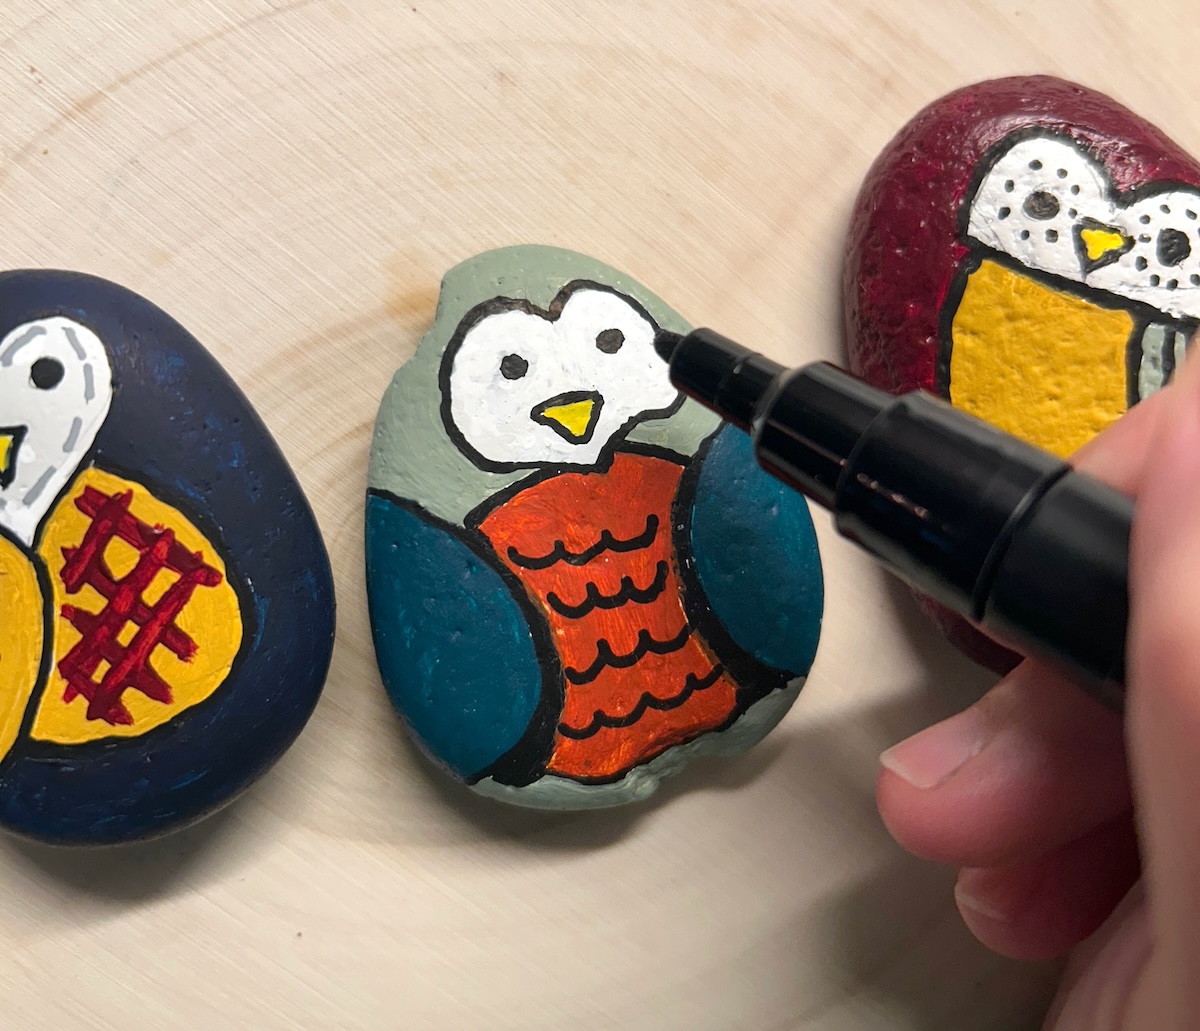
- Use a paint pen to outline the pencil design of each owl. Let dry. Then start filling in the details with small brushes and craft paint. Or you can use additional paint pens (but those always have limited colors).
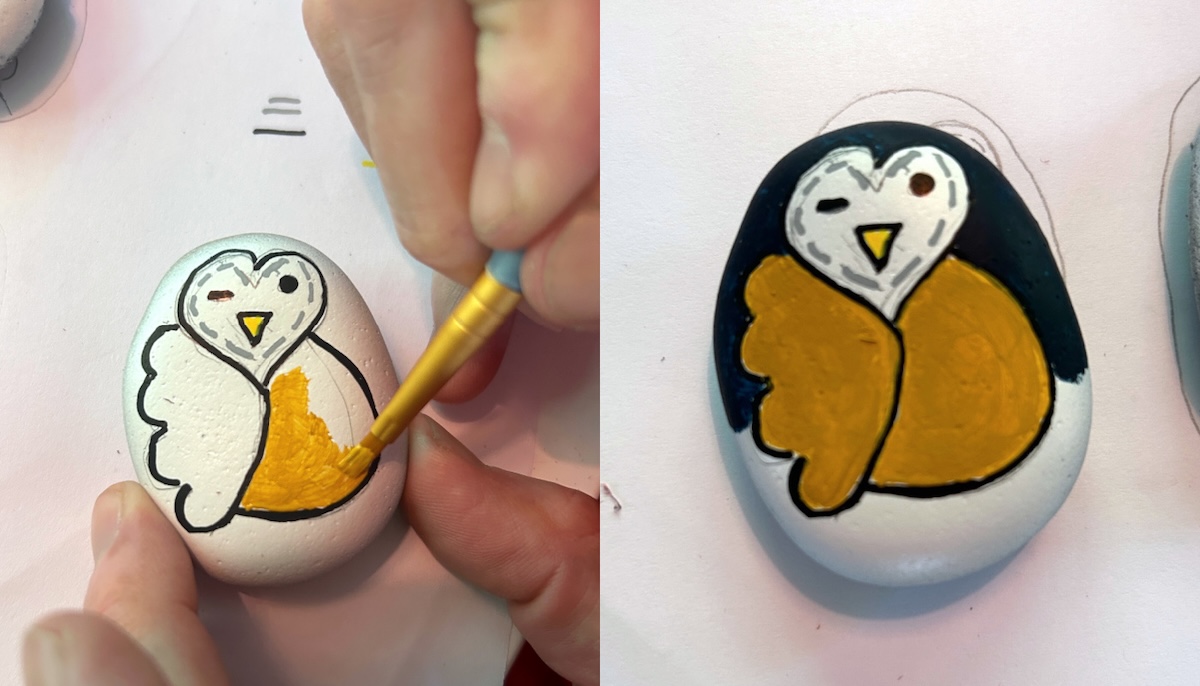
- Paint in the details: big round eyes with tiny black pupils, a small triangle beak, wings, and chest feathers. I used fine paint pens for all the details. Let dry.
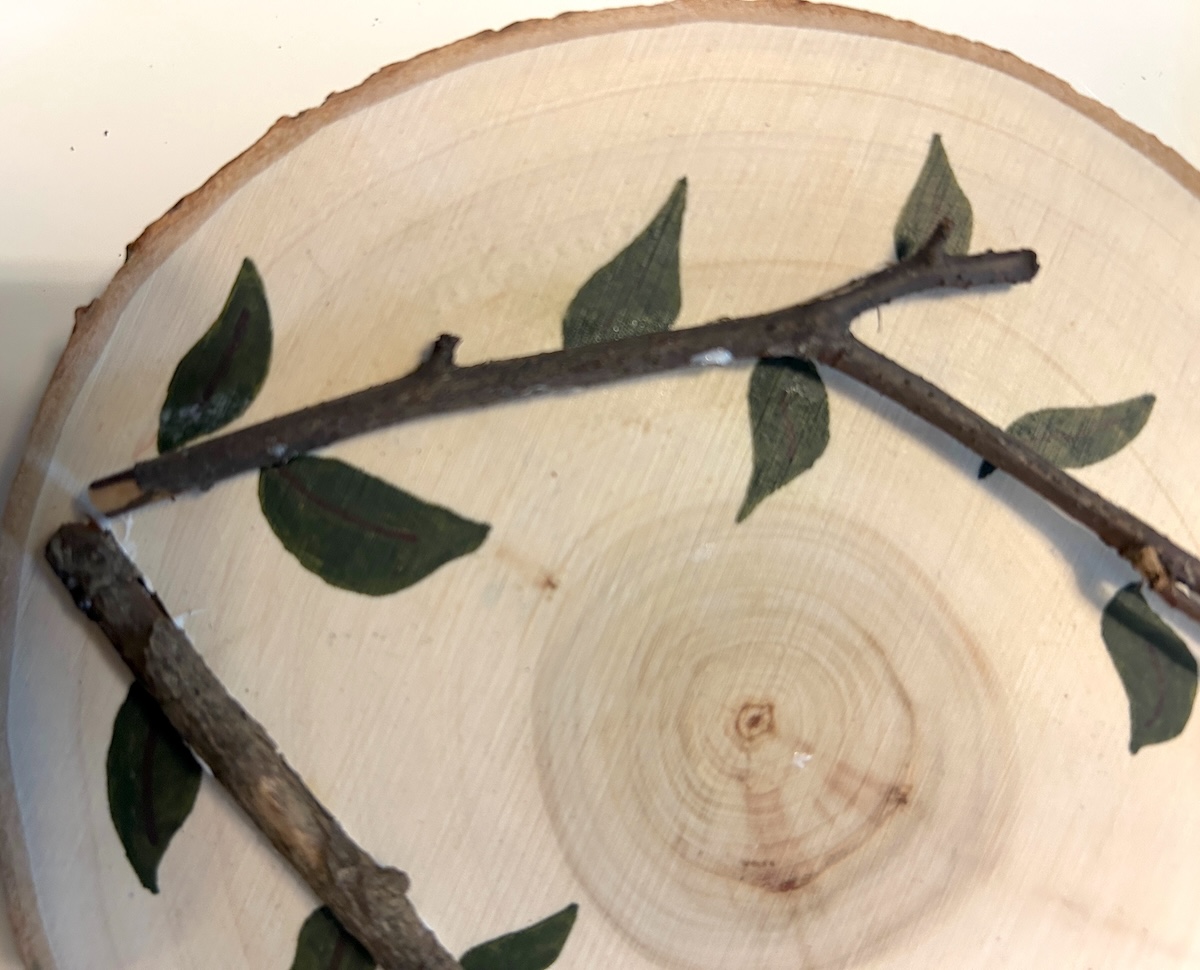
- Now you're going to assemble the plaque. Begin by trimming your twigs down to size with pruners.
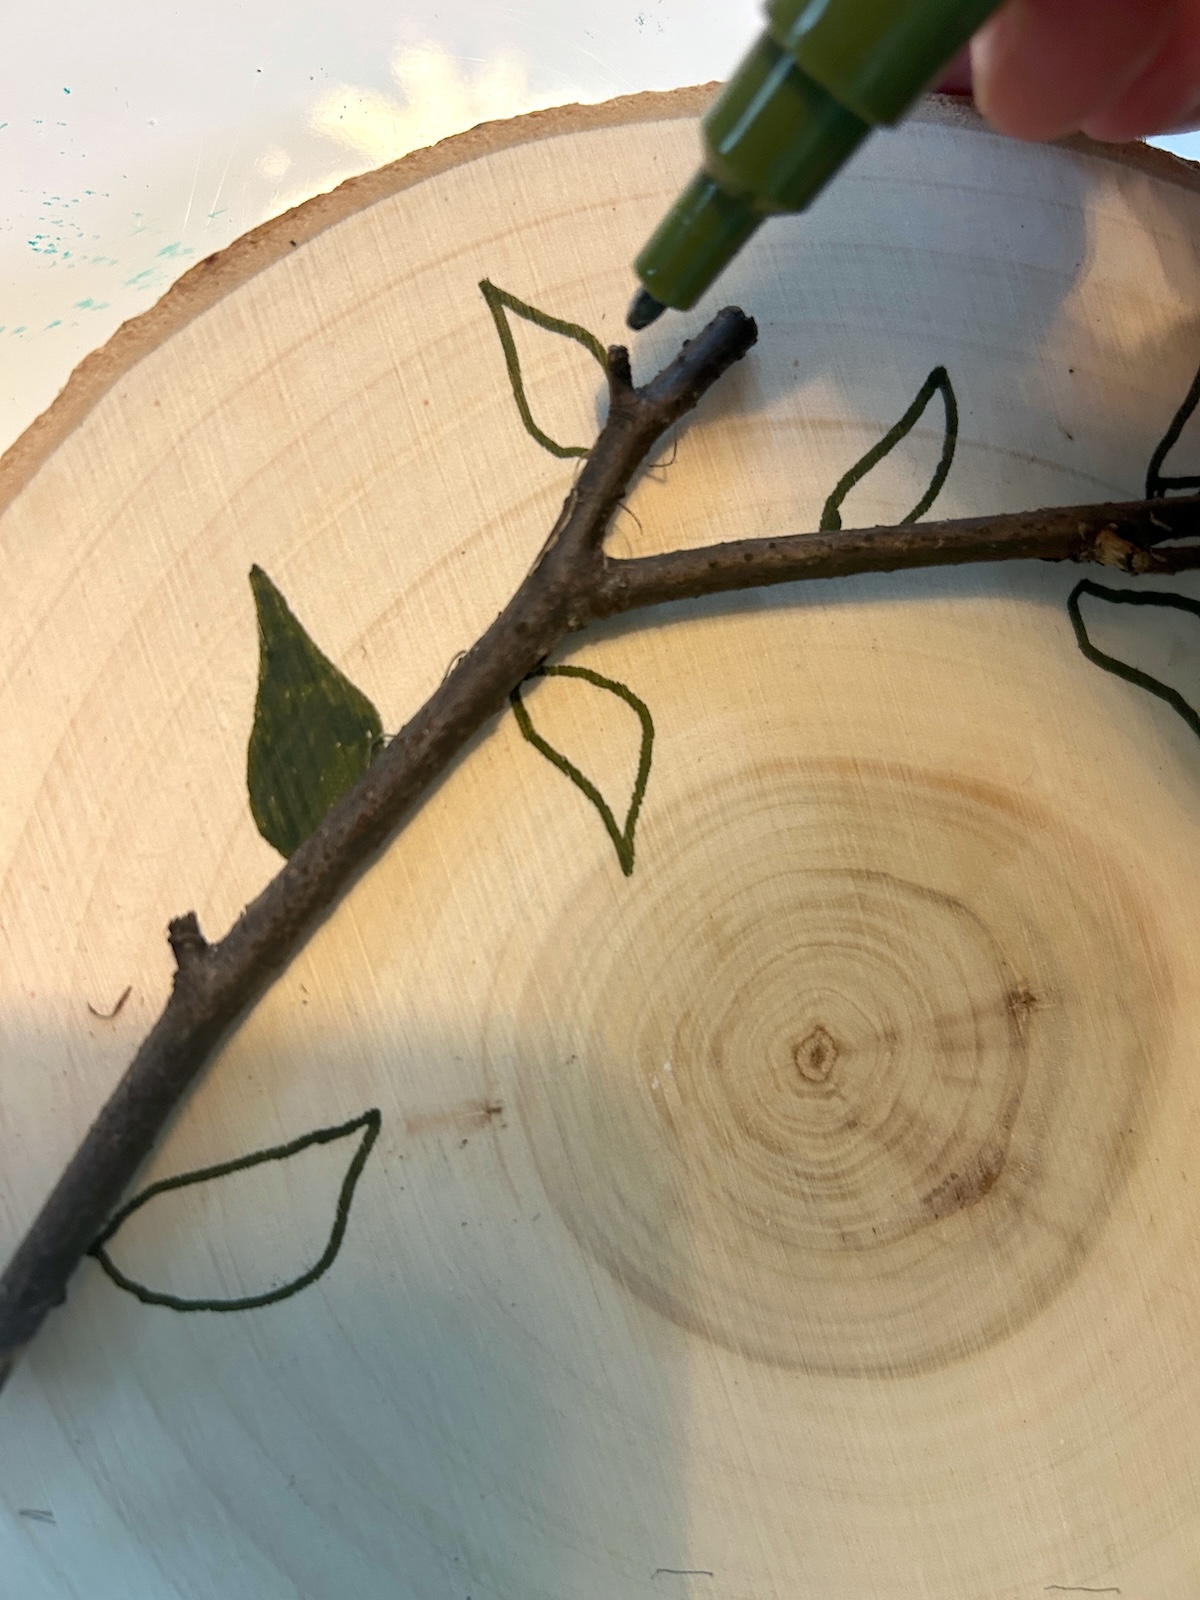
- Lay out the branches and owls on the plaque. Make some pencil marks directly underneath the twigs so you know where to place them. Don't glue anything down yet.

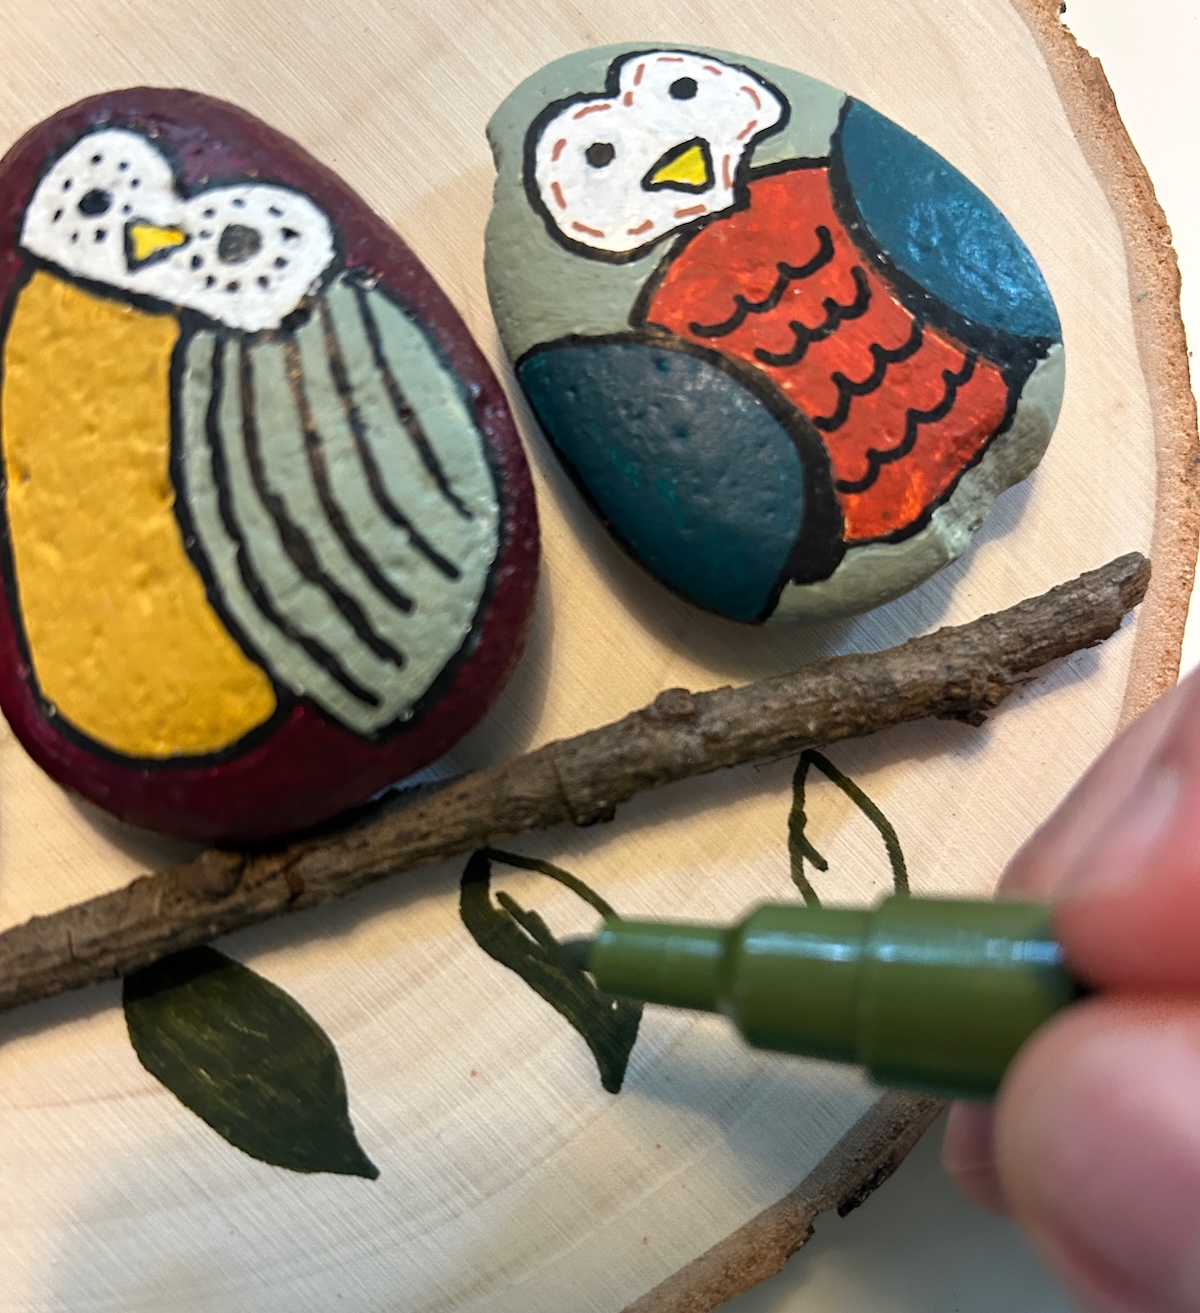
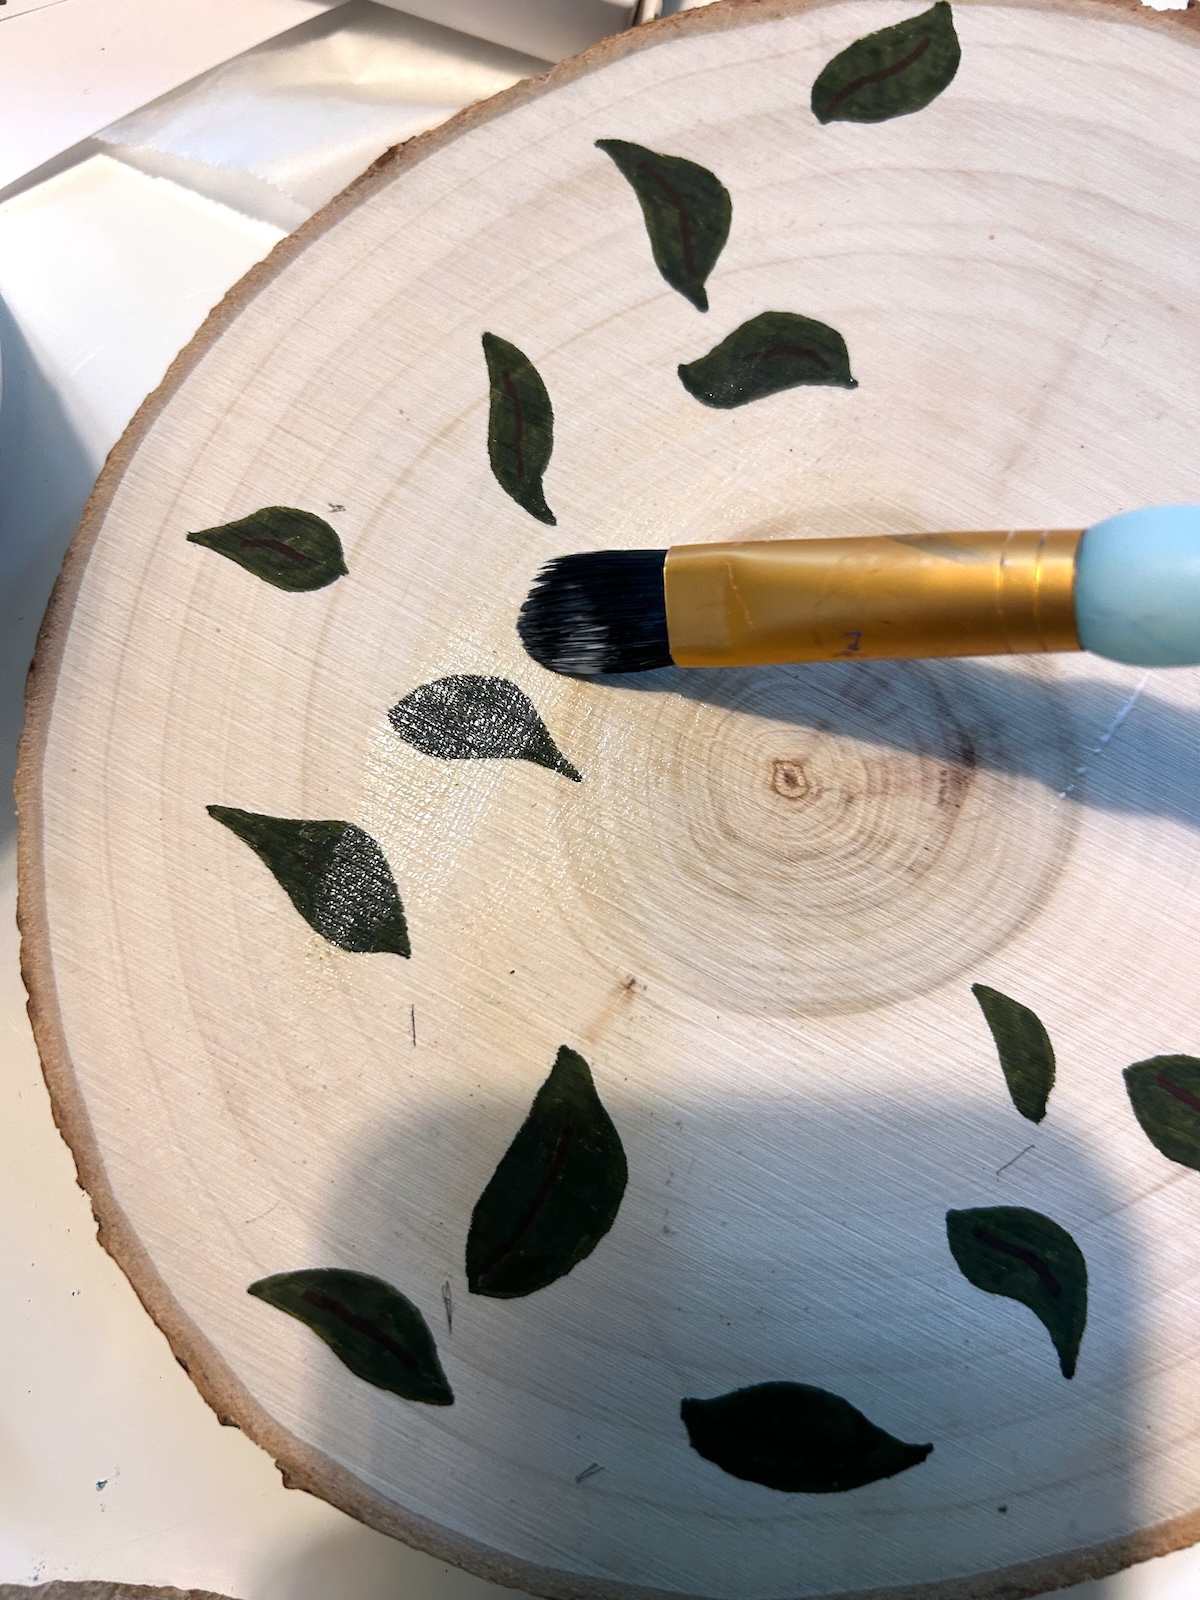
- Directly underneath the twigs (and randomly), draw leaves using paint markers. If you need to pull up the twig to draw you can - the pencil marks from the previous step will tell you where the branch should be placed.
- On the bottom branch, you're going to add leaves just on the bottom branches. Let dry.
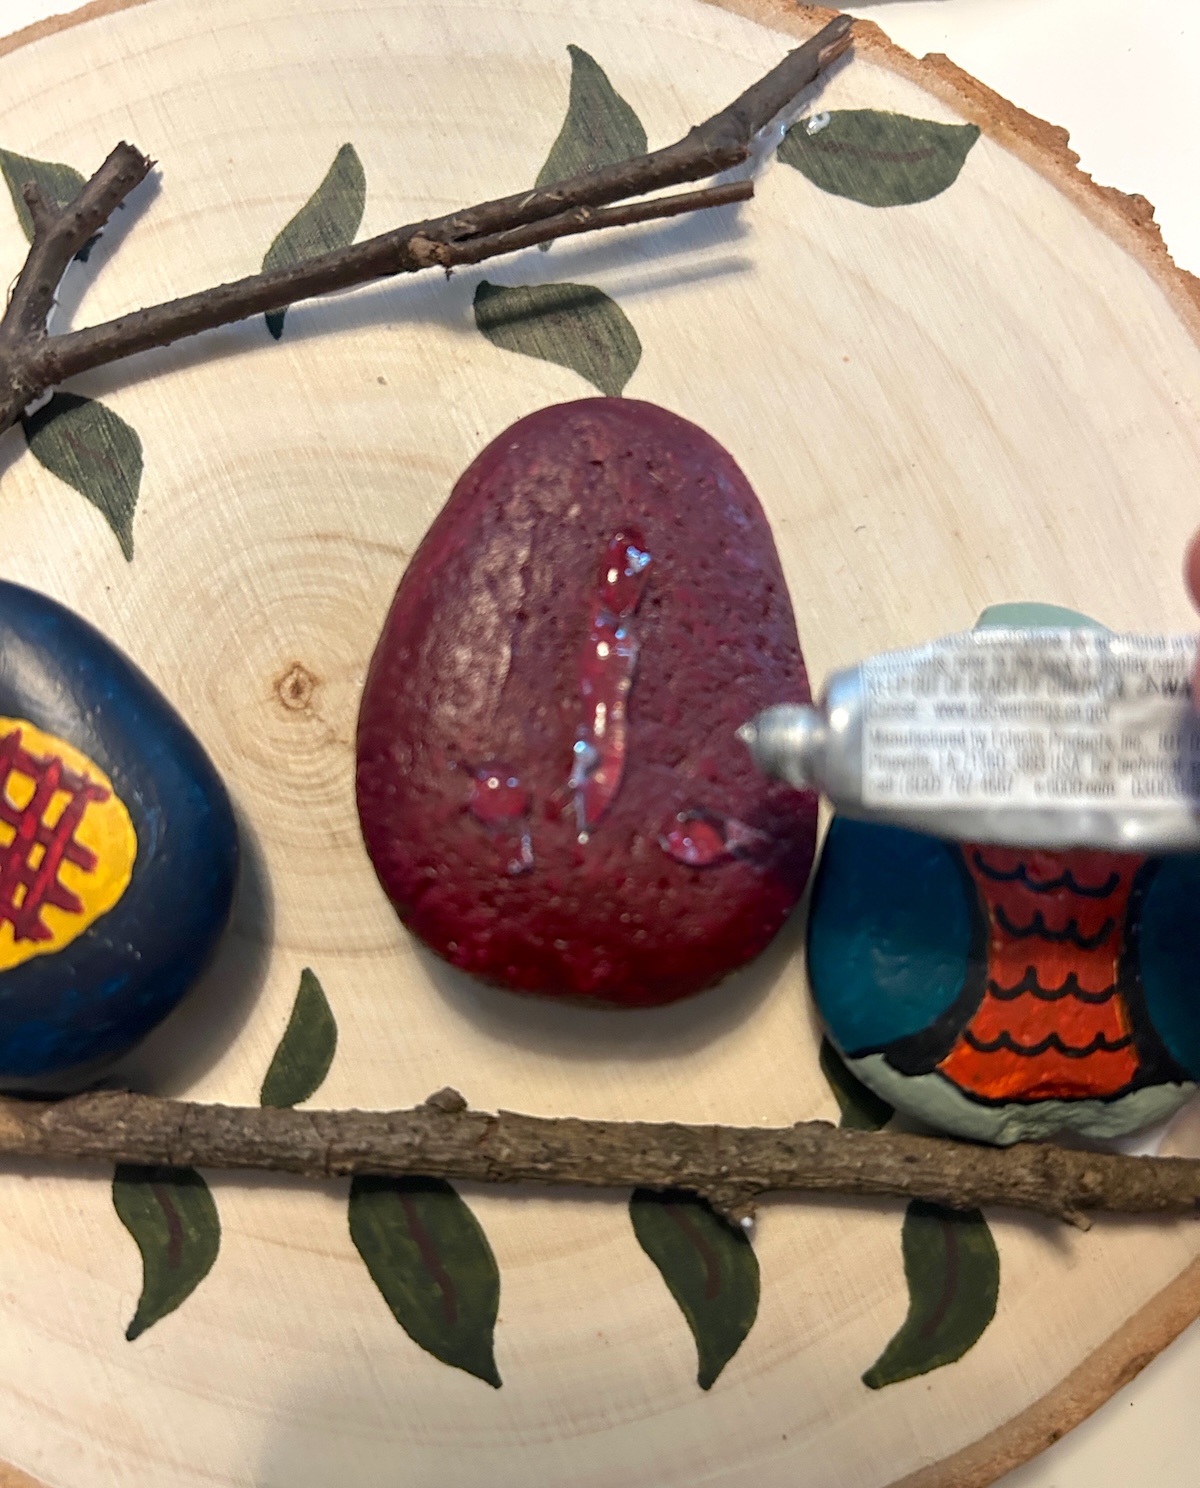
- Seal your rocks at this time, using the Mod Podge of your choice. I also sealed the plaque too, so everything would have the same finish. Let dry.
- Place lines of glue on the plaque where the twigs are going to go. The twig might not touch every part of the glue and that's okay - it will dry clear.
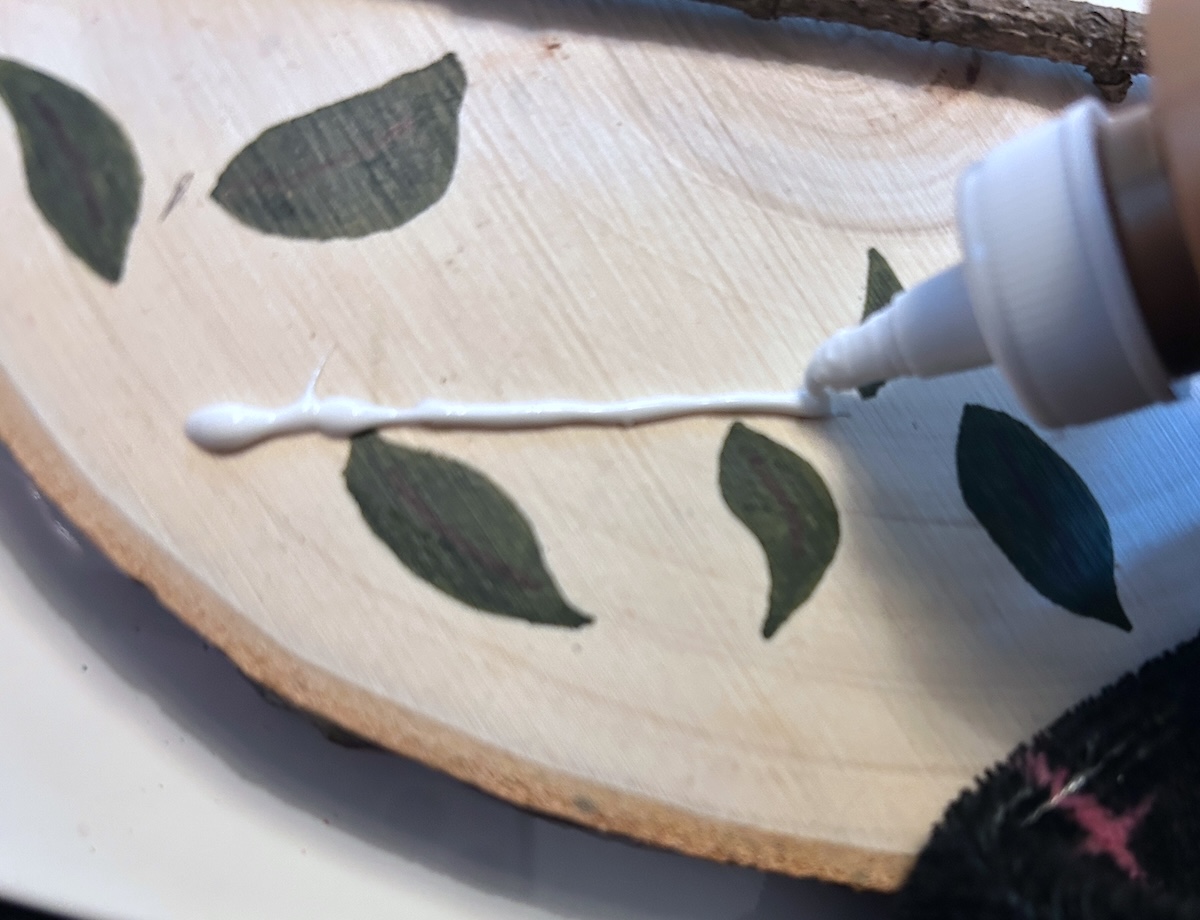
- Press them into the craft glue and let dry.
- Since the rocks are heavier, use E-6000 to attach those to the plaque. Add glue to the backs of the stones, and press down to attach. Let dry on a flat surface overnight.
Notes
Step 10: I added some leaves to the top of the branch but you can't even see them with the owls. So I would skip.
Step 12: You can use E-6000 for this step also, but I find it easier to apply craft glue, so for lighter weight items, I default to craft glue.
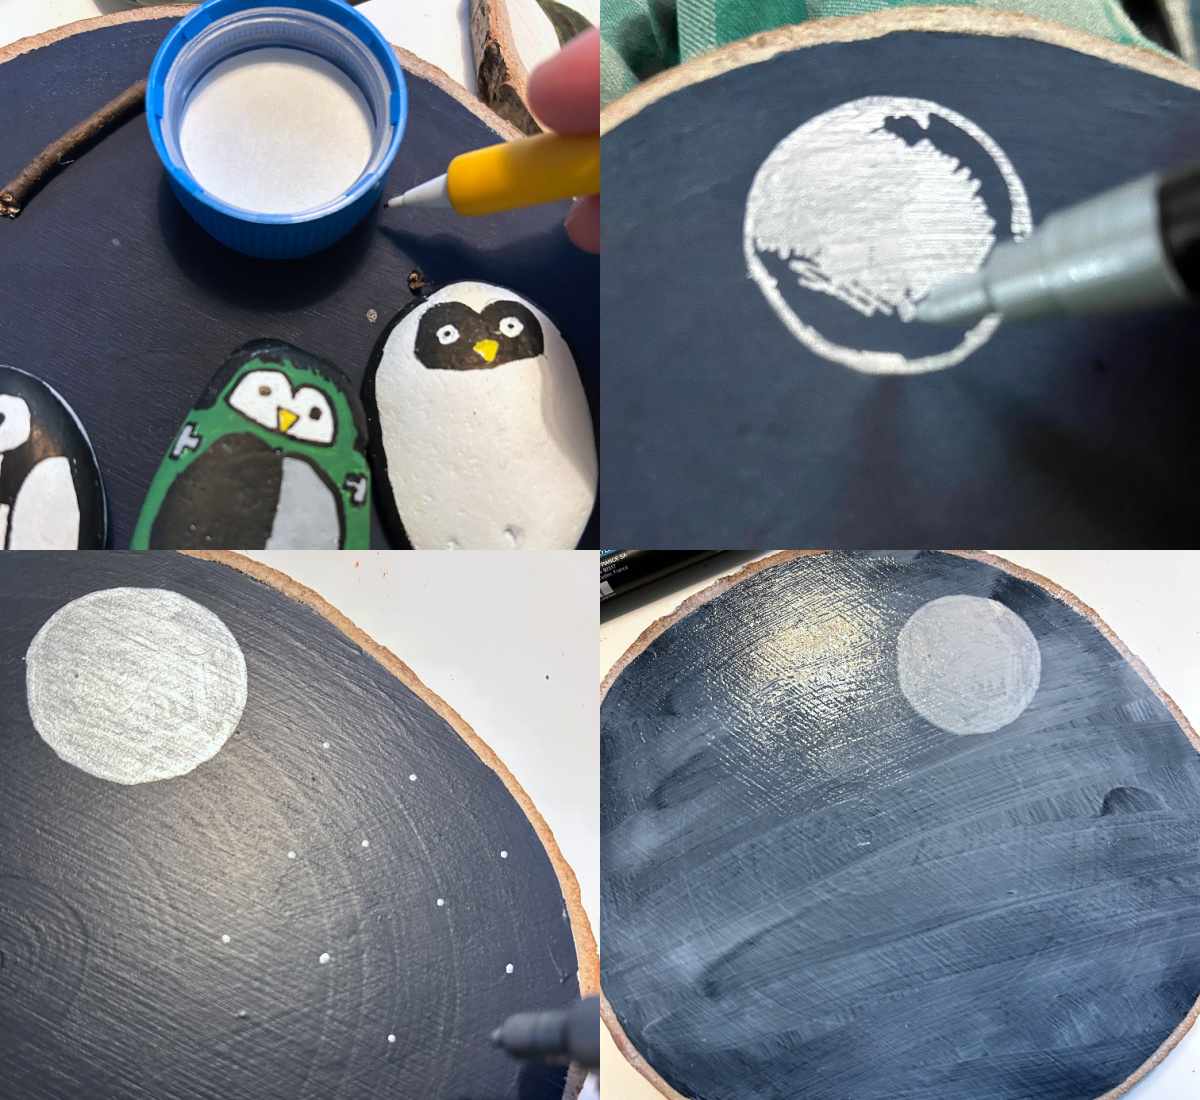
For the Halloween version, I did a few things differently. I painted the background with a dark blue craft paint for a night sky. Then I used a pill bottle top to make a circle shape and turned it into a moon with a silver marker. I sealed the plaque and then realized I wanted to add some stars by dotting with the silver paint pen.