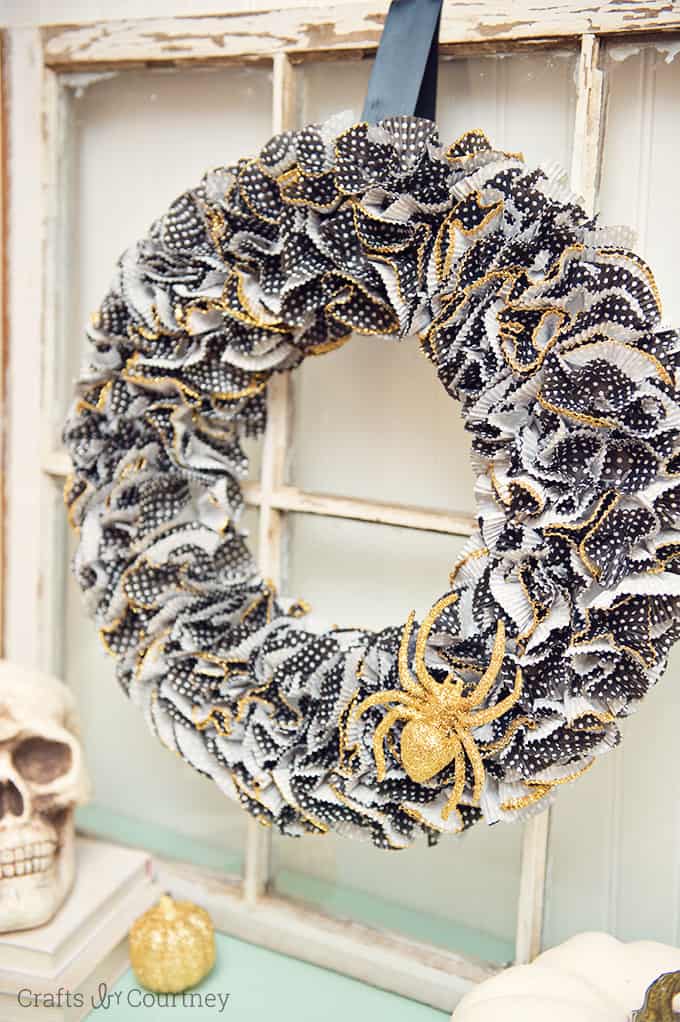
Halloween Cupcake Liner Wreath
Learn how to make a cute DIY Halloween wreath using cupcake liners! This project is easy and inexpensive.
Yield: 1 wreath
Cost: $8
Equipment
- Wreath Hanger
Materials
- Mod Podge Matte
- Glitter
- Foam Wreath
- Push Pins
- Ribbon
- Cupcake Liners
- Fake Spider
- Craft Glue
Instructions
- Flip a cupcake liner inside out, and then put a push pin through the middle.
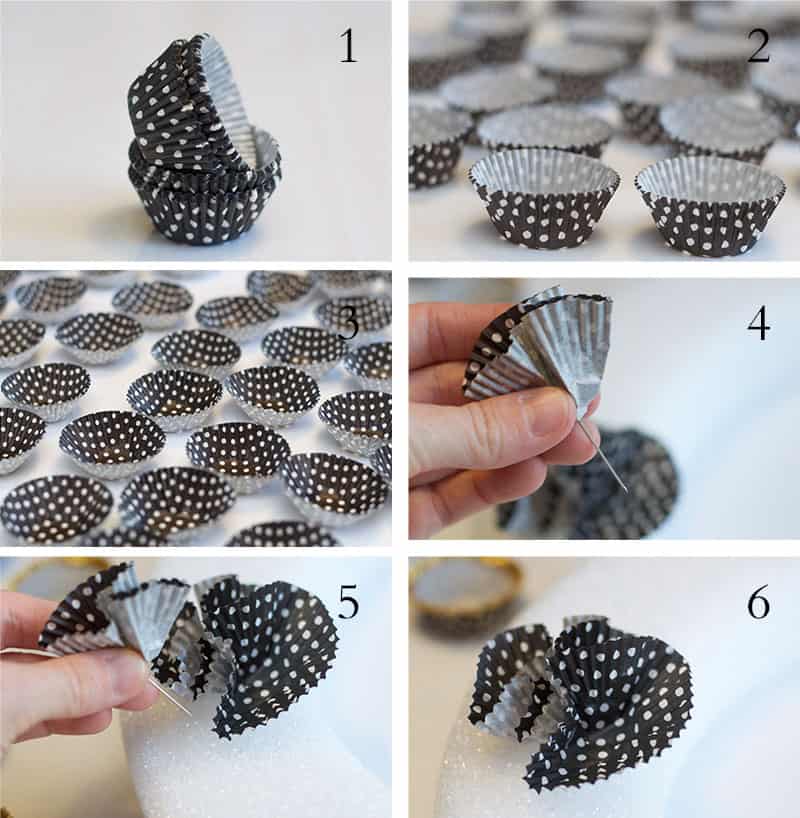
- Fold up the sides of the liner and place it into the foam wreath. Repeat, randomly placing the liners into the wreath form with pins. Do this until the wreath is about half full.
- To add glitter to some of the cupcake liners, fill a bowl with Mod Podge and a bowl with glitter. Place some of the liners' edges into the Mod Podge and then into the glitter. Set aside to dry.
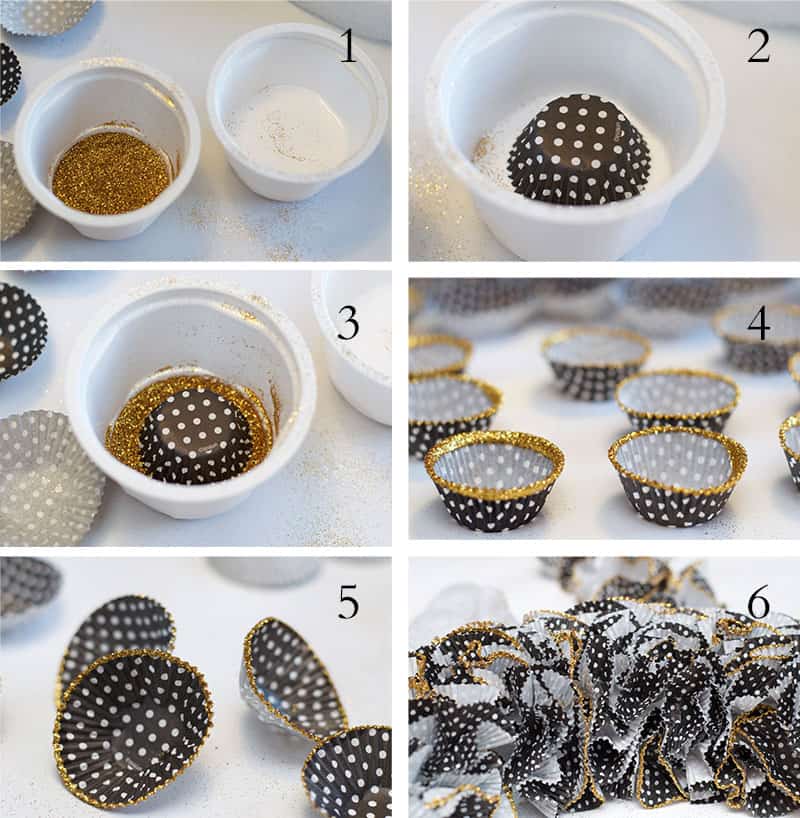
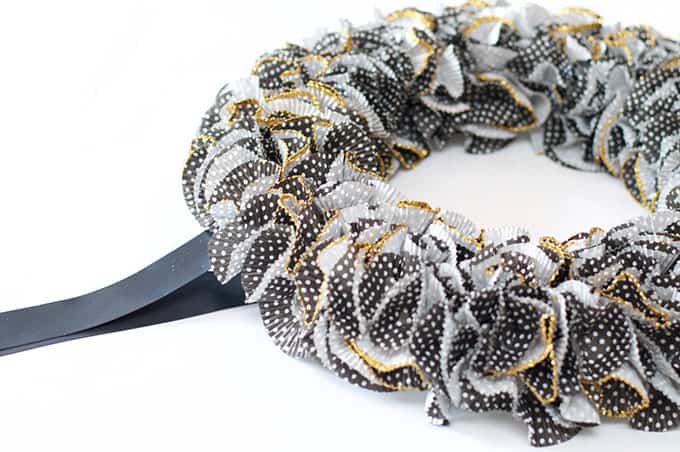
- Once dry, continue to add the liners to the wreath with pins until you've filled out the wreath. Leave a little space at the top to add the ribbon.
- Add ribbon with some push pins, then add liners over the top to fill in bare spots.
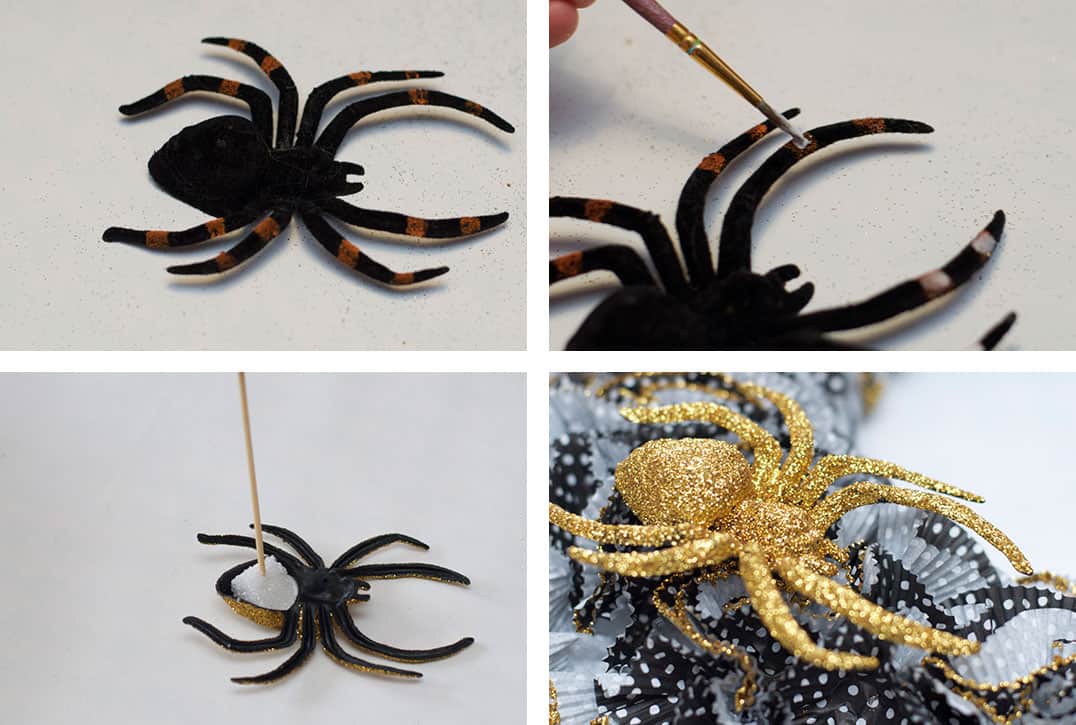
- Cover the fake spider in Mod Podge. Sprinkle glitter over the top and let dry. Touch up any areas with Mod Podge and glitter.
- Let the spider dry completely, then glue a piece of foam inside. Use the foam to pin the spider to the wreath form (so that it stays on).
- Let the wreath dry completely; hang with a wreath hanger.