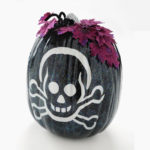
DIY Skeleton Pumpkin
Learn how to turn a plain faux pumpkin into a spooky Halloween skull pumpkin! It's very easy to do, and perfect for your holiday decor.
Yield: 1 pumpkin
Cost: $12
Equipment
- Paintbrush(es) two sizes – small and large
Materials
- 1 Craft pumpkin
- Skeleton clip art printed out to fit the pumpkin
- Craft paint I used FolkArt - Licorice, Dove Gray, Metallic Silver Sterling
- Mod Podge Sparkle
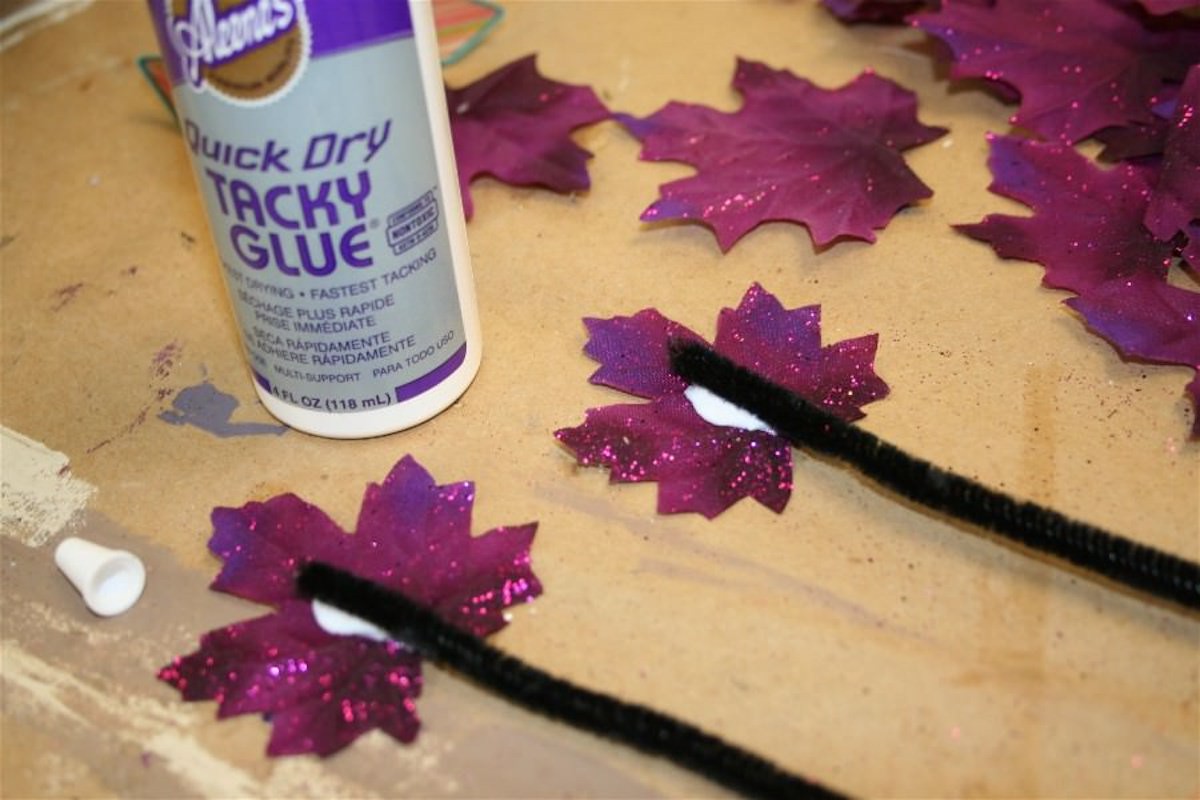
- Purple craft leaves
- Pipe cleaners black
- White transfer paper and stylus
- Stencil tape
Instructions
- Paint the craft pumpkin with Licorice (unless you got a black craft pumpkin).
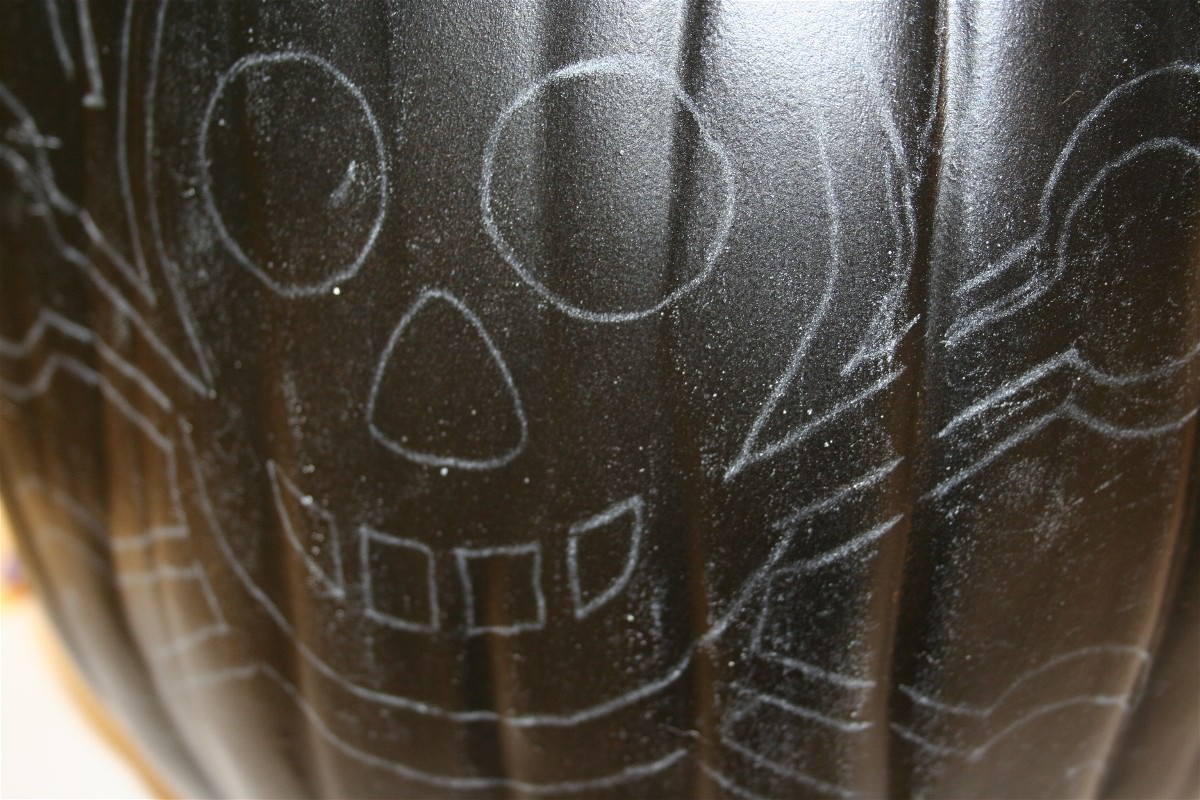
- Tape the white transfer paper behind the pattern onto the pumpkin surface. Use a stylus or pencil to trace the image, leaving the white lines behind.
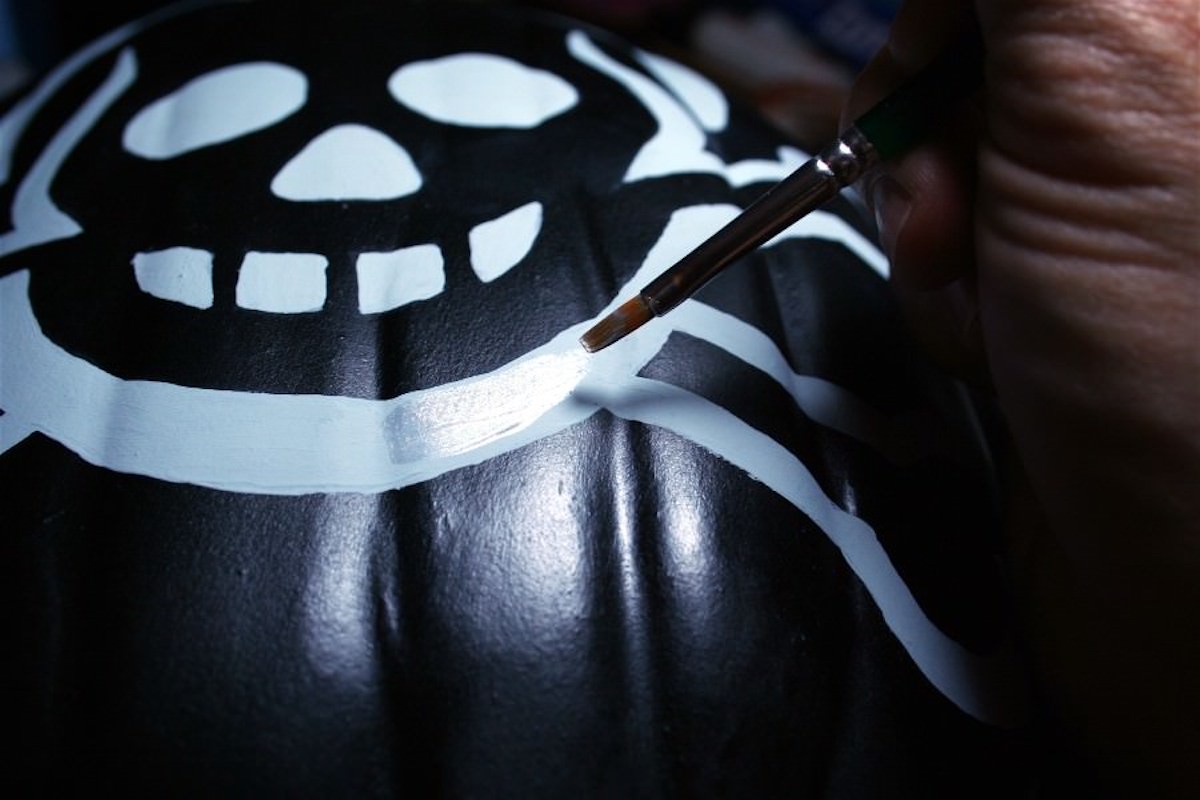
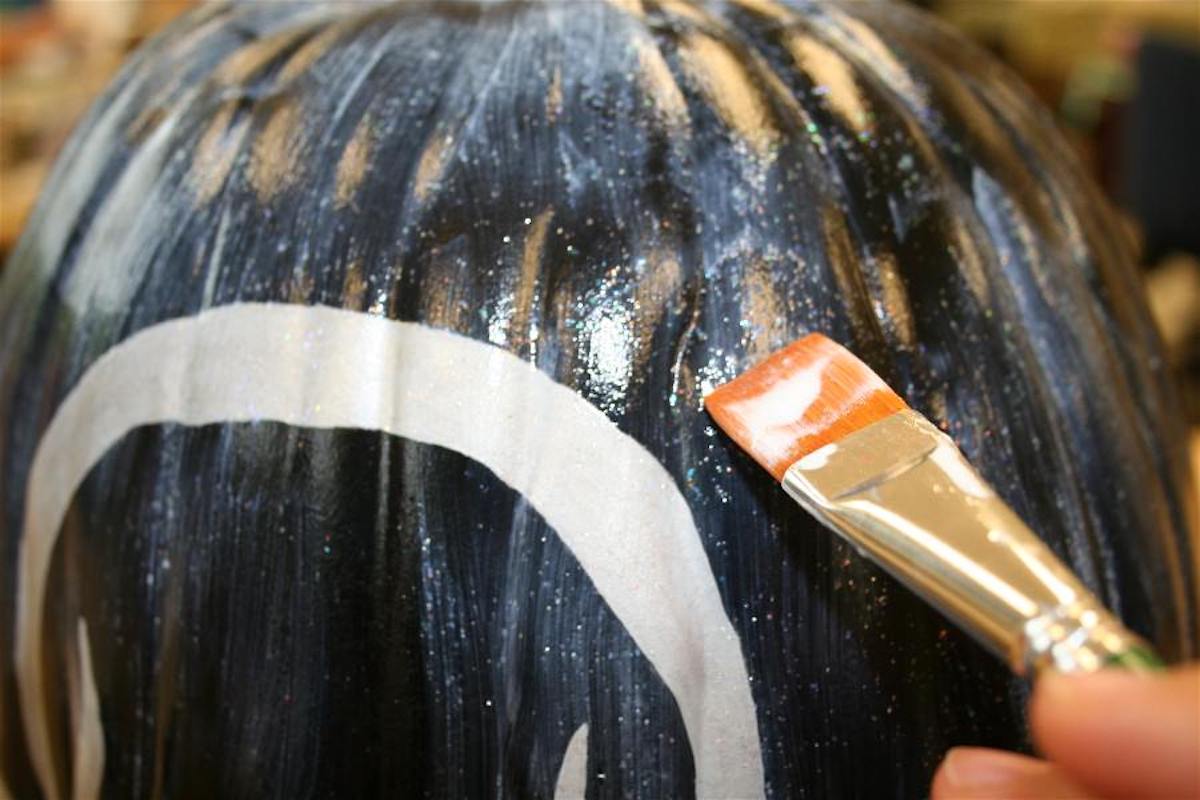
- Use your small brush to paint in the skeleton design with gray paint. Follow the pattern lines as closely as you can. Keep painting until you’ve filled the skeleton completely in and then allow to dry. Don’t forget the stem.
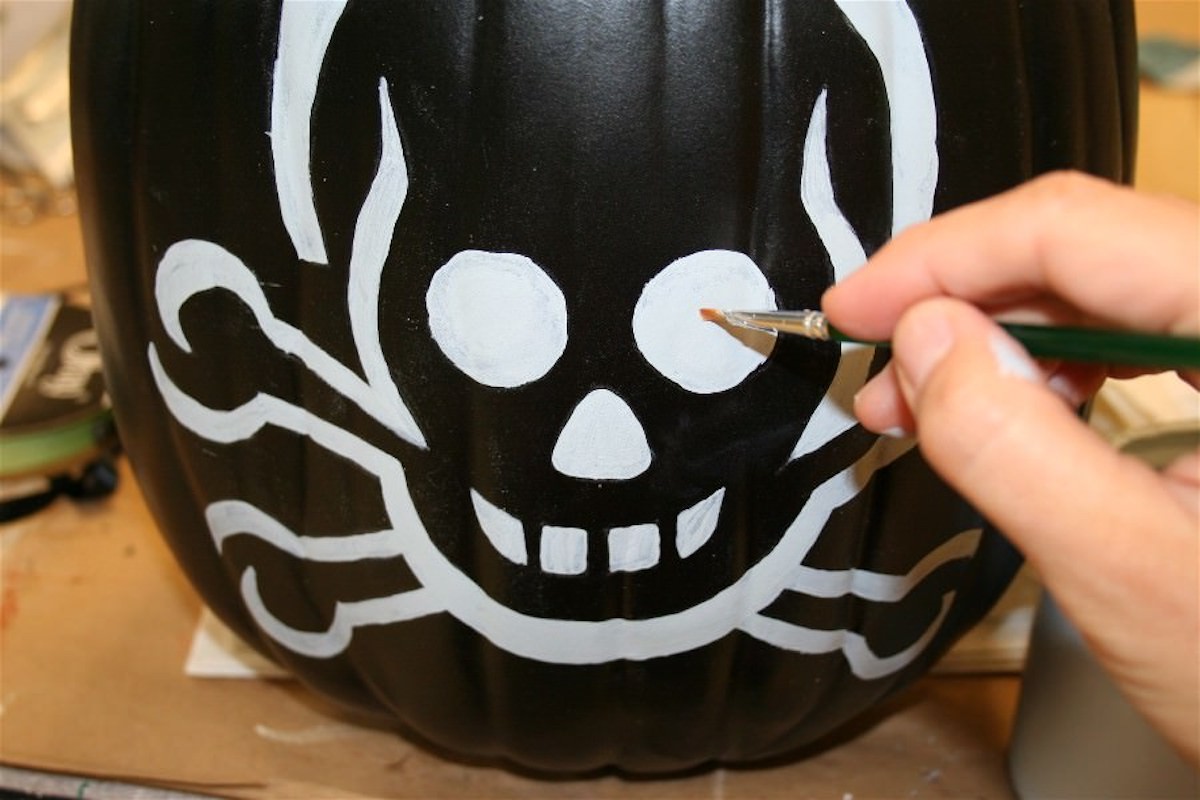
- Use your small brush and silver to paint over the gray. It gives it a nice little sheen. Cover and then allow to dry. Paint the stem too.
- Coat the pumpkin with several layers of Sparkle Mod Podge, allowing to dry between coats. Set aside and allow to dry.
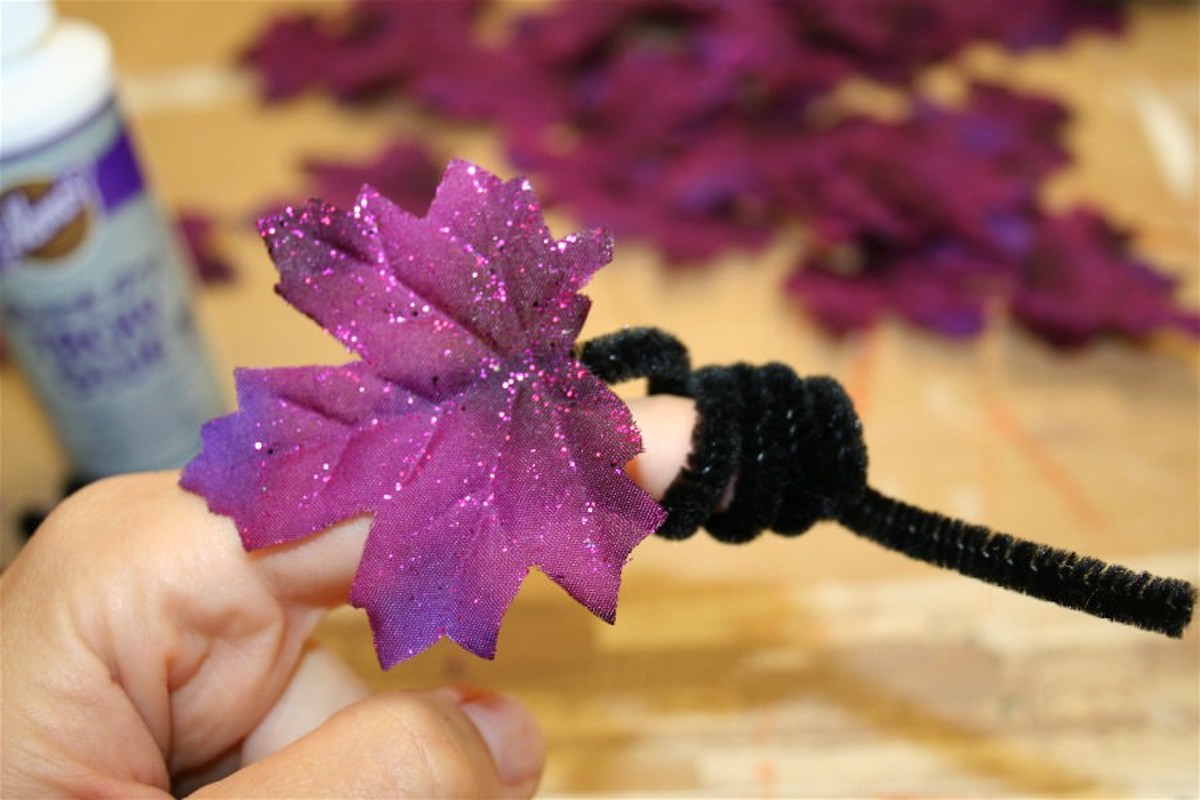
- While you are waiting for the pumpkin to dry, take some of the leaves and glue onto the ends of pipe cleaners.
- Once dry, wrap the pipe cleaners around a finger to make a curled vine effect.
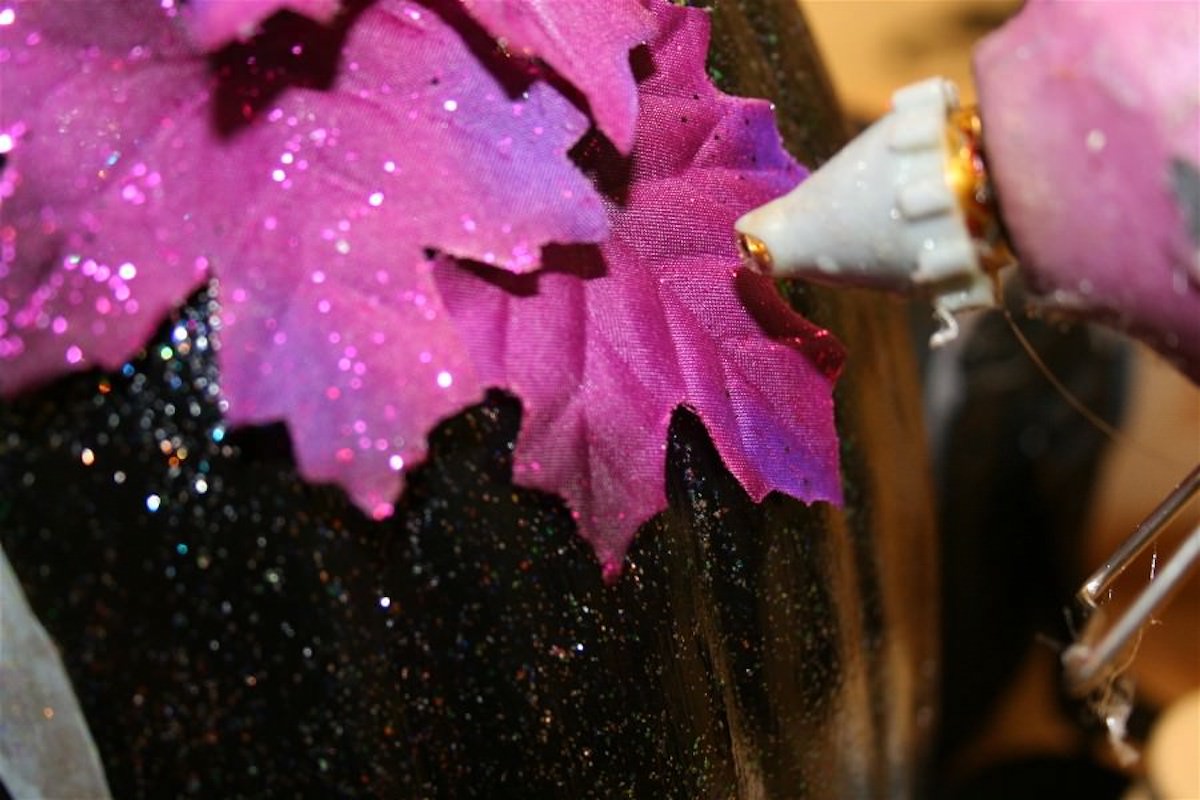
- Using the hot glue gun, attach the pipe cleaner “vines” to the top of the pumpkin, then start attaching leaves. Let the glue cool completely before displaying.
Notes
Other methods for transferring the pattern if you don't want to do transfer paper:
- Cut out the image and hold it to the pumpkin, tracing around it in chalk (you can erase it later). Don't draw so hard with the chalk that you create grooves in the pumpkin surface.
- Turn the pattern over and color it with a white crayon. Tape it to the pumpkin and use a pencil to trace the lines, which will transfer the crayon to the surface of the pumpkin.