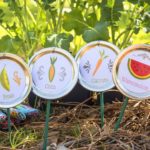
DIY Plant Markers
Learn how to make these cute garden markers with mason jar lids and Mod Podge! I have a free printable for you, too.
Yield: 6 markers
Cost: $3
Equipment
- Printer and paper laserjet preferred
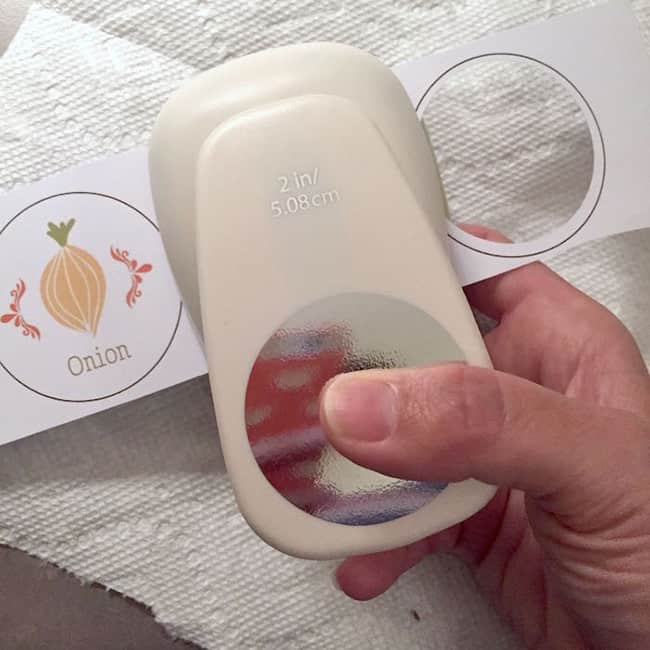
- Circle punch(es) 2-inch
- Power punch or hole punch strong enough to make a hole in thin metal
Materials
- Presentation paper 180 gsm min, or white cardstock to print on
- Garden marker lid template
- Mod Podge Outdoor
- Mason jar lids one for each marker
- Floral picks
Instructions
- Print out your free garden marker printable on thick paper. Cut into strips and use the 2-inch hole punch to punch the labels of your choice right inside the lines.
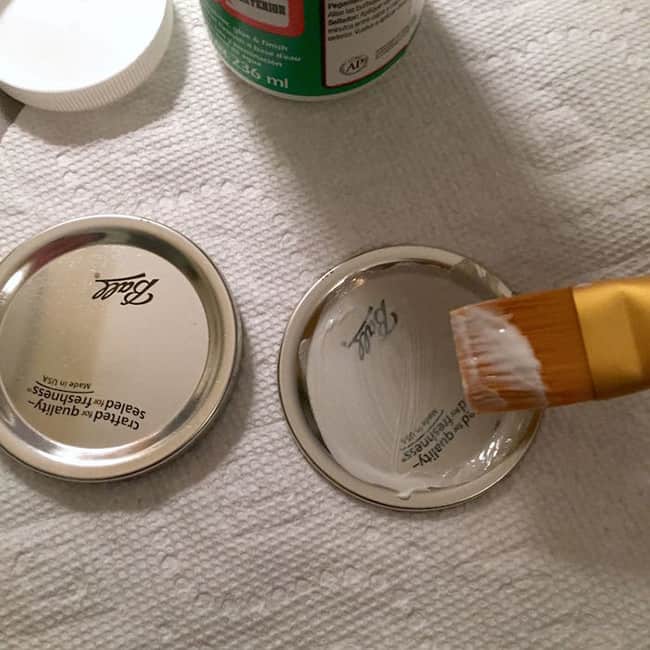
- Place a medium layer of Outdoor Mod Podge on the mason jar lids using the paintbrush.
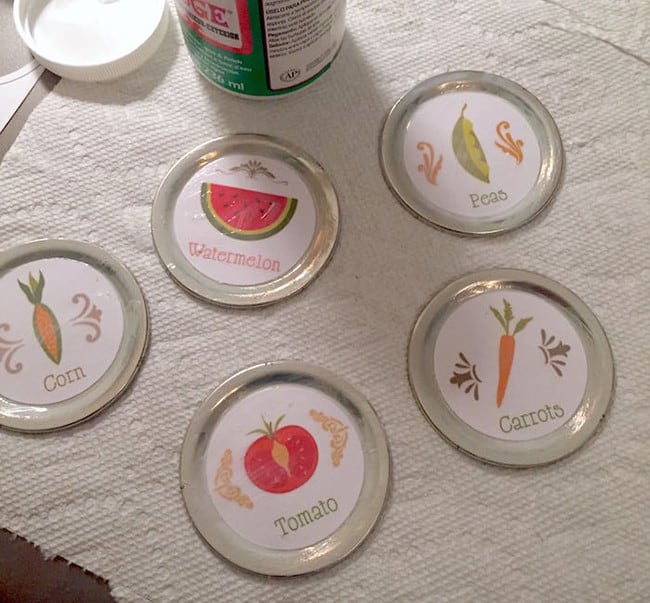
- Press the labels down into the Mod Podge. Smooth and wipe away the excess that comes out the sides. Let dry for 15 – 20 minutes.

- Give all of the labels a top coat of decoupage medium and let them dry. Then give at least two more coats.
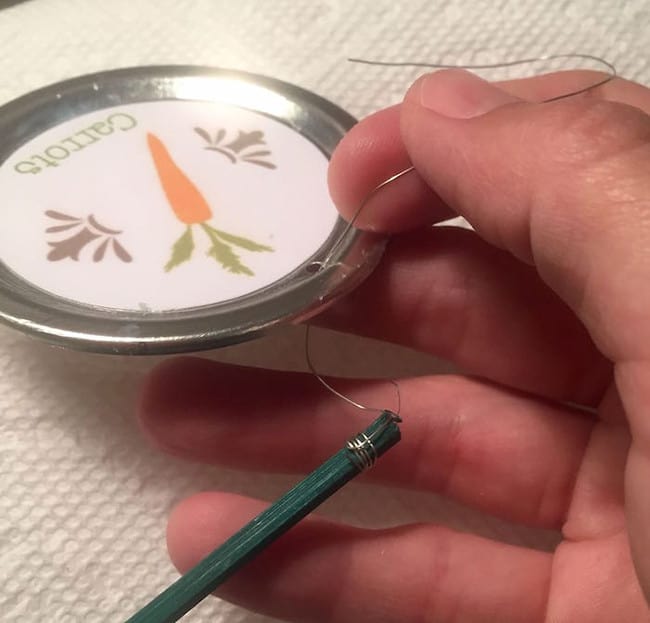
- Use the power punch or hole punch to put a small hole at the top of the plant label. Use the wire from the top of the plant picks to attach the lid to the pick. If the plant picks didn't come with wire, cut a length of wire and wrap to finish.
Notes
TIP: If you don’t have a punch, you can also use a hammer and nail to make the hole! It won’t be as clean as with a punch, but it will work just fine. Just make sure to put a board under the lid before you punch the hole so that the nail has something to go in to.
TIP #2: You can use small wood dowel rods and thin jewelry wire to get the same effect for your garden markers.