DIY Notebook Cover
Learn how to cover a notebook with decorative paper and Mod Podge! This is such an easy way to customize.
Yield: 2 notebooks
Cost: $3
Equipment
- Scissors or craft knife and mat
Materials
- 2 Notebooks
- Scrapbook paper or other decorative paper
- Cardstock if desired for accents
- Washi tape
- Mod Podge formula of your choice
- Parchment paper or wax paper
- Clear acrylic spray sealer optional
Video
Instructions
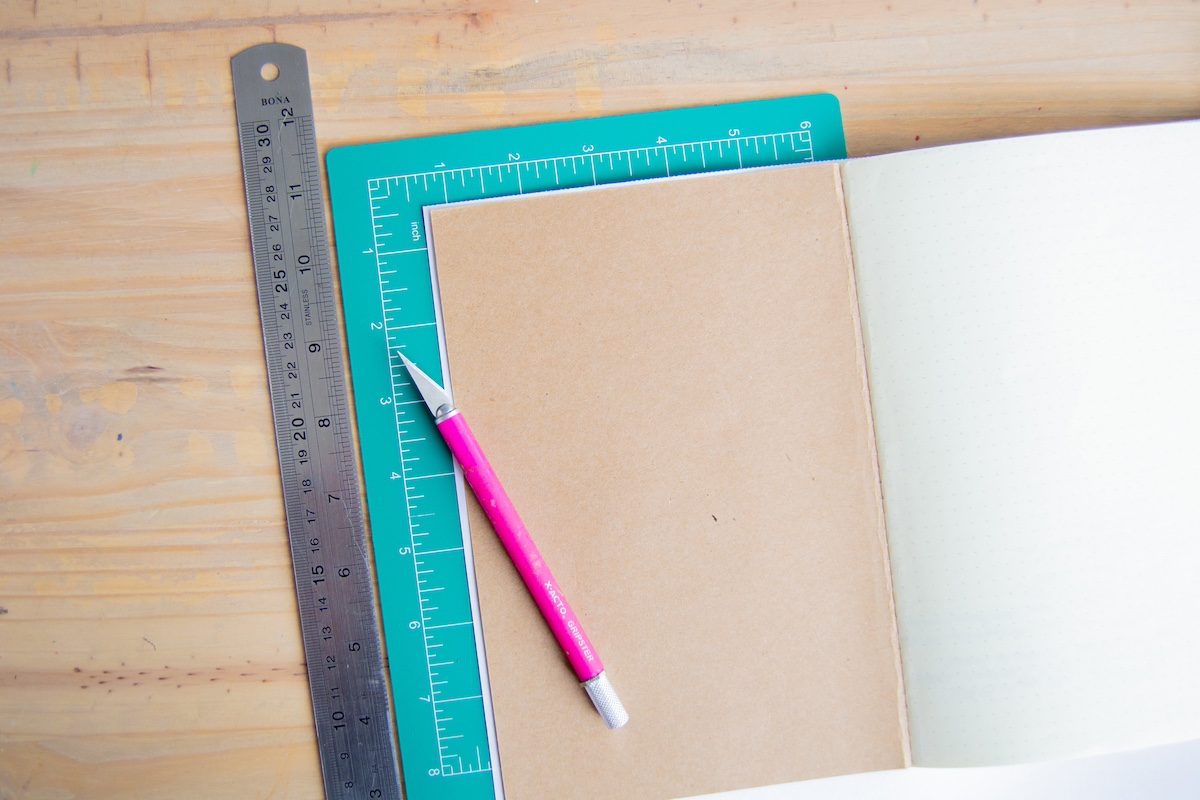
- Cut your paper to the size of your notebook's cover, using the ruler to help you measure out the correct size.
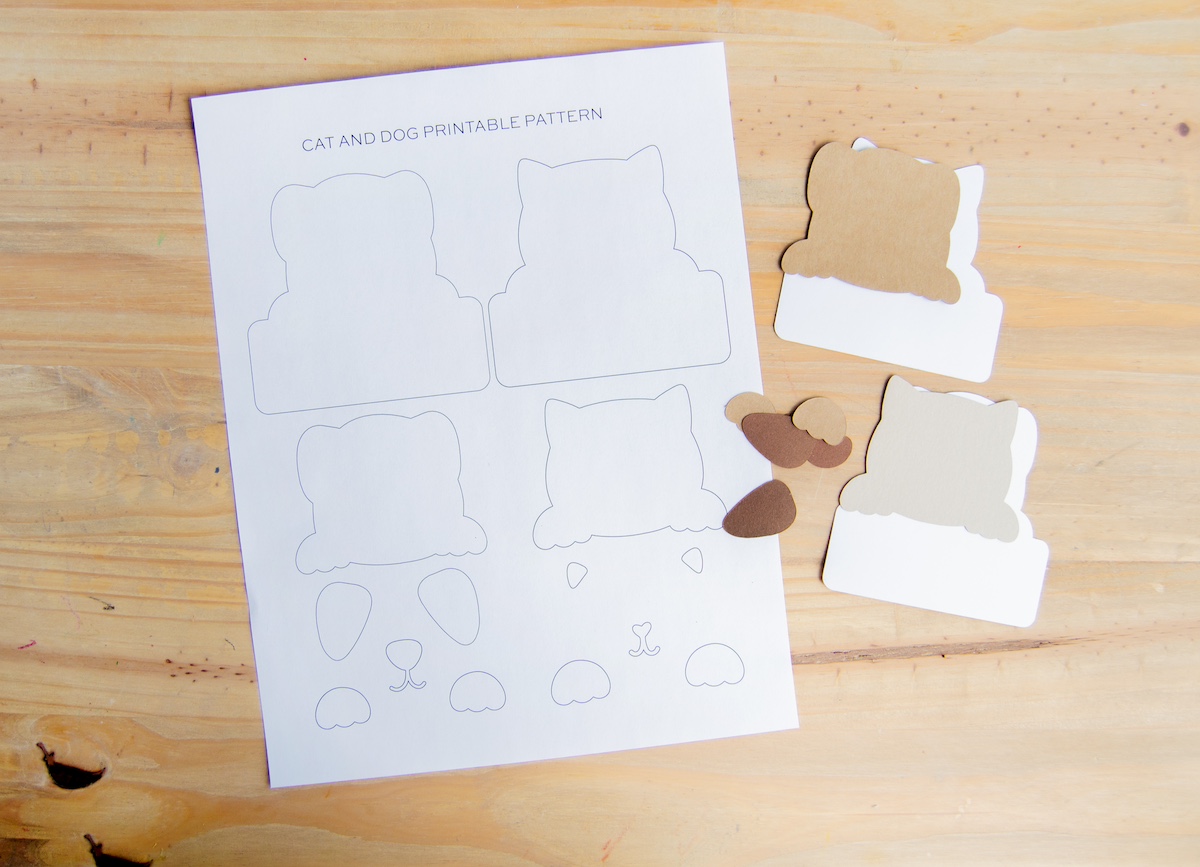
- If desired, cut any smaller shapes to decorate the front using scissors and the cardstock. Set aside.
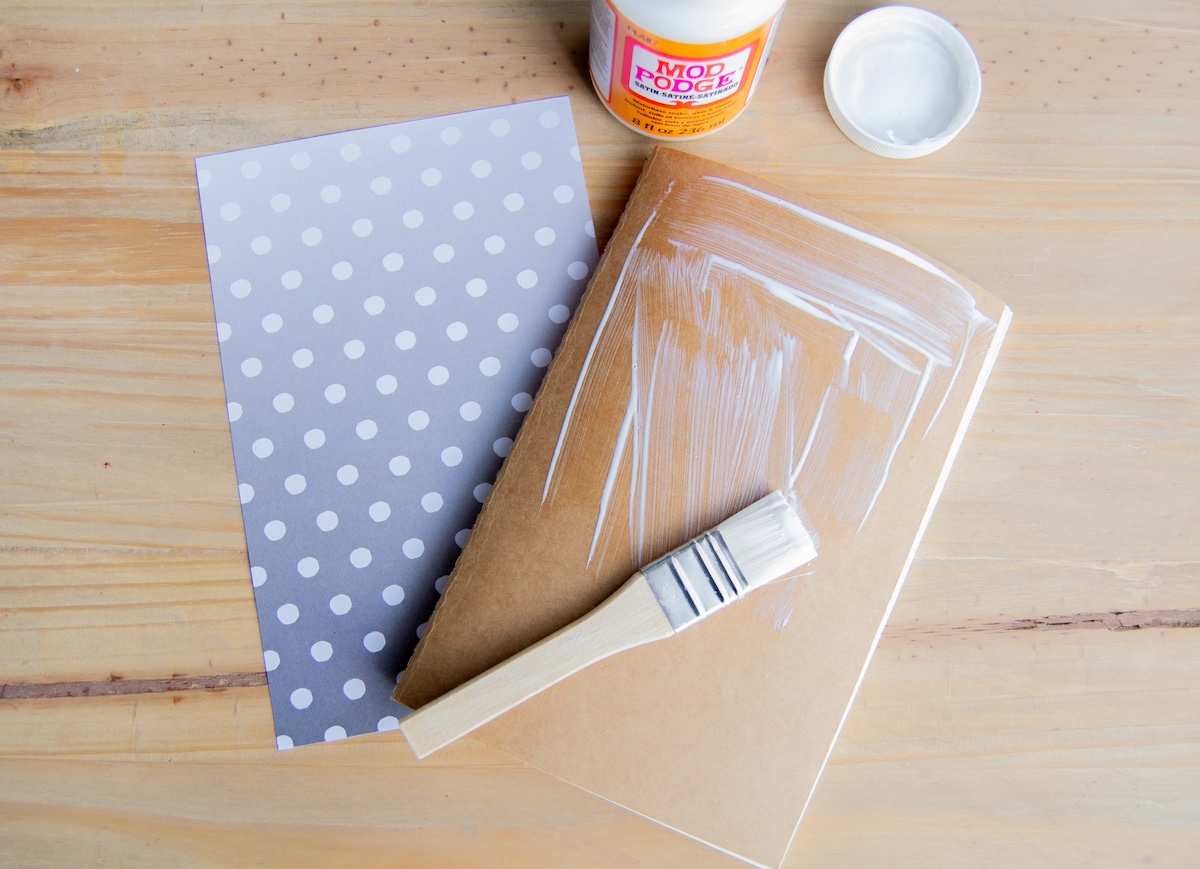
- Place wax or parchment paper underneath the cover. Apply Mod Podge to the front of the notebook with a paintbrush. Carefully line up the paper on your notebook, and smooth it into place, wiping away any Mod Podge that comes out the sides. Let dry 15 - 20 minutes.
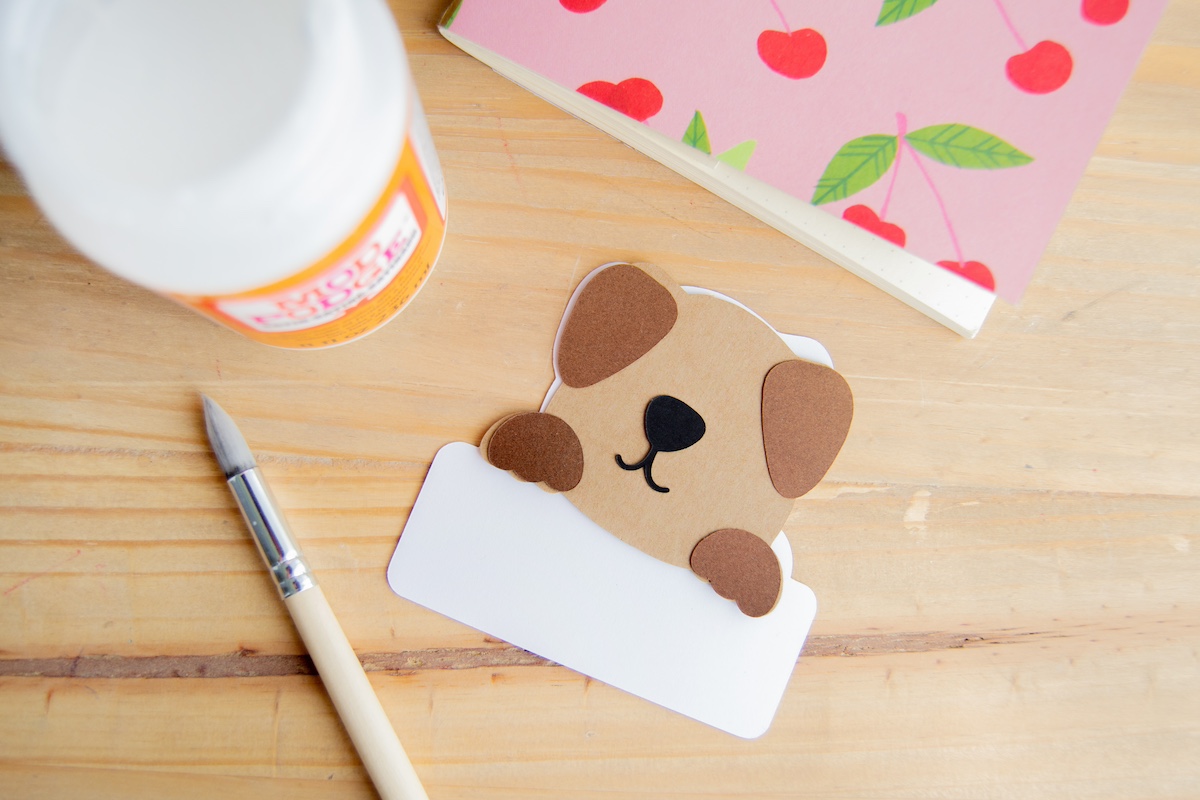
- Assemble any die cuts for the front of the notebook, using Mod Podge to stick them together. Let dry.
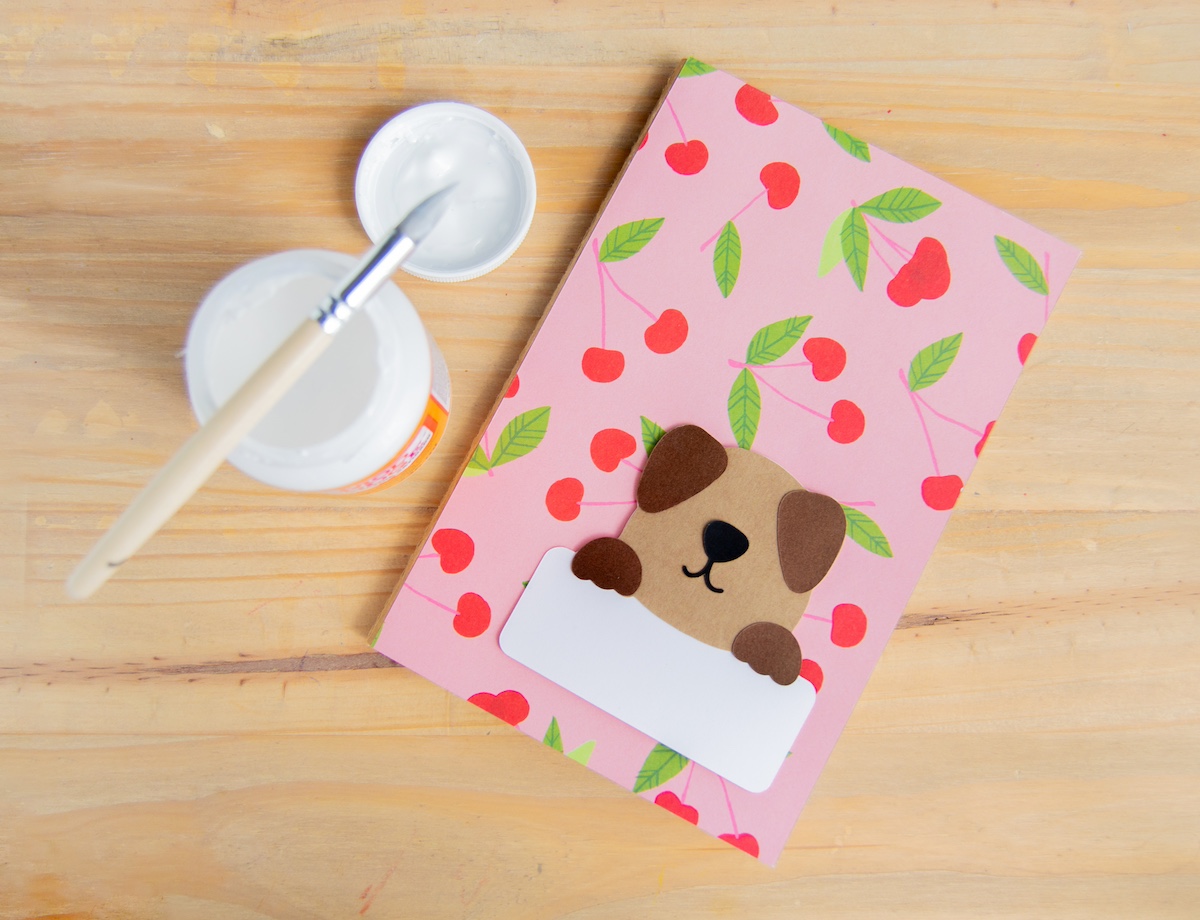
- Use Mod Podge to glue the die cuts to the front of the notebook. Let dry.
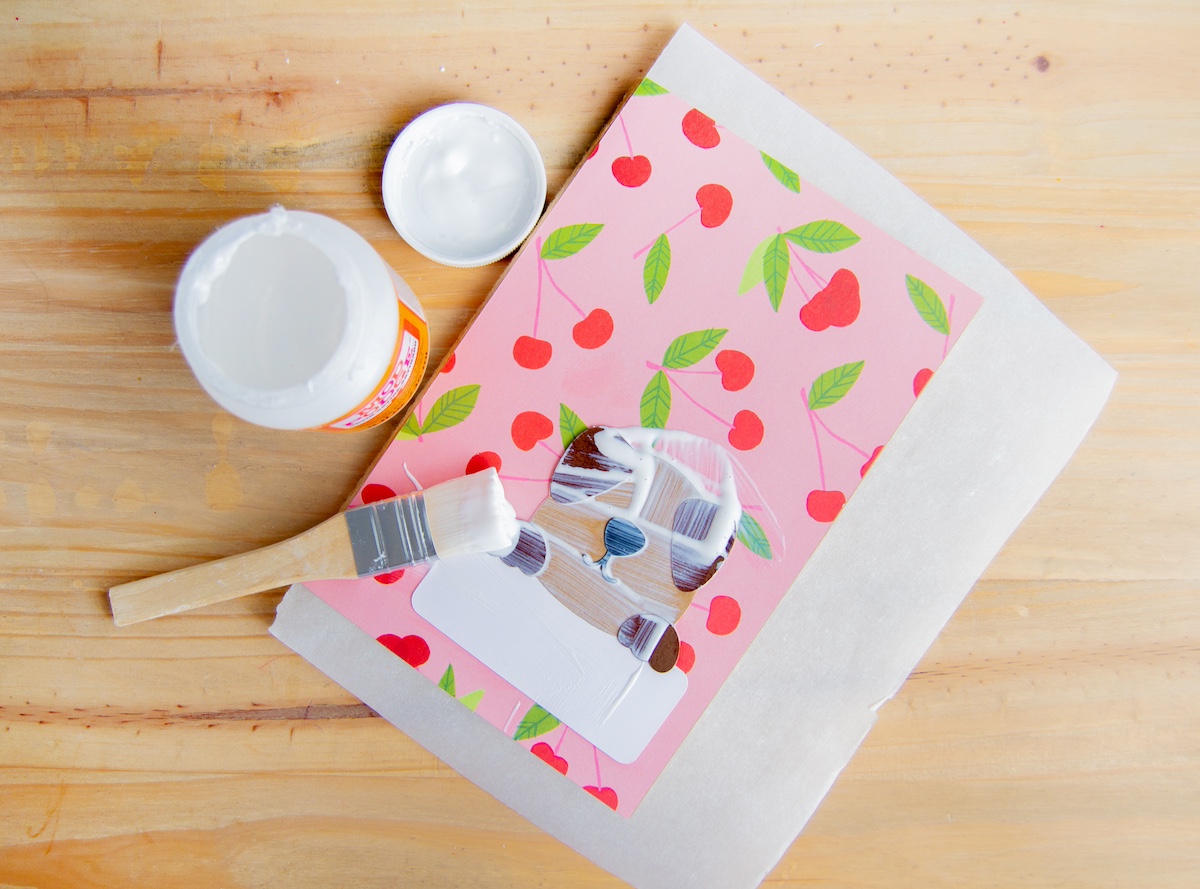
- Seal the front of the notebook with a coat of Mod Podge and let dry. Spray with acrylic spray if desired to reduce tackiness until fully cured.
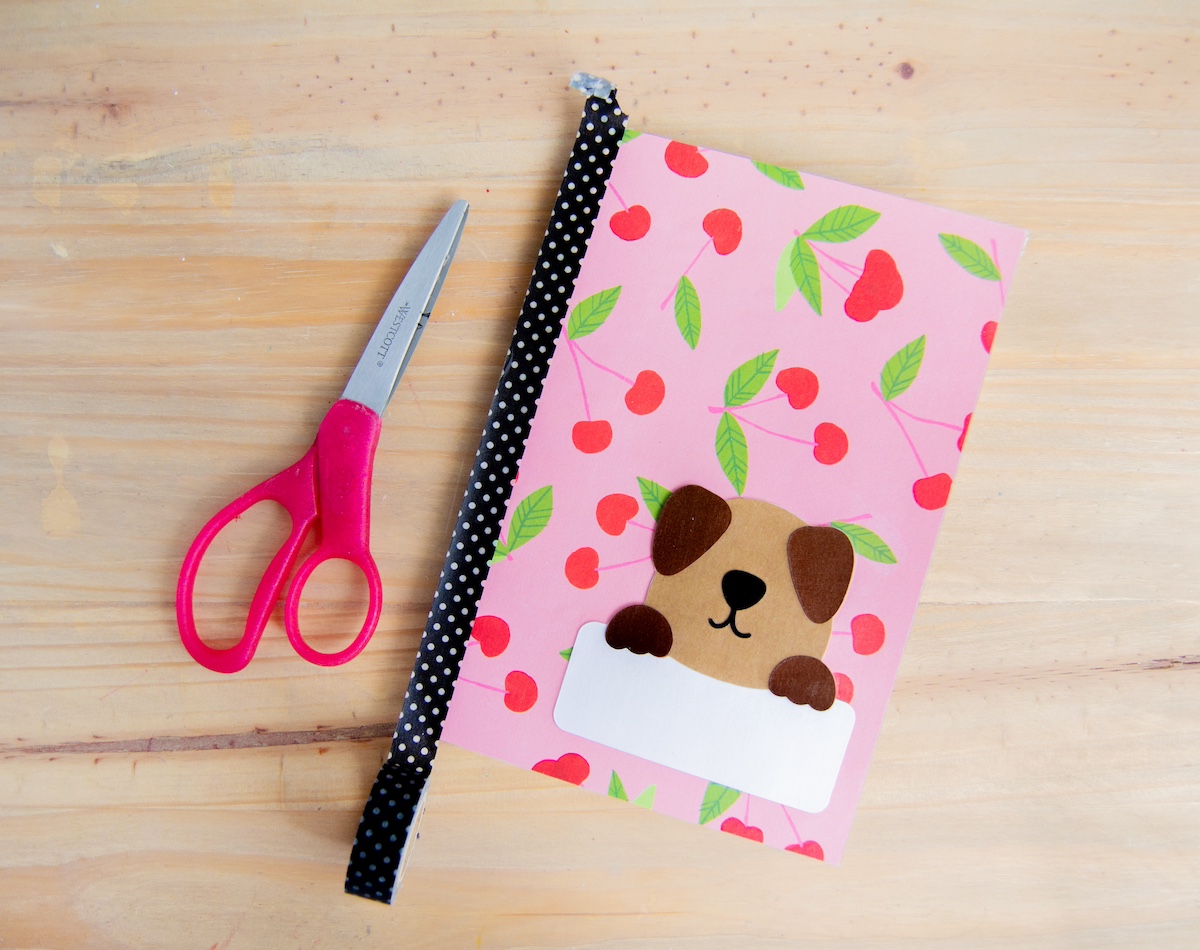
- Use washi tape to add to the binding of the notebook. If you find it's not sticking, seal it with Mod Podge.