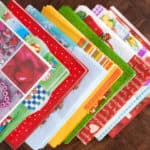
Decoupage Napkins
Learn how to decoupage with napkins using these simple tips!
Yield: 1 project
Cost: $3
Equipment
Materials
- Decorative paper napkin(s)
- Mod Podge
- Scotch tape
Instructions
- Separate the napkin layers before beginning. This means peel the (typically) white layer off the back of the front layer. You can gently rub the layers together to separate or use a piece of Scotch tape in one corner and pull.
- You can cut or tear your images. The way to tear them is to use a detail brush, dip it in water, and trace around the part of the image that you want to save. The napkin will easily pull away.
- Place Mod Podge on the surface of the item and then place the napkin (or portion of napkin design) down on top. Use a piece of plastic wrap on top to smooth the image. This will help you smooth the napkin down without tearing. Work on smoothing from the middle out.
- Alternatively, some use hair spray on their napkins before decoupage. Spray with several coats of hair spray, let dry, and then Mod Podge your napkin as usual.
- Pressure of your brush is crucial. Don't be light as you're just weakening the napkin, and don't be rough as you will tear your napkin. Practice and patience are key!
- Always do a light sanding and varnishing at the end of your project. Sand until it is smooth.
