
Decoupage Christmas Tree Centerpiece
Make a DIY Christmas centerpiece with inexpensive wood from the hardware store and Mod Podge! It's so easy.
Yield: 1 centerpiece
Cost: $16
Equipment
- Hand saw or chop saw
- Protective eyewear
Materials
- 4 pieces Wood measuring 1/2" thick by 2" wide get four 36" long pieces
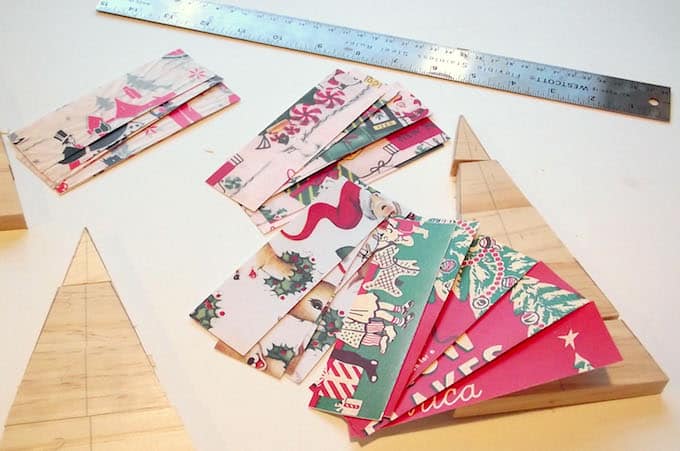
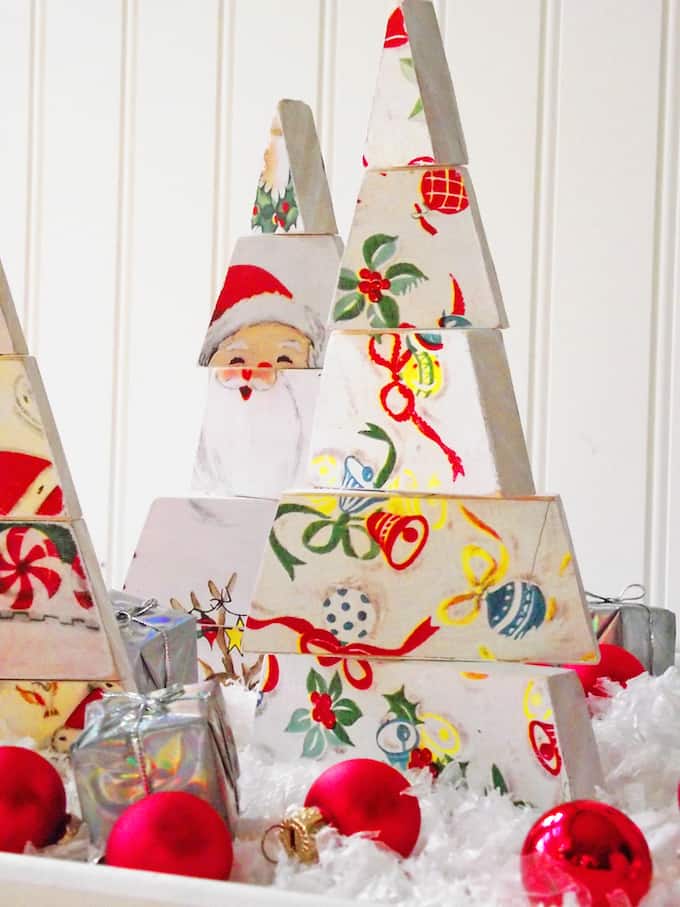
- Vintage Christmas paper
- Mod Podge Matte
- White paint
- Wood glue
- Sandpaper
- Tray
- Faux snow
- Mini ornaments and gifts
Instructions
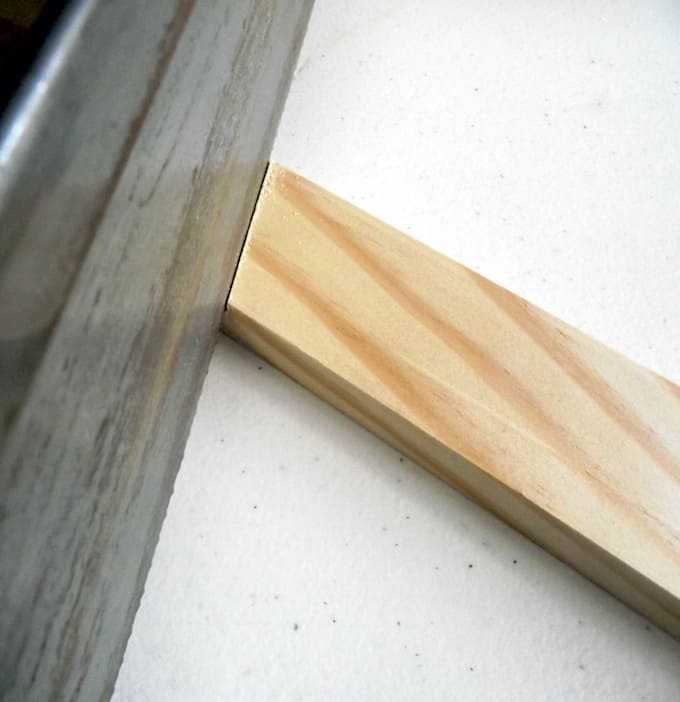
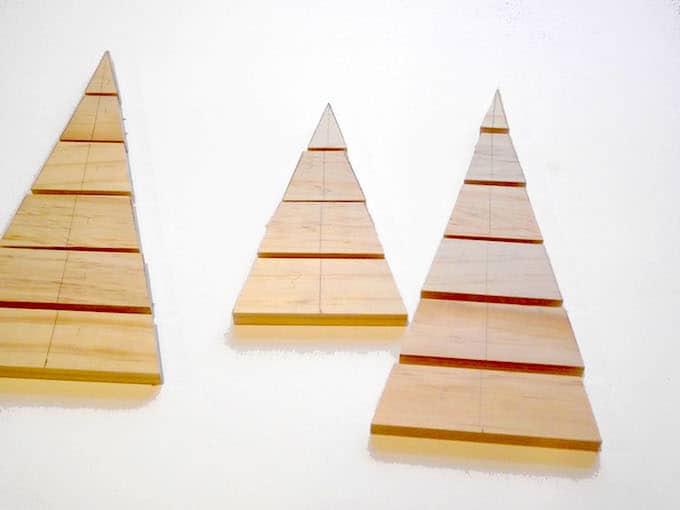
- Begin by laying out the wood slats, one on top of the other, on your work surface. Draw basic triangles (tree shapes) using the ruler and pencil.

- Then cut each slat to length (at an angle) using a saw.
- Once you cut all the pieces, lay them out on the table to form your three individual trees.
- Cut the paper you are using down to 2" wide strips - you'll want enough to cover both sides of all trees.
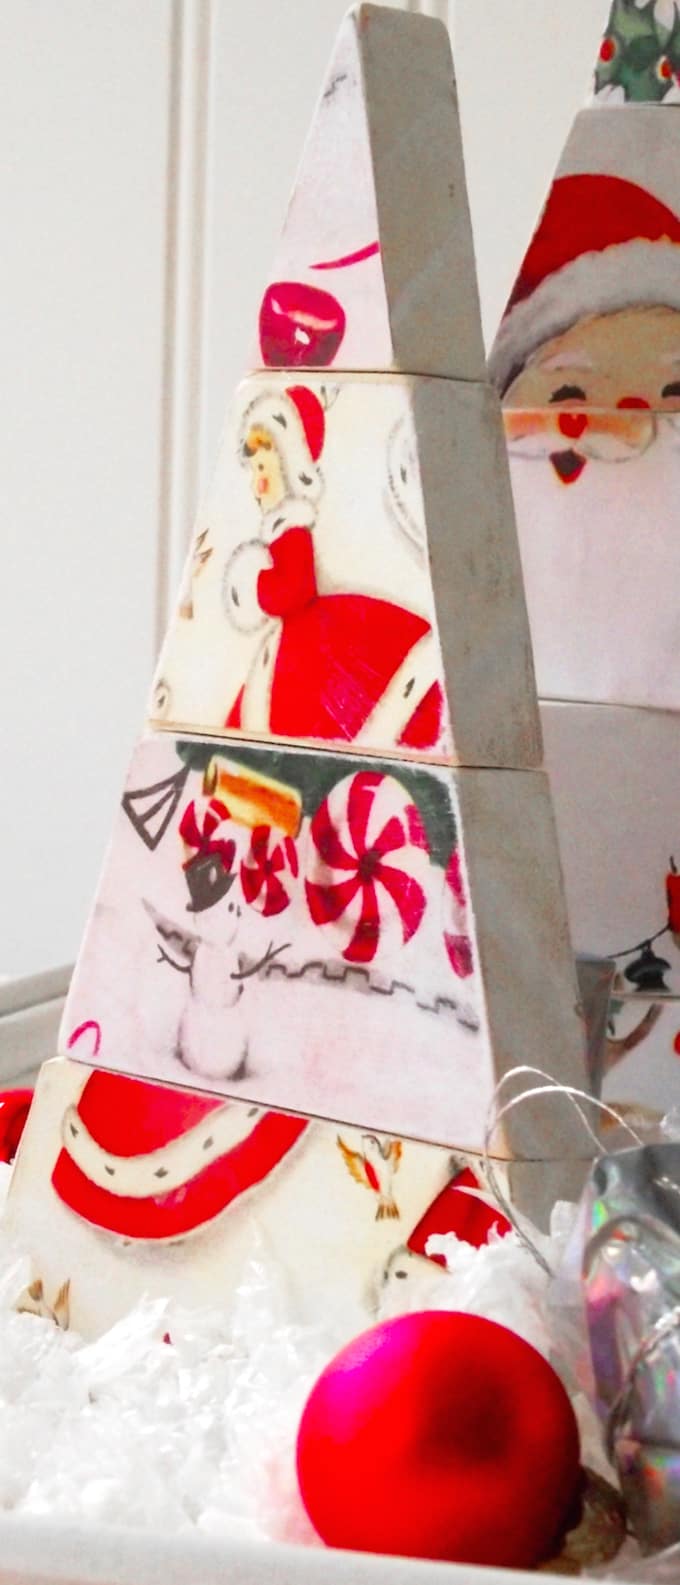
- Mod Podge your Christmas paper into place on both sides of the slats. Let dry completely.
- Trim away any excess paper. Give the trees a second and third coat of Mod Podge, letting dry between coats.
- Paint the edges of the slats white and let dry. If desired, sand a bit of the edges down.
- Stack the pieces together on top of each other and attach with hot glue. You'll twist each piece slightly as you glue it down.
- Hot glue each tree to a small scrap wood piece from the scraps as a base for stability.
- Place in a large tray and add Christmas embellishments like faux snow, small ornaments, and small packages.
Notes
- I used scans of vintage paper but you could use anything - wrapping paper, Christmas napkins, scrapbook paper, etc.
- I did find they needed a little base to keep them super stable - I just glued the bottom to some scrap wood and covered it with snow.
- You can cut the slats with a regular hand saw as pictured, but a chop saw makes faster work of it. Just be careful with the smaller "tops" of the trees - you'll want to go back to the handsaw for those for safety sake.
- If you're not into sawing and power tools, you could do the same thing with popsicle sticks or balsa wood and a sharp craft knife.
- I decided (after I was done, of course) that I liked the paper that used designs or patterns a bit more than the ones that had Santa faces. There is something a bit "un-Christmas-y" about cutting St. Nick's face in half!