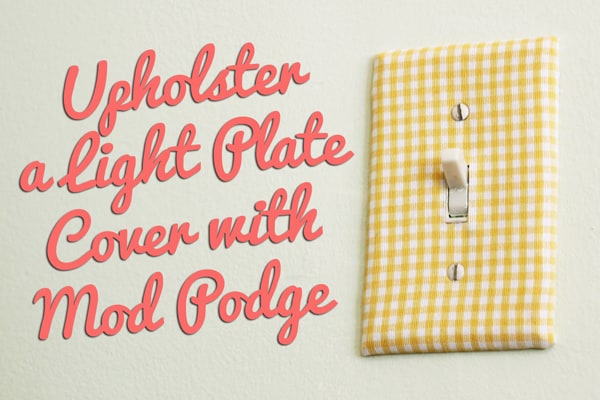
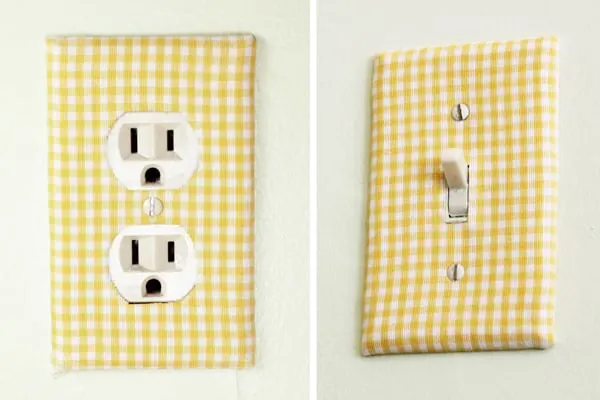
Learn how to make decorative switch plates the easy way with Mod Podge! You’ll want to cover all of your switch plates in paper or fabric.
Skills Required: Beginner. It helps to have some prior crafting experience, but not required. You’ll be cutting fabric to fit a light plate and then affixing it with Mod Podge.

This is Heidi from Hands Occupied. As an apartment dweller, I often have to deal with things like dirty, cracked light switch plates in . . . special shades of beige.
They also have paint on them from one or two lazy paint jobs. You know, someone who didn’t think to remove (or tape) said covers before paint application. What I’m saying is, it was time for a cute home decor craft to change things up a bit.
This simple Mod Podge project is an awesome way to cover up cruddy light plate covers – and you can even use fabric that matches drapes in the room to tie everything together. This is such an easy craft for adults. Once you try it, you’ll want to do all the plates in your home! Check out this decoupage idea below.
Decorative Switch Plates
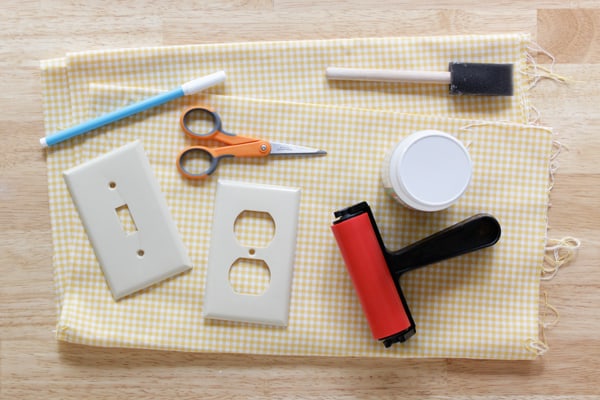
Gather These Supplies
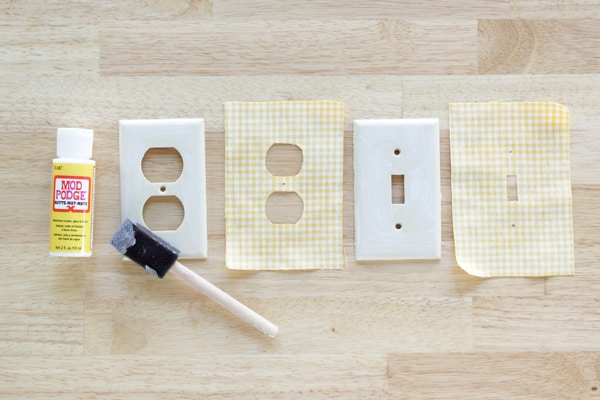
- Mod Podge Matte
- Sponge brush
- Fabric
- Sharp scissors
- Water soluble pen
- Light plate & outlet covers
- Clothespins
- Waxed paper
- Rubbing alcohol
- Brayer (optional)
Directions
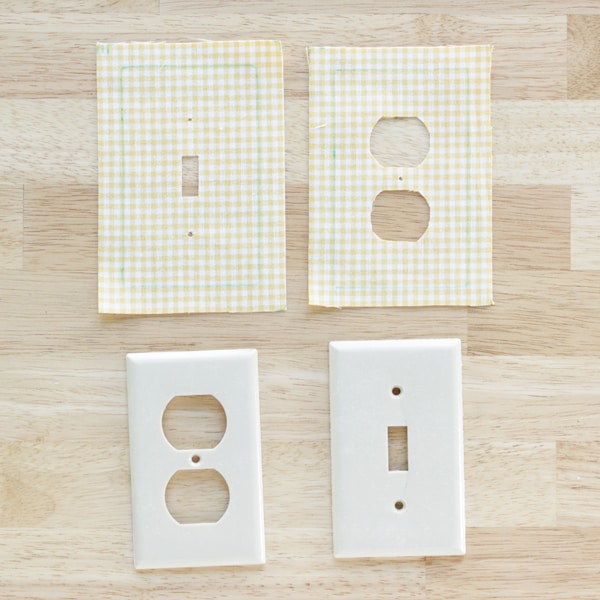
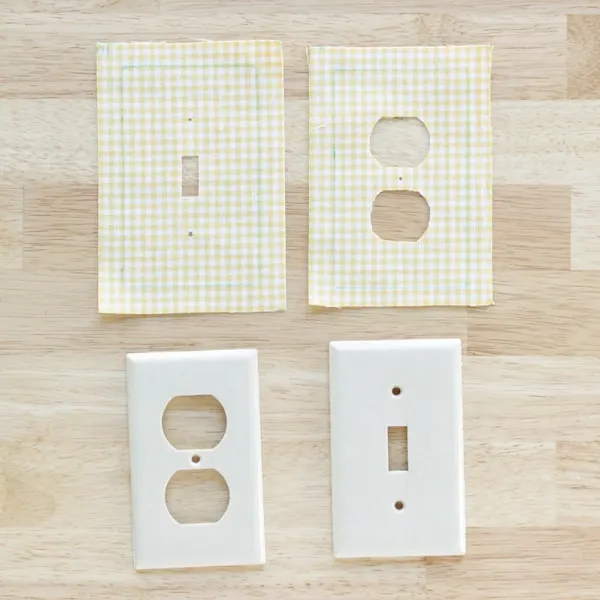
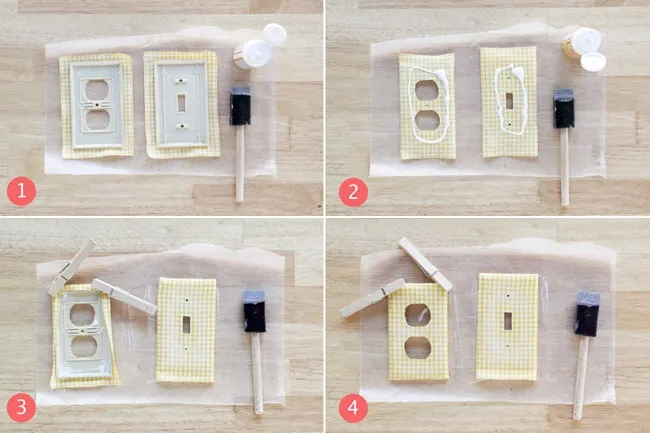
Clean your light plate covers with rubbing alcohol. Trace your outlet and/or light switch cover onto the wrong side of your fabric.
Cut out each tracing with an additional half inch of space between the outer edge of each tracing and the edge of your fabric piece. Also cut out tiny holes for the screws, switches and electrical outlets.
Rinse off the pen lines in the sink and pat your fabric dry; don’t wring it. You want the fabric as smooth and wrinkle free as possible. Since Mod Podge is water-based, it’s okay if your fabric is damp for the next step.
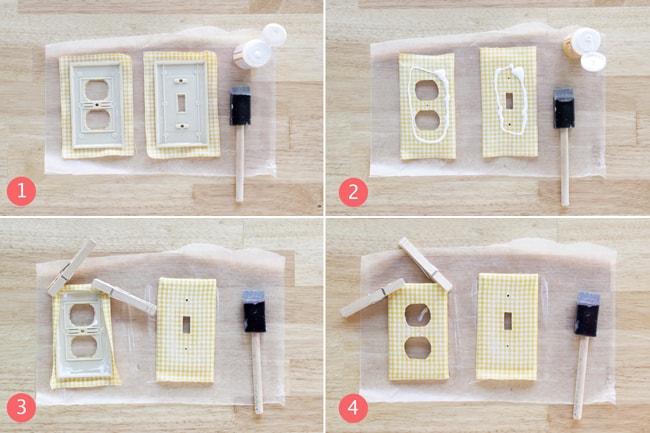
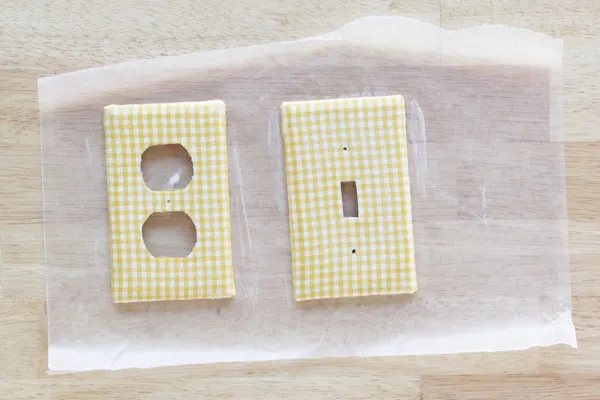
Paint a layer of Mod Podge on your plate covers. Line up your fabric cutouts, wrong side down, on your Podged light plate covers. Be careful to get the screw holes just right.
Turn over your lined up fabric and covers and add some Mod Podge along the edges of the back of each cover. My fabric was upholstery grade – so fairly thick. It didn’t really want to stay in place on the back of the plates.
What worked for me was folding over two edges (see number 2 below) and letting it sit for a half hour. That let the Mod Podge dry enough for the edges to start staying put.
While the edges were drying, I applied a generous layer of Mod Podge over the outside of the front of the plate cover. You’ll want to completely saturate the fabric for this project to be successful.
To get the fabric on the shorter ends of my plate covers to stay, I used clothespins (picture 3) to hold the fabric in place until it’s dried enough to stay in place on its own.
Don’t let the Mod Podge dry completely with the clothespins on because they’ll be stuck to the plates, ruining your project.
Tip: If you get bubbles between your fabric and plates, a brayer is helpful for ironing them out.
Eventually all of the fabric will behave and you can let your plates dry completely, lying face up on waxed paper.

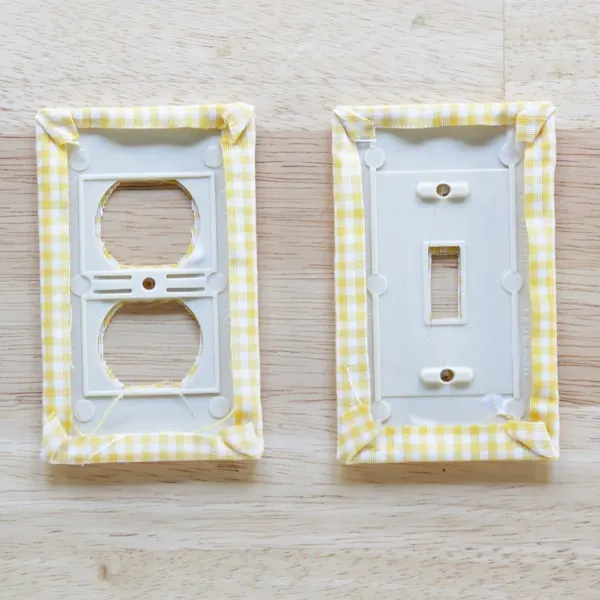
Here’s a look at the backs of your decorative switch plates when they’re all done.

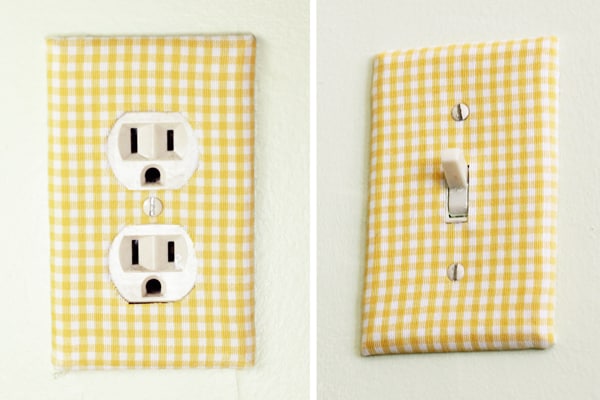
The last step is, of course, screwing the plates in place. Aren’t they cute?
Decorative Switch Plate Covers
Learn how to decorate light switch plates using Mod Podge and fabric! This project is easy, even for a beginner - and what a cute addition to your home decor.
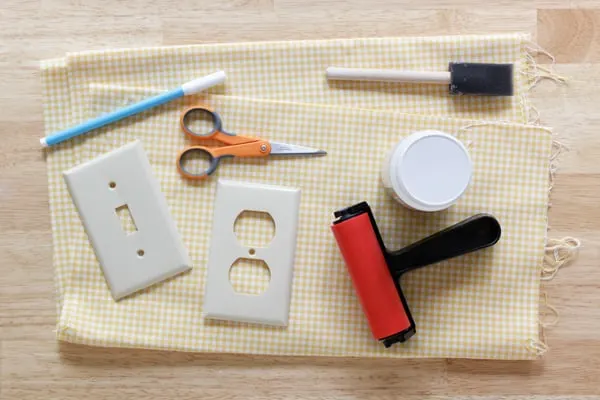
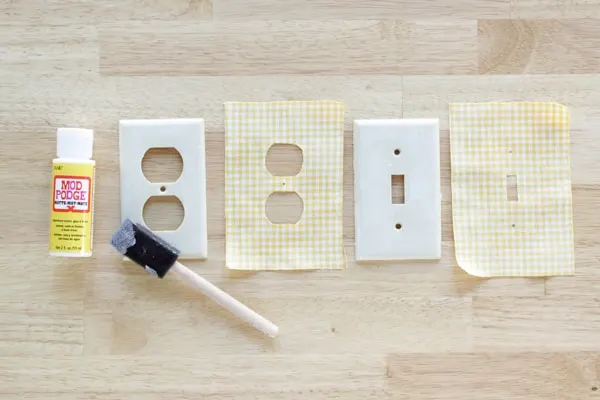
Materials
- Light plate & outlet covers
- Mod Podge Matte
- Fabric
- Water soluble pen
- Rubbing alcohol
- Clothespins (optional)
- Waxed paper
Tools
- Sponge brush
- Sharp scissors
- Brayer (optional)
Instructions
- Clean the light plate covers with rubbing alcohol and let dry.
- Trace the outlet and/or light switch cover onto the wrong side of your fabric.
- Cut out each tracing with an additional half inch of space between the outer edge of each tracing and the edge of your fabric piece. Also cut out tiny holes for the screws, switches and electrical outlets.
- Rinse off the pen lines in the sink and pat the fabric dry; don't wring it. The fabric should be as smooth and wrinkle free as possible. Leave the fabric damp for the next step.
- Paint a layer of Mod Podge on the covers. Line up the fabric cutouts, wrong side down, on the Podged light plate covers. Match the screw holes and smooth with your hands (or a brayer).
- Turn the covers over and add some Mod Podge along the edges of the back of each cover. Fold the edges over and let dry. Use clothespins if necessary to keep in place.
- Apply a generous layer of Mod Podge over the outside of the front of the plate cover and let dry. Repeat with another coat and let dry.
- Screw the plates back into place to finish.
Notes
Don't let the Mod Podge dry completely with the clothespins on because they'll be stuck to the plates. You can use a bit of wax paper if you want to leave them.
Did you enjoy this cute craft idea? I’d love for you to check out these other posts:
Trish Mayer
Thursday 10th of February 2022
I loved the Light plate covers. I can't waite to try it. Thank you so much for all your wonderful DIY projects.
Laura / The Shed blog by Pet Scribbles
Wednesday 24th of July 2013
Totally cute! Thanks for the great tutorial, as I definitely need to do something with the boring off-white switchplates throughout our home!