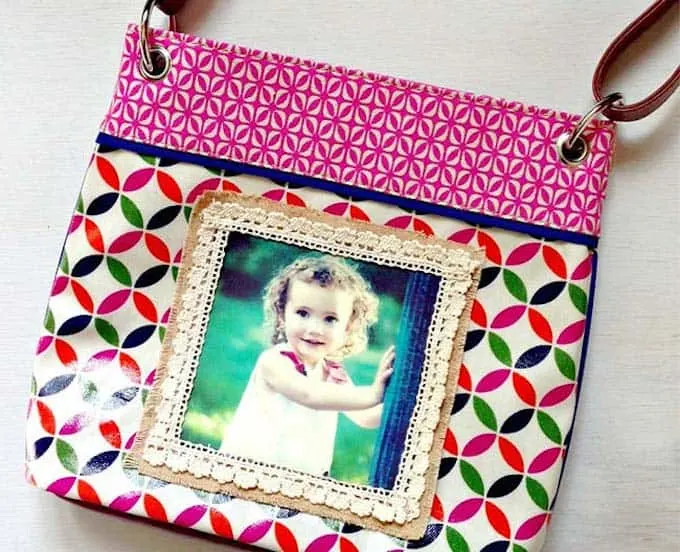
You can make a cute photo purse with a bag you already have in your closet! Use this tutorial to get the look – it’s a great gift idea!
Skills Required: Intermediate. You’ll need to do a photo transfer to fabric for this purse, which takes some experience. I’d try a photo transfer first if you’ve never done one before attempting this project.

If you haven’t tried Mod Podge photo transfer medium, it’s pretty awesome stuff. It does exactly what it promises – transfers photos to surfaces! It’s not a clear/transparent photo transfer; instead, it puts a white background behind the photo.
This makes it nice when doing fashion craft projects like Candie did above – you can put a photo transfer directly onto a printed surface and the background doesn’t show through.
I love Candie’s purse idea, and I think it would be fun to put a picture of one of my dogs on a purse. So that everyone would know (instead of just thinking) that I’m a weird dog lady.
Whose face would you put on a photo purse? Learn how to make this photo craft below.
DIY Picture Purse
Gather These Supplies
- Purse
- Mod Podge Photo Transfer Medium
- Canvas fabric piece
- Color copy of photo (should be laserjet or other dry ink printer)
- Paper towel
- Wax paper
- Sponge
- Ribbons/trim
- Hot glue gun and glue sticks
- Scissors
- Paintbrush
- Fabric glue
Instructions
Measure your purse and print the photo to size. Cut the photo out and lay onto wax paper.
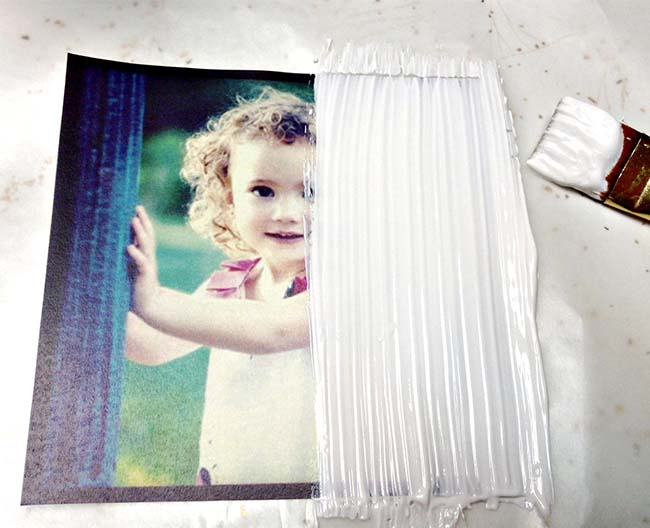
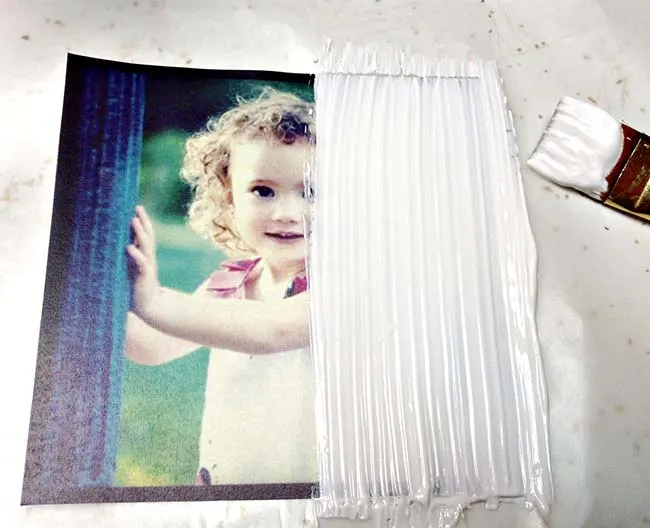
Following the manufacturer’s instructions, paint a thick coat of the MP Photo Transfer Medium onto the printed side of the photo. It’s important that you not be able to see the photo underneath the medium.
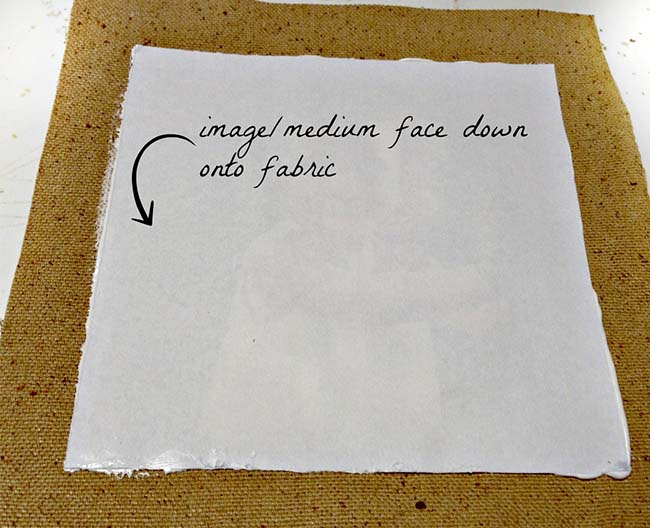
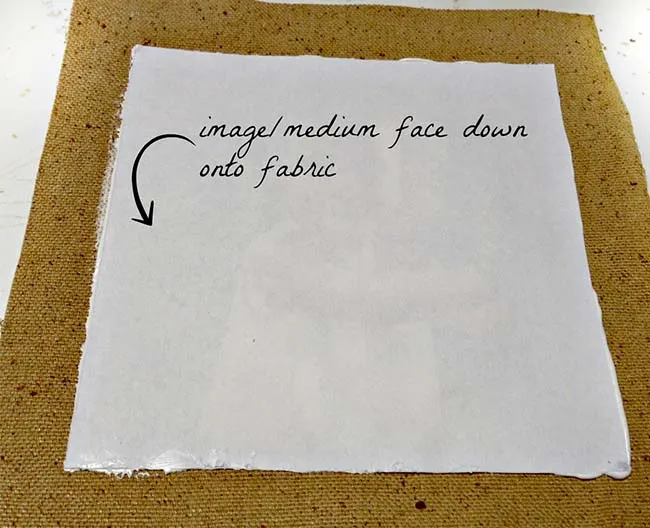
Pick up the photo piece carefully by its edges and flip over onto the piece of canvas. Smooth the photo piece down lightly with your fingers. Wipe up any excess with a paper towel. Allow to dry for 24 hours.
Note: you want to smooth, but you don’t want all the medium to squeeze out the sides. You will not smooth the same way you do with regular Mod Podge – go lightly.
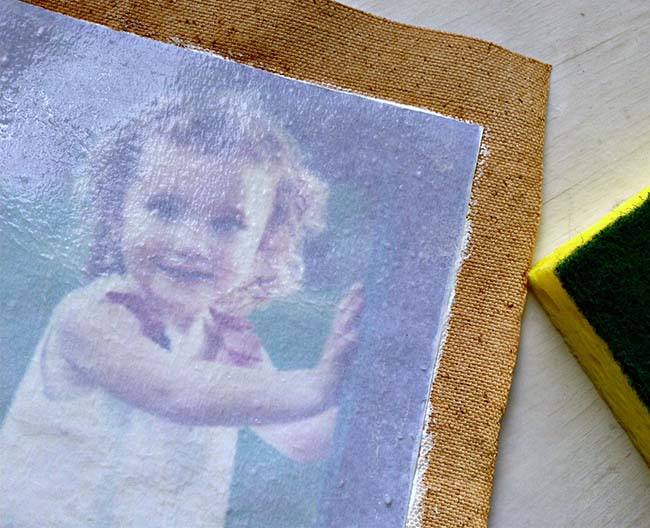

Once dry, dampen the paper backing with a sponge and let sit for two minutes.
Remove the paper backing by rubbing in a circular motion with a sponge. Take care not to rub through the photo.

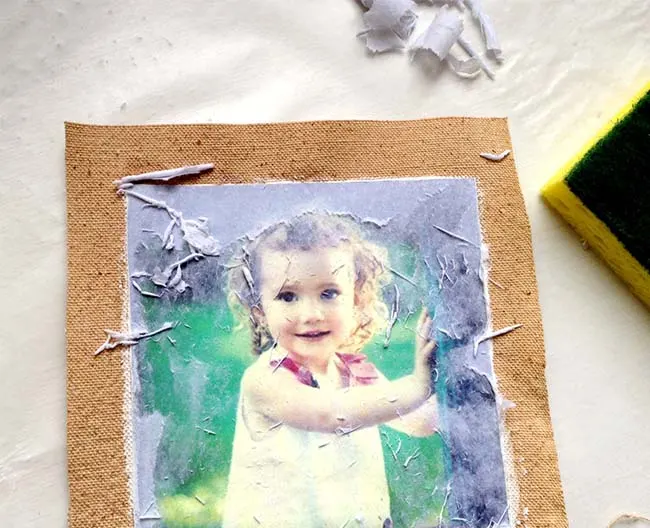
When the paper is removed, leave the photo piece to dry. Once dry, there may be areas that need more paper removed.
Once the photo piece is ready, trim out the photo with ribbons and embellishments applied with hot glue. If there is any medium around the edges, the trim will cover it.
Glue the photo piece to the purse. Let dry completely before using.
DIY Photo Purse
Learn how to make a photo purse using Mod Podge photo transfer medium! This makes a perfect gift idea.
Materials
- Purse
- Canvas fabric piece
- Mod Podge Photo Transfer Medium
- Color copy of photo (laserjet or dry ink)
- Paper towel
- Wax paper
- Sponge
- Ribbons/trim
Tools
- Hot glue gun and glue sticks
- Scissors
- Paintbrush
Instructions
- Print out the photo at the size desired. Cut out with scissors and lay on wax paper.
- Paint a thick coat of the Photo Transfer Medium onto the printed side of the photo. It’s important that you not be able to see the photo underneath the medium.
- Pick up the photo piece carefully by its edges and flip over onto the piece of canvas. Smooth the photo piece down lightly with your fingers. Wipe up any excess with a paper towel. Allow to dry for 24 hours.
- Once dry, dampen the paper backing with a sponge and let sit for two minutes.
- Remove the paper backing by rubbing in a circular motion with a sponge. Take care not to rub through the photo.
- When the paper is removed, leave the photo piece to dry. Once dry, there may be areas that need more paper removed.
- Once the photo piece is ready, trim out the photo with ribbons and embellishments applied with hot glue.
- Glue the photo piece to the purse.
Notes
Cost assumes you are using a purse you already have on hand - which is what I did.
If you enjoyed this photo purse tutorial, I’d love for you to check out these other ideas!
Shelia
Wednesday 14th of February 2024
Can you transfer a picture to something like a Stanley water container
Amy
Wednesday 14th of February 2024
Hi Sheila! Unfortunately no, those surfaces are a special coated metal. I use vinyl stickers on my Yeti and those seem to be waterproof. I'm sure you can get vinyl stickers printed somewhere (I just use preprinted ones and they are great in the dishwasher).