You don’t need a fancy die cutter to make subway art! David will show you how to get this distressed subway art using your computer and Mod Podge.
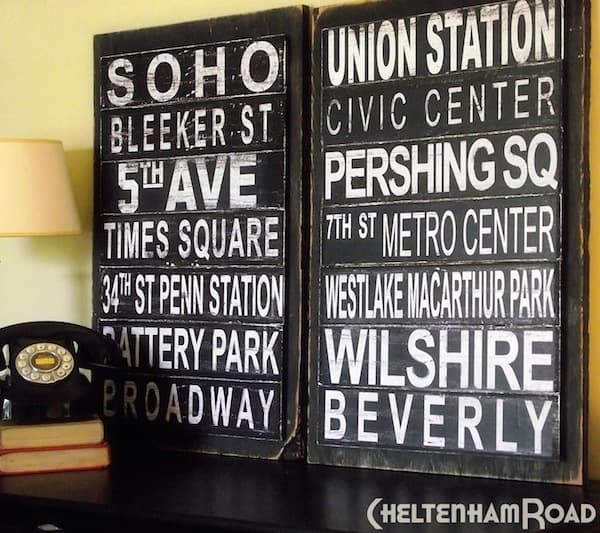

I think it’s so cool that Man Podger David is bi-coastal – he’s spent amounts of time in both Los Angeles and NYC! In this post, David will show you how to make subway art to commemorate his fave cities – and you don’t need a fancy die cutter!
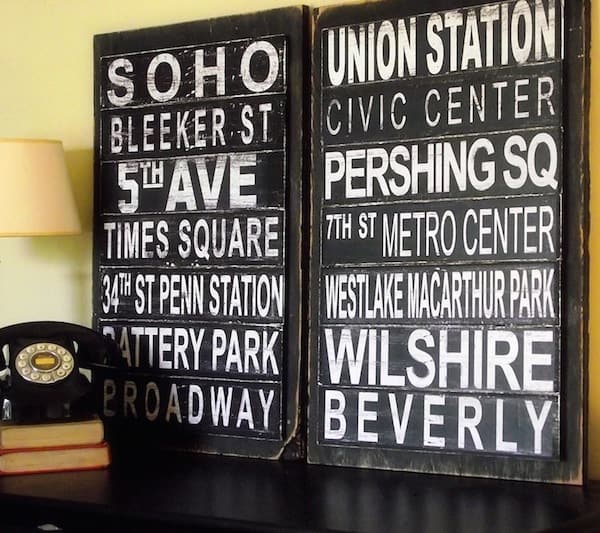
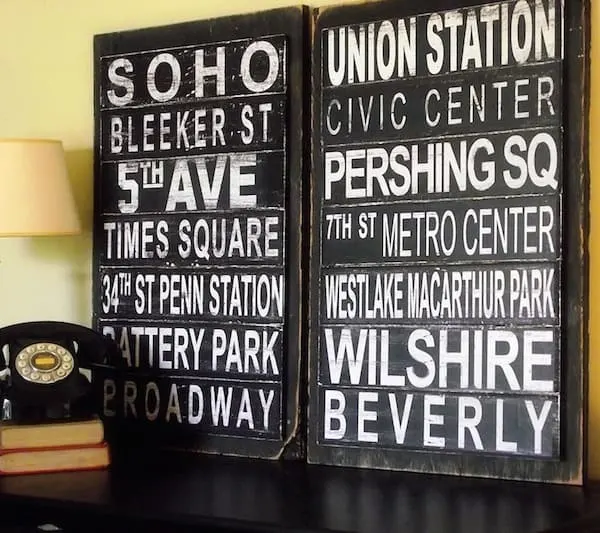
I like the panels that raise the names of the places up a bit, giving this decoupage idea a lot of texture. These panels would look smashing on my wall (how about in dark teal??).
Here’s David to tell you how to make subway art. PS – you don’t need a die cutter to make these signs. You just need Microsoft Word!
I’m perhaps a bit late to the party, but I’m totally hooked on subway art. I wanted to create something that represented my two “home” cities (LA and NYC) and I wanted something a little different than what I’ve seen. The goal was to create something fun and spend as little as possible.
DIY Subway Art

For the Backboard:
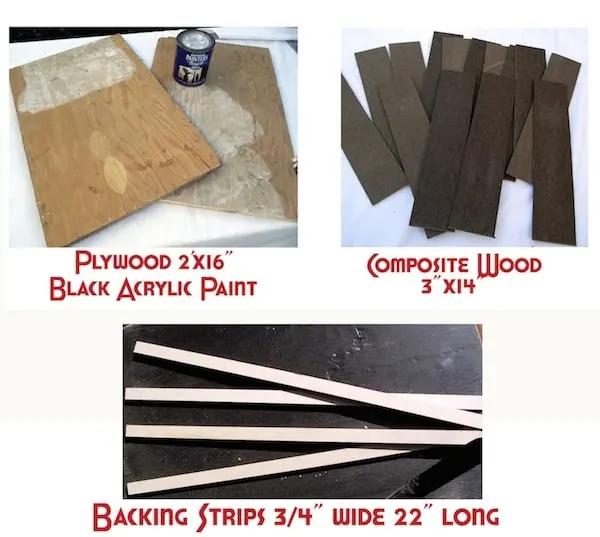
- Two plywood pieces cut to 2’ x 16” rectangles
- Black and white acrylic paint
- For the street signs/slats I used strips of composite wood cut into 3”x14” strips (you could use craft wood from Michaels, MDF, anything that was fairly sturdy and thin)
- Four more strips of scrap wood ¼ thick and 22” long – any wood will do – you won’t see them
In addition I used:
- A scanner and printer
- An old candle
- 80-grit sandpaper
- Mod Podge Matte
- Foam brush
- Hot glue gun
- Matte acrylic spray sealer
- Electric sander (optional)
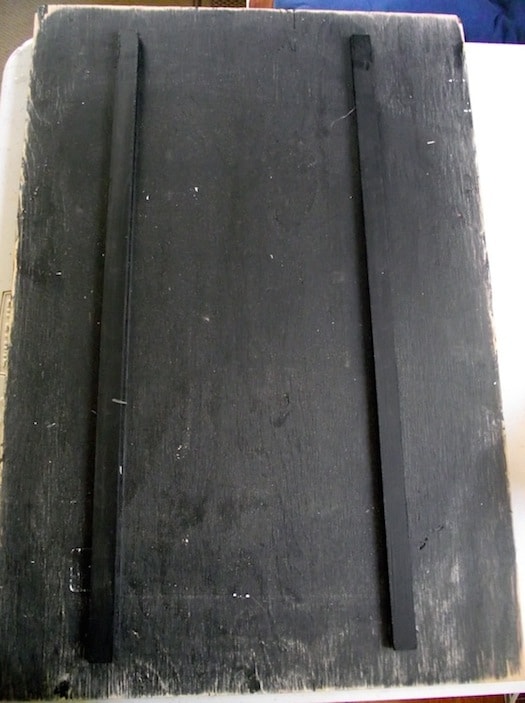
Step 1: Prep the Boards
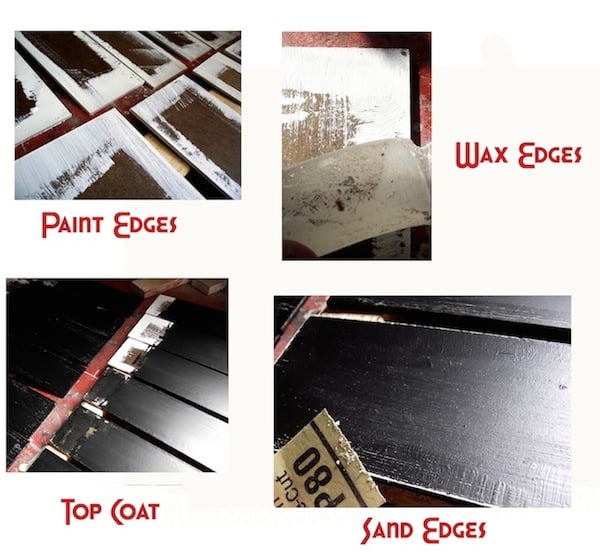

Paint the edges and sides of the composite wood slats with white acrylic paint. Let dry.
After the paint is dry, rub your candle over the white paint on various parts of the slats. This will be your distressing.
Paint the slats with black acrylic paint and let dry. At the same time, paint the plywood backboard and scrap wood strips. Let dry.
Use the 80-grit sandpaper to sand the edges of the slats. This will reveal some of the white paint beneath, and give a distressed look to the project. Don’t sand too hard, just enough to reveal the paint in some areas.


At this point, you can use a power sander to distress the edges of the backer board.
Step 2: Make the Street Signs
I don’t have a vinyl cutter, I didn’t want to cut out each letter by hand and my stenciling skills are lacking (to say the least). I decided to do it on the computer using Microsoft Word.
Here’s how I did it.
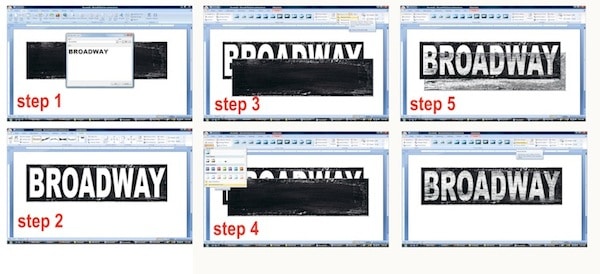
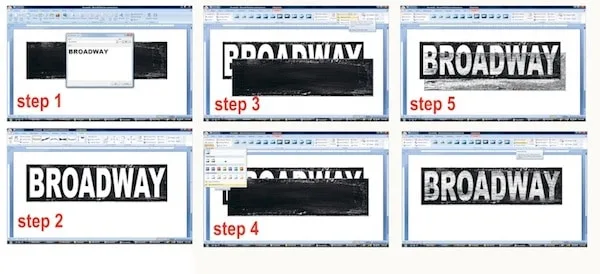
Scan a couple of the finished slats and save them as jpegs. Open a new document (legal sized, landscape orientation) and insert one of the jpegs of the slats.
Create the lettering in the font of your choice. Set the text wrapping option to “in front” and resize to fit the front of a slat.
Make a copy of the scanned slat and bring it to the front. Choose the “recolor” option from the Format menu and clicked on a black section of the image. This wipes out most of the black in the image, leaving you with a rough, distressed texture.
Move that layer in front of the lettering and you have instant distressing!
To create variations (so they all didn’t look alike), I scanned a couple of my pieces of wood and then simply rotated them or cropped and stretched them.
After that, I just printed out my signs and trimmed them to fit the slats and, using Mod Podge, attached them.
There was a bit of a difference in sheen between the painted wood slats and the decoupaged paper, so I used two coats of a matte spray acrylic finish to balance them out.
Step 3: Finish the Art
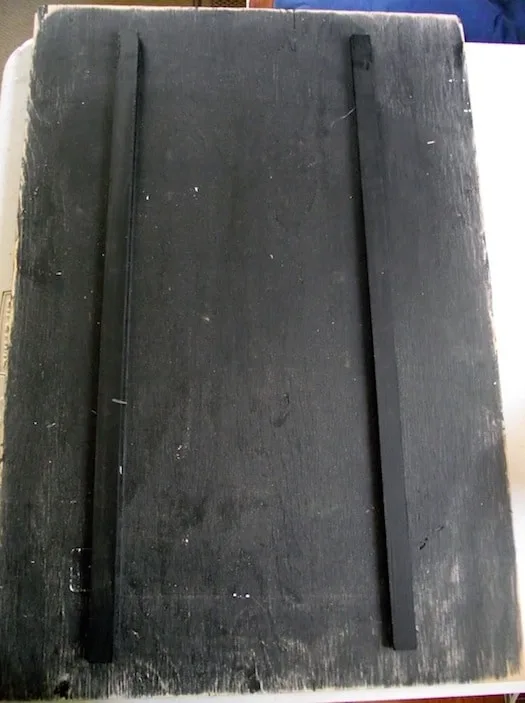
Next I hot glued my support strips in place. Then I attached the street signs to the strips – again using the glue gun. That’s how to make subway art!
I realize some of the MS Word stuff may be confusing, so I will monitor the comments and if you have any questions please don’t hesitate to ask. Thanks!
DIY Subway Art
Learn how to make subway art with this unique tutorial - no die cutter required!
Materials
- Two plywood pieces cut to 2’ x 16”
- Acrylic paint - black, white
- Composite wood strips, 14 - cut to 3" x 14" each
- Scrap wood, 4 - 1/4" x 22"
- An old candle
- 80-grit sandpaper
- Mod Podge Matte
- Matte acrylic spray sealer
Tools
- A scanner and printer
- Foam brush
- Hot glue gun
- Electric sander (optional)
Instructions
- Paint the edges and sides of the composite wood slats with white acrylic paint. Let dry.
- After the paint is dry, rub your candle over the white paint on various parts of the slats.
- Paint the slats with black acrylic paint and let dry. At the same time, paint the plywood backboard and scrap wood strips. Let dry.
- Use the 80-grit sandpaper to sand the edges of the slats. This will reveal some of the white paint beneath, and give a distressed look to the project. Don't sand too hard, just enough to reveal the paint in some areas.
- At this point, you can use a power sander to distress the edges of the backer board. This is optional.
- Scan a couple of the finished slats and save them as jpegs. Open a new document (legal sized, landscape orientation) and insert one of the jpegs of the slats.
- Create the lettering in the font of your choice. Set the text wrapping option to "in front" and resize to fit the front of a slat.
- Make a copy of the scanned slat and bring it to the front. Choose the “recolor” option from the Format menu and clicked on a black section of the image.
- Move that layer in front of the lettering and you have instant distressing! To create variations (so they all didn’t look alike), I scanned a couple of my pieces of wood and then simply rotated them or cropped and stretched them.
- Print out the signs and trim them to fit the slats. Use Mod Podge to attach and then let dry for 15 - 20 minutes before applying a top coat. Let dry.
- Hot glue the support strips in place. Attach the signs to the strips. Let cool before displaying.
Michelle
Wednesday 5th of February 2014
I see that David said he makes these to order. How can I order one??? I know that I will NEVER be able to be able to do the MS WORD modifications and I am very good with the computer but that made no sense to me! I figured it might have been easier for me to just order one!
Beth
Monday 27th of January 2014
Hi! This is the first time I've ever left a comment on a site. I read you were having trouble with wrinkles in your mod podge projects. Something I've tried and works great is to apply a thin coat of the mod podge to the area you plan to attach (the wood) and apply a thin coat to the back side of your design (lettering in paper). Let them both dry. Then continue as you normally would attaching letters to wood using mod podge. Just make sure that you dont over do the coats of mod podge each application should be thin. May take a tiny bit longer but well worth the couple extra minutes. I really hope this will help and would love to here if it helps out or not. Love, Georgia
dorelle
Friday 31st of May 2013
Hi what version of Ms Word did you use for this I could not find word art or a bunch of other things that you referred to on my MS Word which is 2003 I believe. Thanks
Kristina
Wednesday 24th of April 2013
Is there anyway you can upload the jpegs of the wood you created for us to download?
Andrea
Monday 8th of April 2013
Love the look of this! I was able to find the "recolor" option on Word, but it won't let me use it. It's "gray" in color, rather than black, and can't be selected. I don't know if that makes sense? I can see it, but not select it. Any advice on this? Thanks!