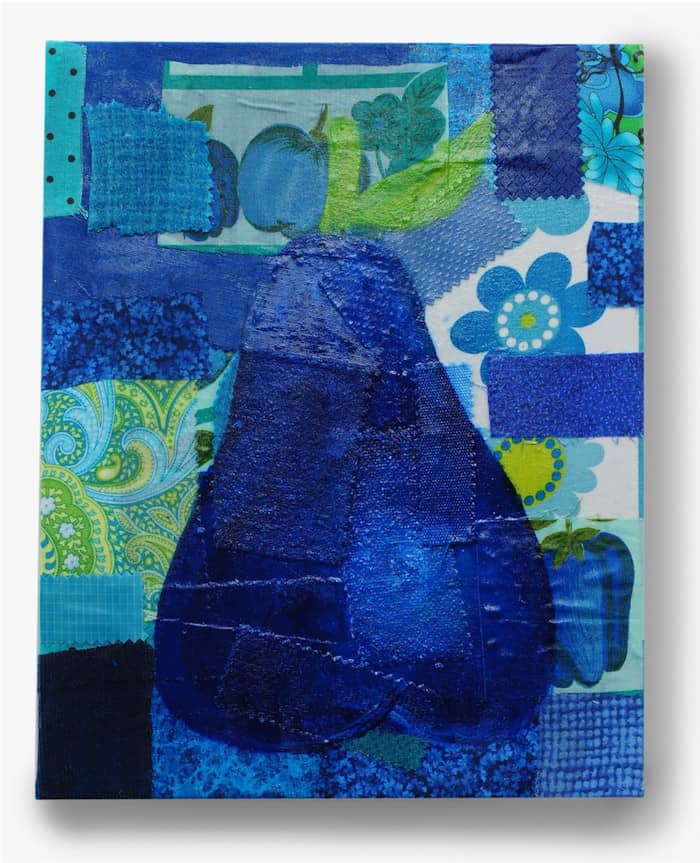
I made this canvas at Brave Girls Camp, and I wanted to share it with you – share my pear, if you will allow me to. I can and will try to describe Brave Girls Camp at some point, but it takes awhile to absorb the experience and talk about it. I will soon.
I can tell you that one of the big things I focused on while I was at BGC was completing the projects I WANTED to do. I don’t mean to sound selfish at all . . . I know that as women (the few men who read this blog too!), you can definitely relate to the pressure of meeting everyone else’s expectations.
And believe it or not, I have gone through periods with this blog of feeling like I was drowning, not posting projects of my own because I thought you would hate what I did.
I didn’t put the time or effort into those projects that I should have, for a million reasons. I accepted guest postings that I shouldn’t have, not because I didn’t want to, but because I over committed myself and that wasn’t responsible.
Brave Girls Camp is about discovering truth. The nice part (and scary part) about truth is that it’s there no matter what you do. I came to terms with a lot of things, good and bad, about my work.
I accepted the fact that I can’t do everything and that I owe people some apologies for the poor job I have done in the past. So to those people who I have let down, I’m sorry.
On the positive side I became more appreciative of you, the readers of this blog. I have the most amazing blog community in the world (in my humble opinion), and you are the nicest, most amazing people I’ve ever met. Thank you.
So how did I make this collage pear? Gather these supplies:
- 16″ x 20″ canvas
- Fabric bits – all that you can find in coordinating colors
- Mod Podge Gloss
- FolkArt Acrylic colors – Brilliant Blue, Cobalt, Wicker White, Citrus Green, Lime Green
- Flat paint brushes – two
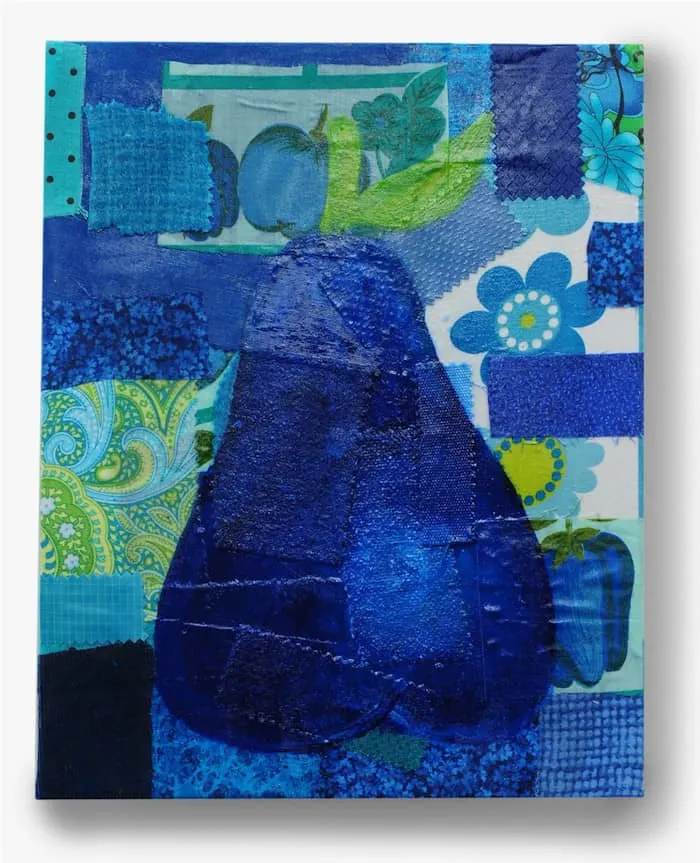
- Begin by layering your fabric pieces on top of your canvas with the Mod Podge. This is so fun and SO messy – I love it! Layer, layer, layer until every exposed part of the canvas is covered. Coat the entire canvas with Mod Podge and allow to dry.
- Paint your pear shape (or the shape of your choice) with the Brilliant Blue. This is so loosey-goosey. I just eyeballed it, because it didn’t matter that it was exact. Fill in the pear shape (it will take a couple of coats) and allow to dry.
- Paint the shape of the stem with Lime Green. Fill in and allow to dry.
- Go back with your Cobalt and Wicker White and add some accents to the pear. I actually used the Cobalt first and then used the Cobalt mixed with some Wicker White to create the main highlight. Play around. You can always go back over it until you are happy – trust me, I did! Allow to dry.
- Accent the stem with Citrus Green. Allow to dry.
- Allow the canvas to dry for 24 hours before hanging.
Let me tell you, after this first one I was ready to do a series! I love mixing fabric, Mod Podge and paint. It’s one of life’s little pleasures.
If you enjoyed this DIY canvas idea, let me know in the comments!
Fawnda@Fireflies and Jellybeans
Monday 23rd of August 2010
Love love love! You ROCK! : )I featured you here:https://mommylikewhoa.com/
creativejewishmom/sara
Thursday 19th of August 2010
Love it Amy! So glad you got to go to camp and dropped by to share a project, great to see you on Craft Schooling sunday! xoxoxo Sara
Sonya@Beyond the Screen Door
Thursday 19th of August 2010
Beautiful colors! Beautiful concept! I've bookmarked this and would really like to give it a try!Thanks so much for sharing and the tutorial!
Rachel@oneprettything.com
Wednesday 18th of August 2010
Ooh that brilliant blue is gorgeous! Brave Girls Camp sounds like it was such a great experience. =) Thanks for the project, I'll be linking.
Kim -today's creative blog
Tuesday 17th of August 2010
You had me at Pear! Don't forget to link to me. :)