Use this recipe to make salt dough ornaments that double as personalized gift tags – both kids and adults will love this EASY craft. Preserve the ornaments with Mod Podge.
Skills Required: Beginner. You’ll make salt dough according to the recipe, cut your shapes, and then bake it. Then you’ll paint and Mod Podge the resulting ornaments. Anyone can do this project without prior experience.


I have a confession to make: I LOVE wrapping gifts. Presentation may not be everything, but it’s worth a lot in my book. When I can add a unique, handmade, and thoughtful topper to my gifts, I’m definitely going to take the time to do so.
In addition to gift wrap, I also love Christmas ornaments. Especially something personalized, that I can make myself. “So what,” I thought, “if I can combine the two together?” So I did. AND they are a perfect craft for adults or winter boredom buster for kids. You’ll really enjoy making these!
DIY Salt Dough Ornaments
These salt dough ornaments, sealed with my new favorite Mod Podge (Sparkle!), are perfect for adding a personalized touch of fun to your gift wrap. Then, of course, you can hang them on your Christmas tree instead of throwing them away as you would a typical gift tag.
How to Make Salt Dough
Salt dough is easy to make with ingredients you probably already have in your kitchen! Our salt dough recipe is made with flour, salt, and water. It’s *really* easy and you can’t mess it up. The only thing I ask is that you don’t eat the dough, or let your children eat it. It tastes terrible anyway!
Preserving the Ornaments
You have a few options for preserving your ornaments. Before you do any preservation, you’ll want to paint them (if you want to use paint). You can paint the entire ornament or partial . . . and I recommend acrylic paint.
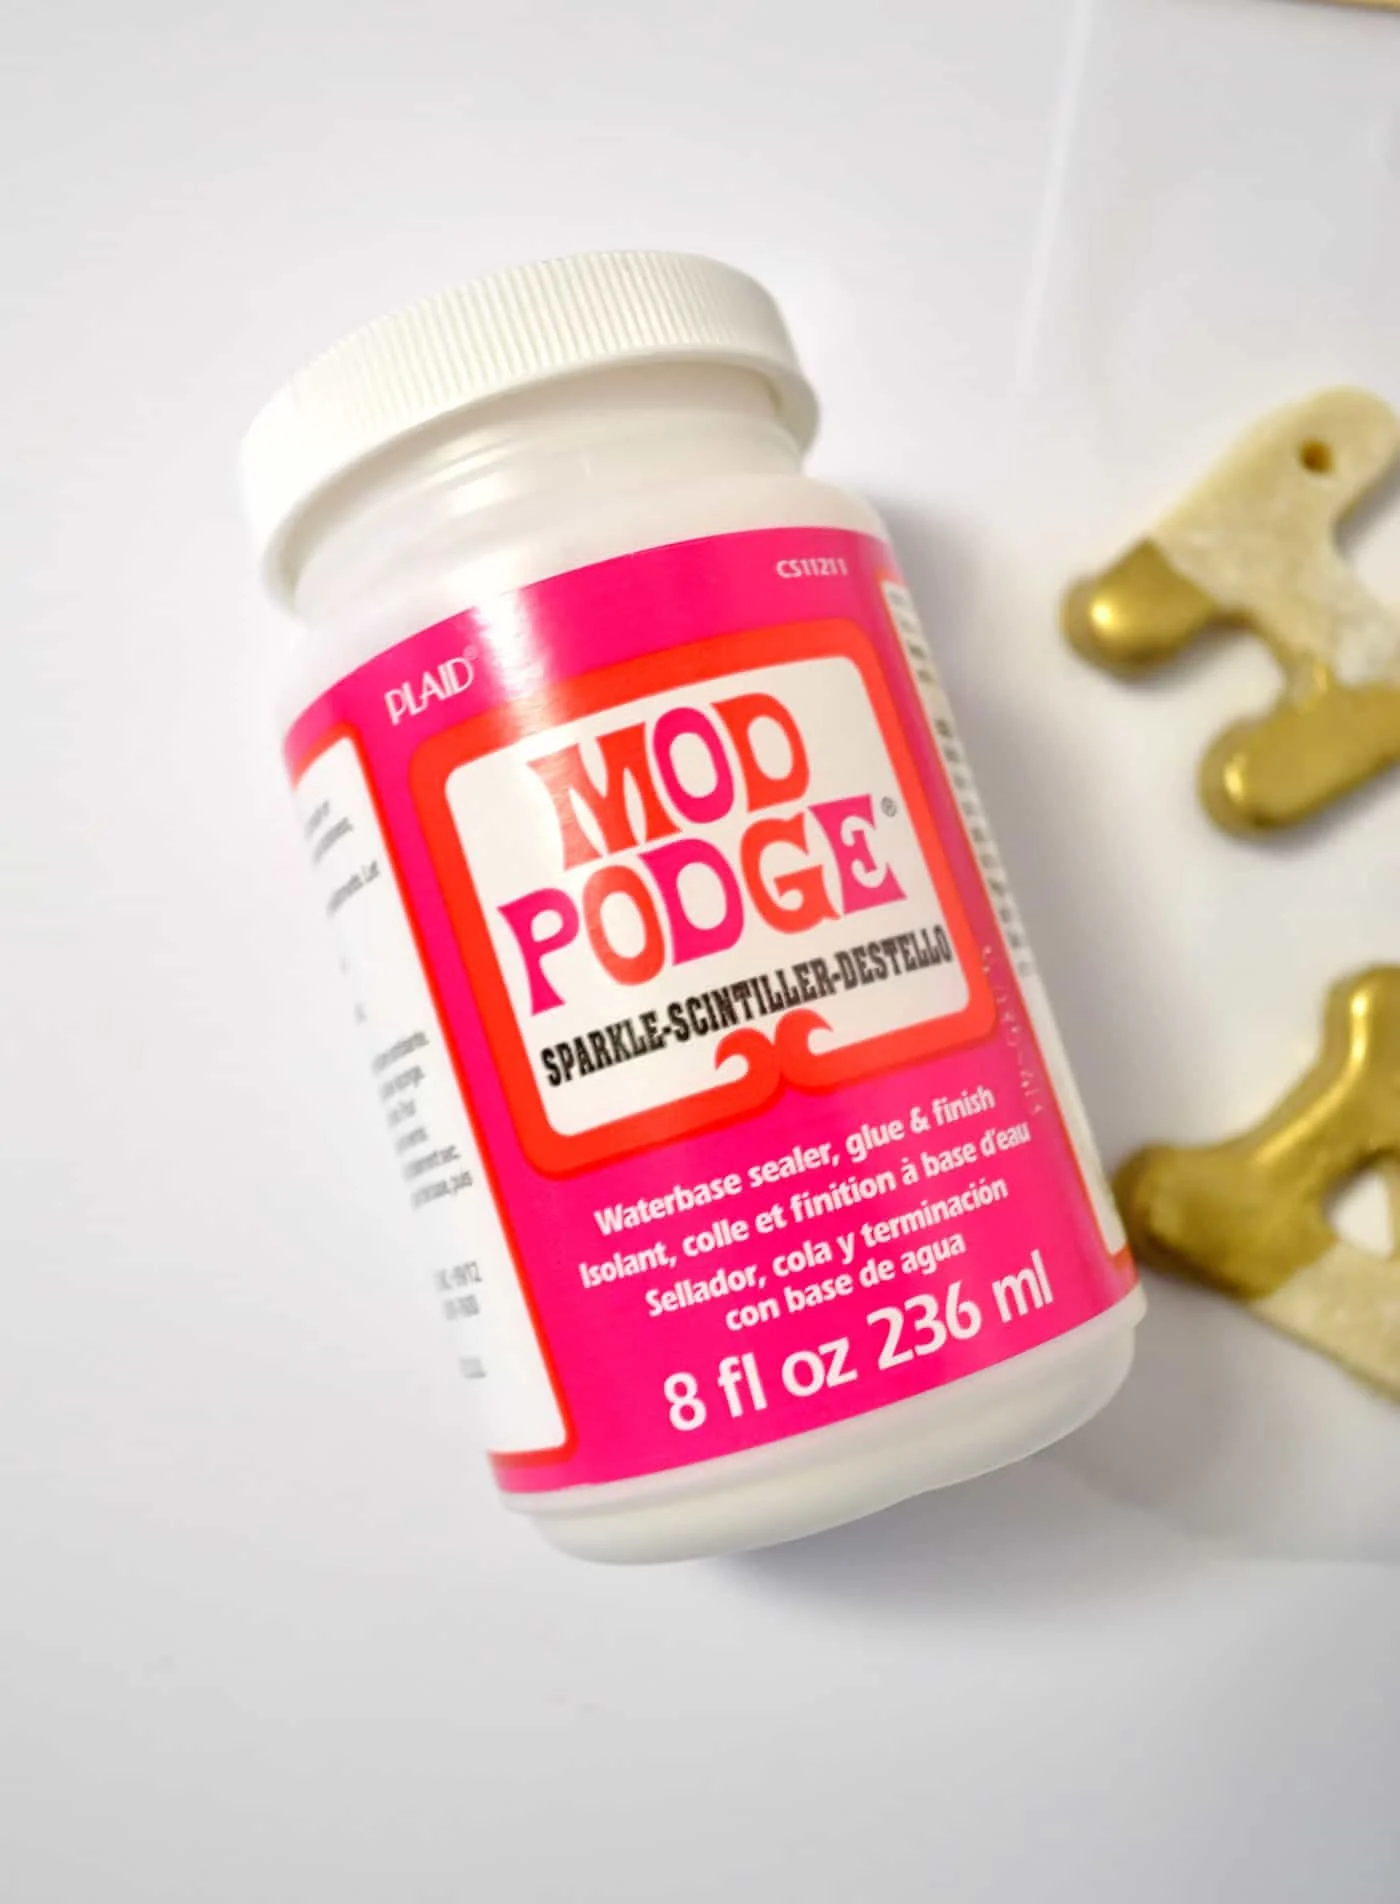
After that you can do one of two things. You can seal the ornaments with Mod Podge (giving them a few coats) or you can use a spray sealer. Or both. In this project, we’re using Sparkle Mod Podge to both seal the ornament and add a bit of bling to the project. So Mod Podge serves double duty in this instance!
The finish you use to preserve the salt dough is up to you – pick Satin, Gloss, or Matte depending on what you like. My personal favorite (besides the Sparkle) is a Satin finish.
How Long do Salt Dough Ornaments Last?
If you preserve your ornaments properly, salt dough can last for years. I have some dough ornaments from my childhood, so they would be at least 35 years old. They are still in great condition and there’s been no disintegration whatsoever!
Salt Dough Recipe
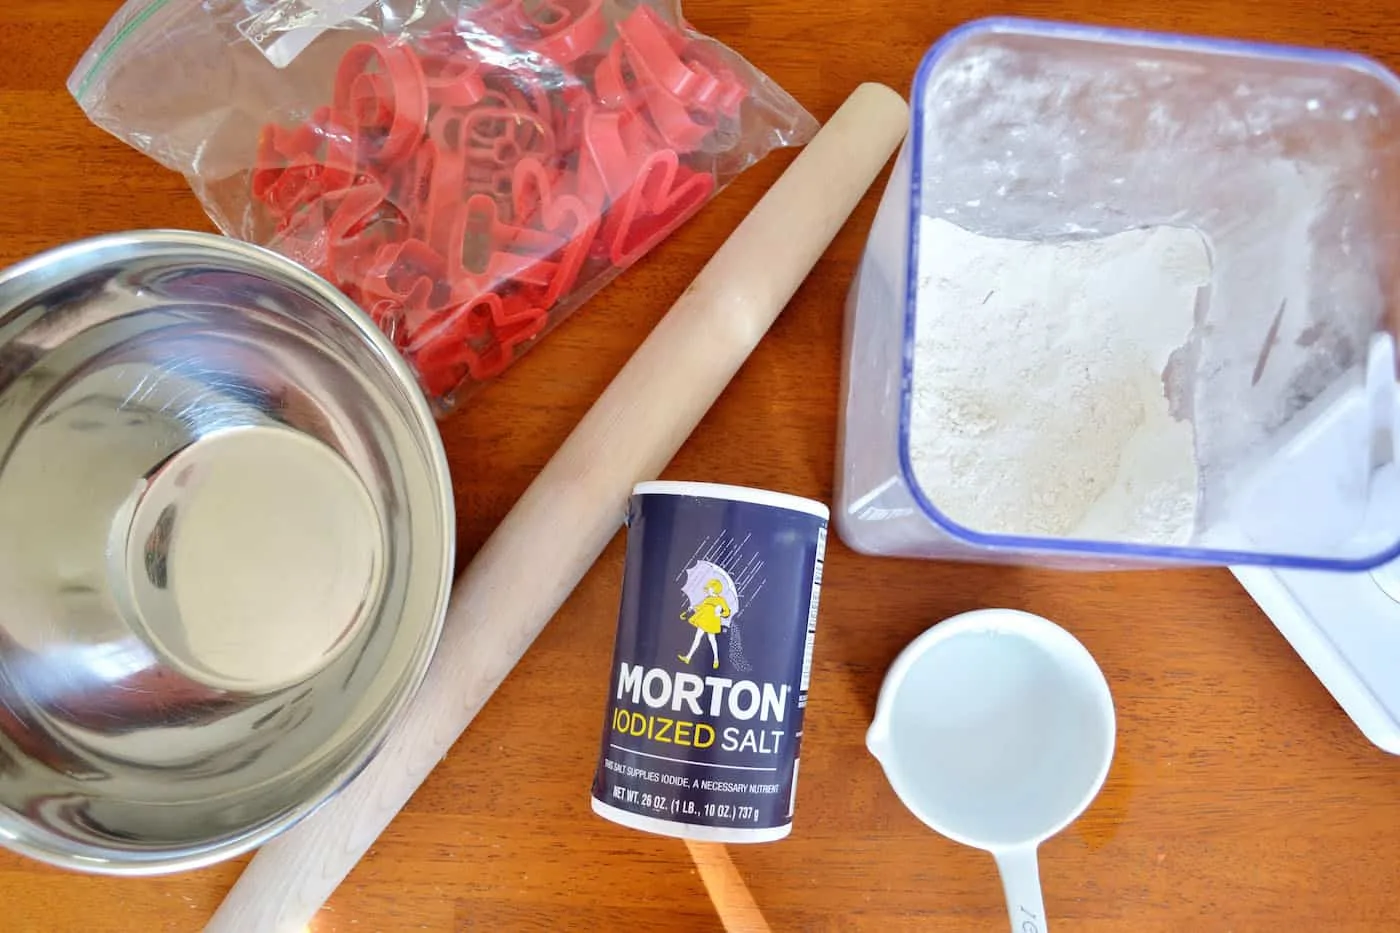
Gather These Supplies
- 2 cups flour
- 1 cup salt
- 3/4 – 1 cup water
- Initial cookie cutters
- Mod Podge Sparkle
- Paint for dipping (if desired)
- Twine or ribbon for hanging

Step 1: Make your dough by mixing your flour, salt, and water. If your dough is too dry, add a bit more water, if it’s too wet, just add more flour . . . salt dough is very forgiving; it’s hard to mess it up!

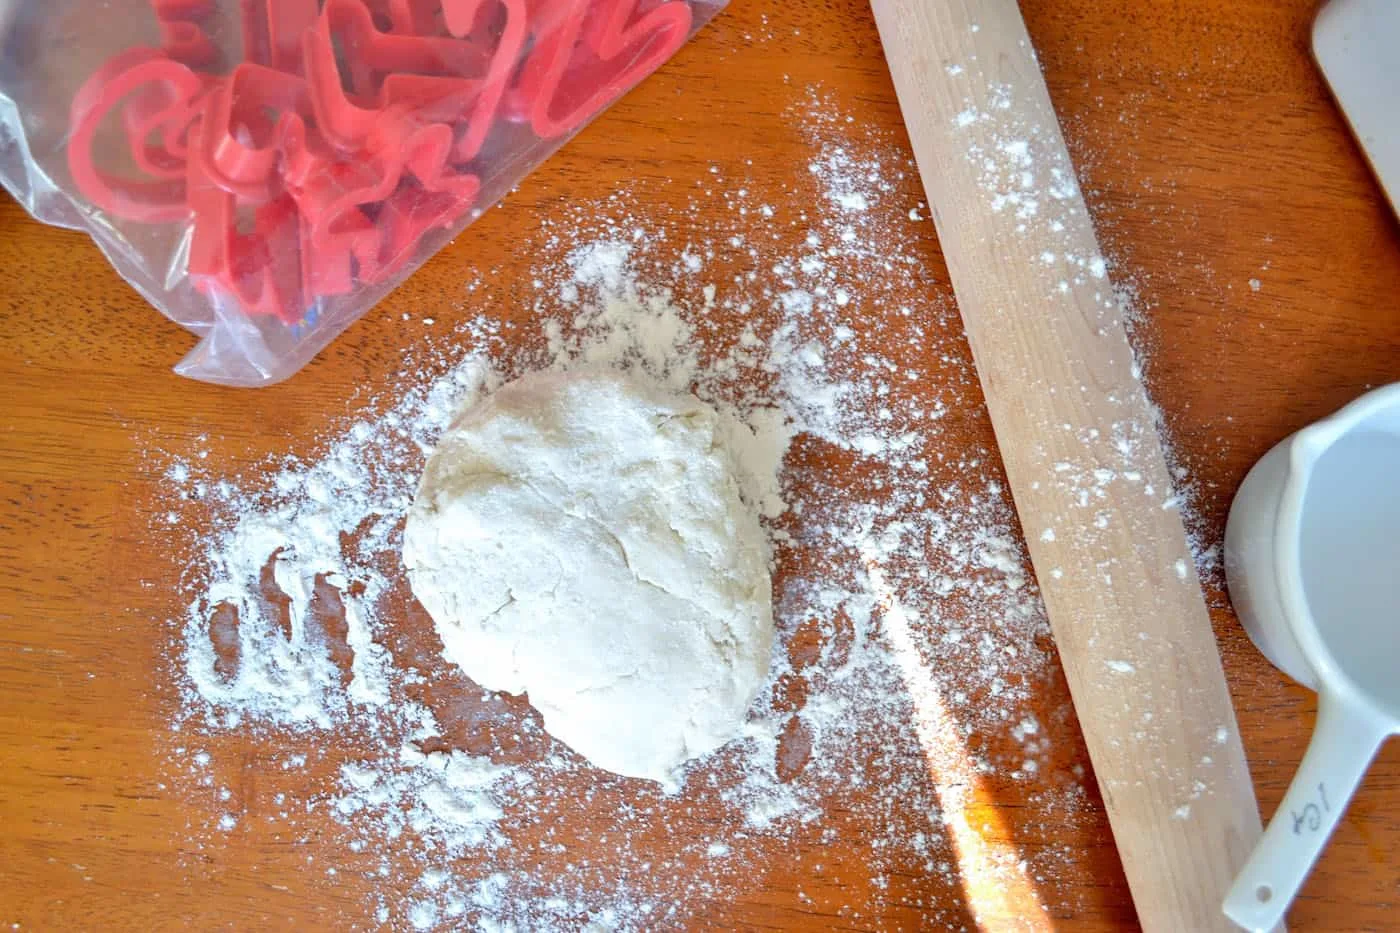
Step 2: Roll out your dough and cut out your initials. Place on a sheet pan lined with parchment paper. You can cut your salt dough ornaments into any shape you like. I did letters, but you can use any cookie cutter shape you find.


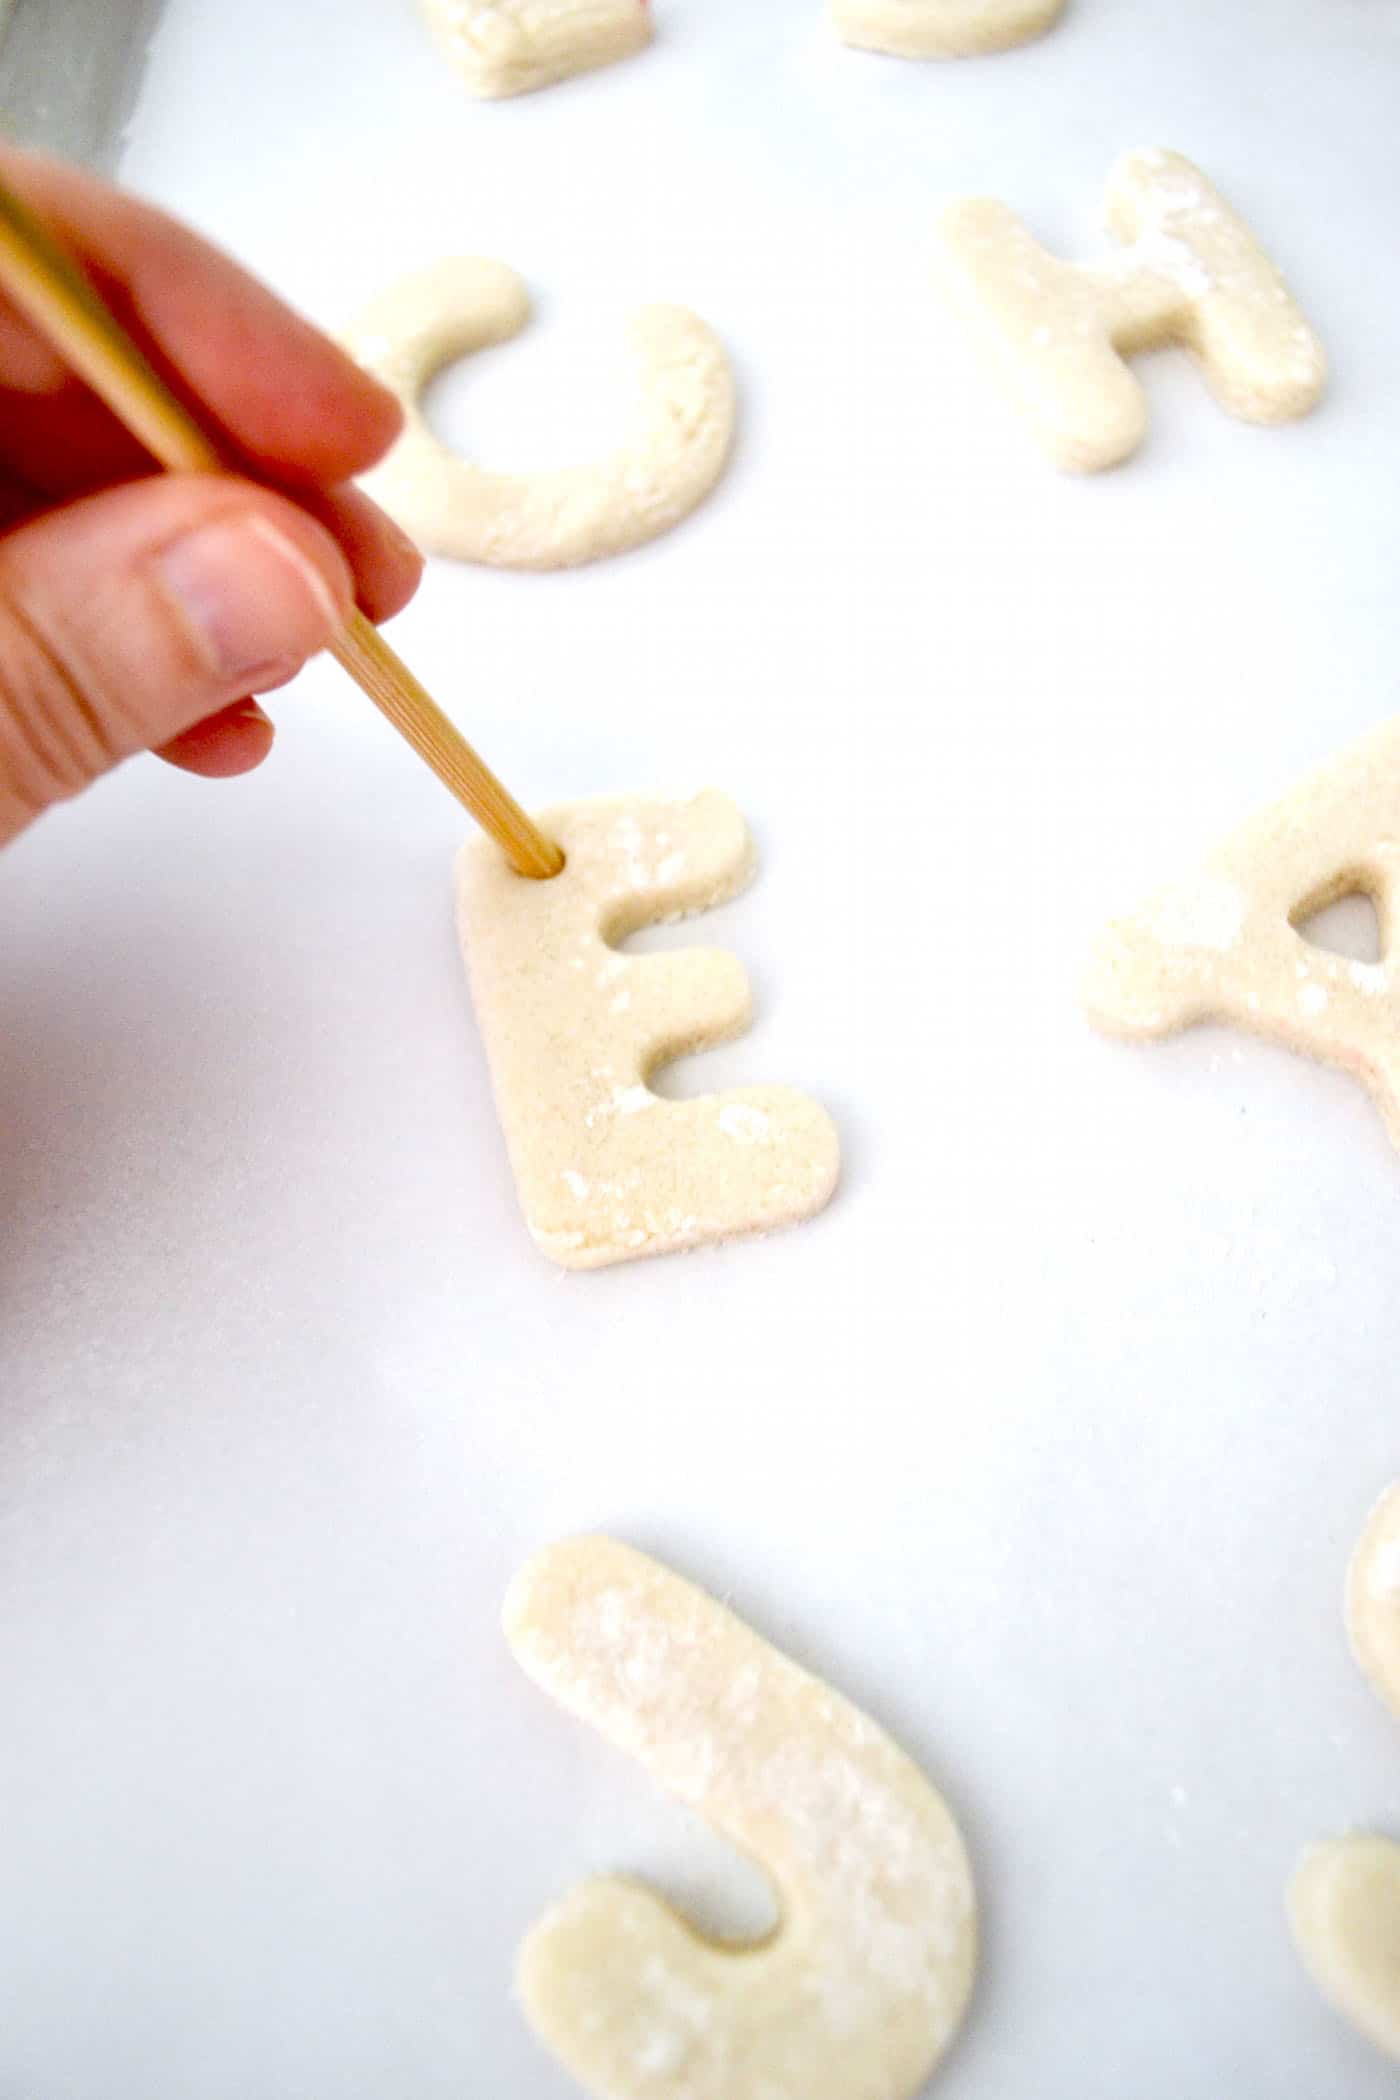
Step 3: Use the end of a skewer to poke a hole at the top of each initial for hanging. Bake at 250 degrees for 2 – 3 hours. Let cool.

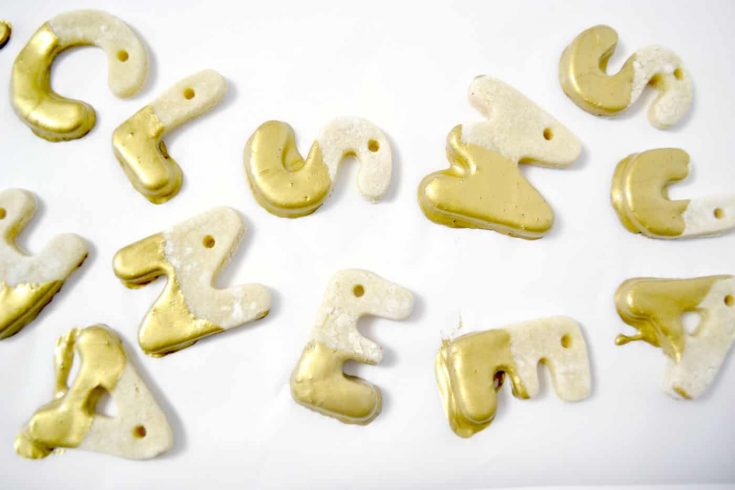
Step 4: I decided to dip my salt dough ornaments in gold paint (which I added to a cup and mixed with about a tablespoon of water to thin).

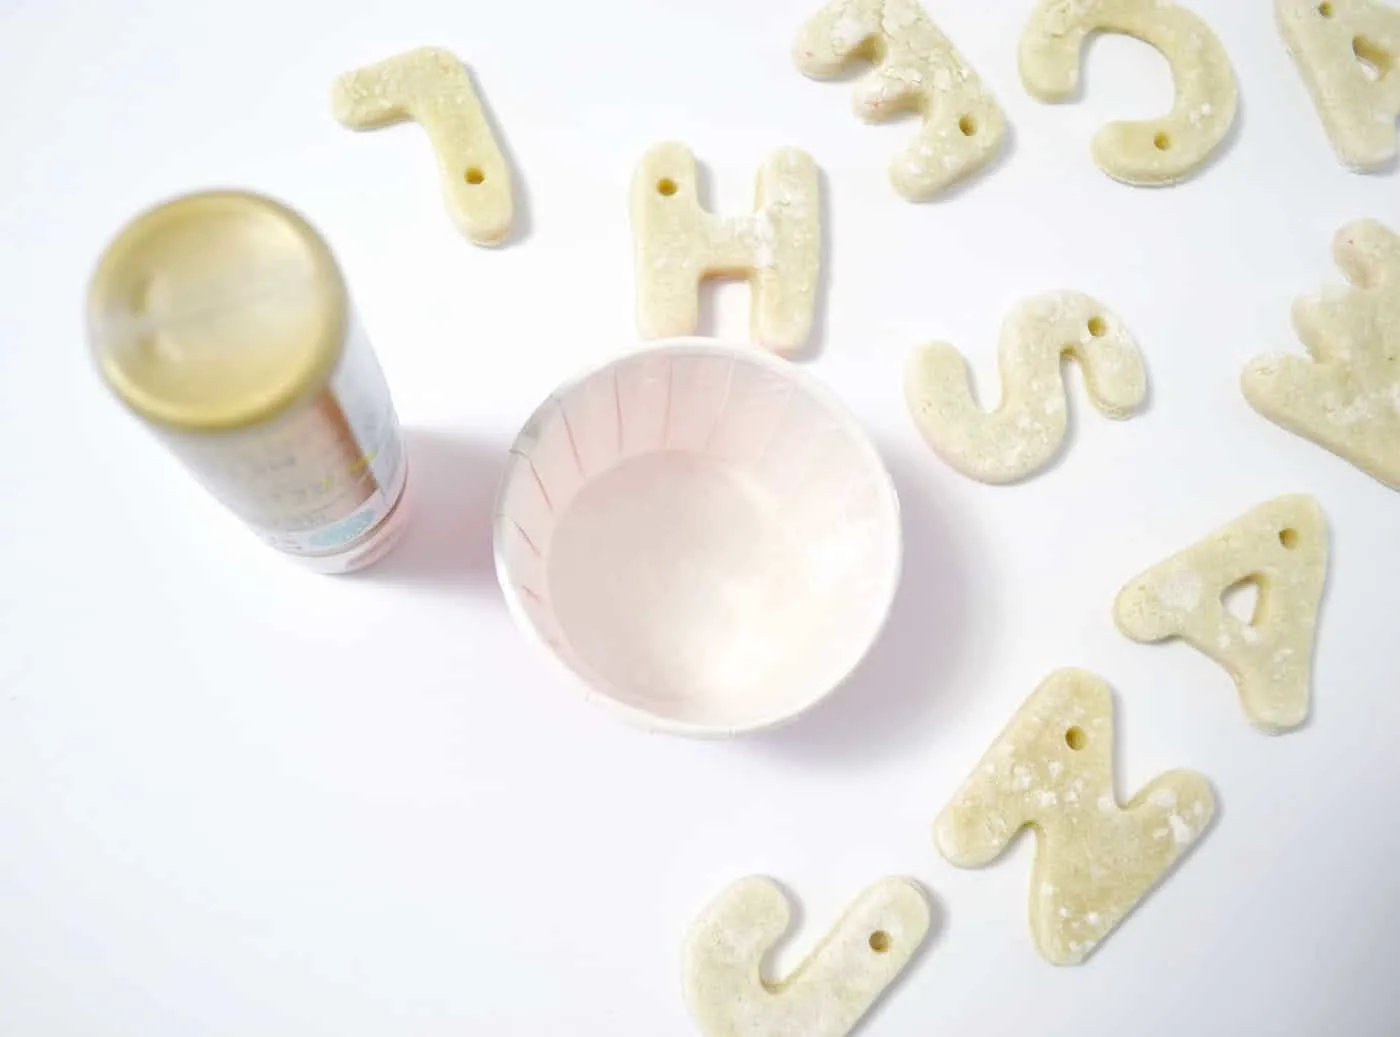
You can decorate your ornaments with glitter, craft paint, or anything else your heart desires. Dip your initials, and let dry on parchment paper.
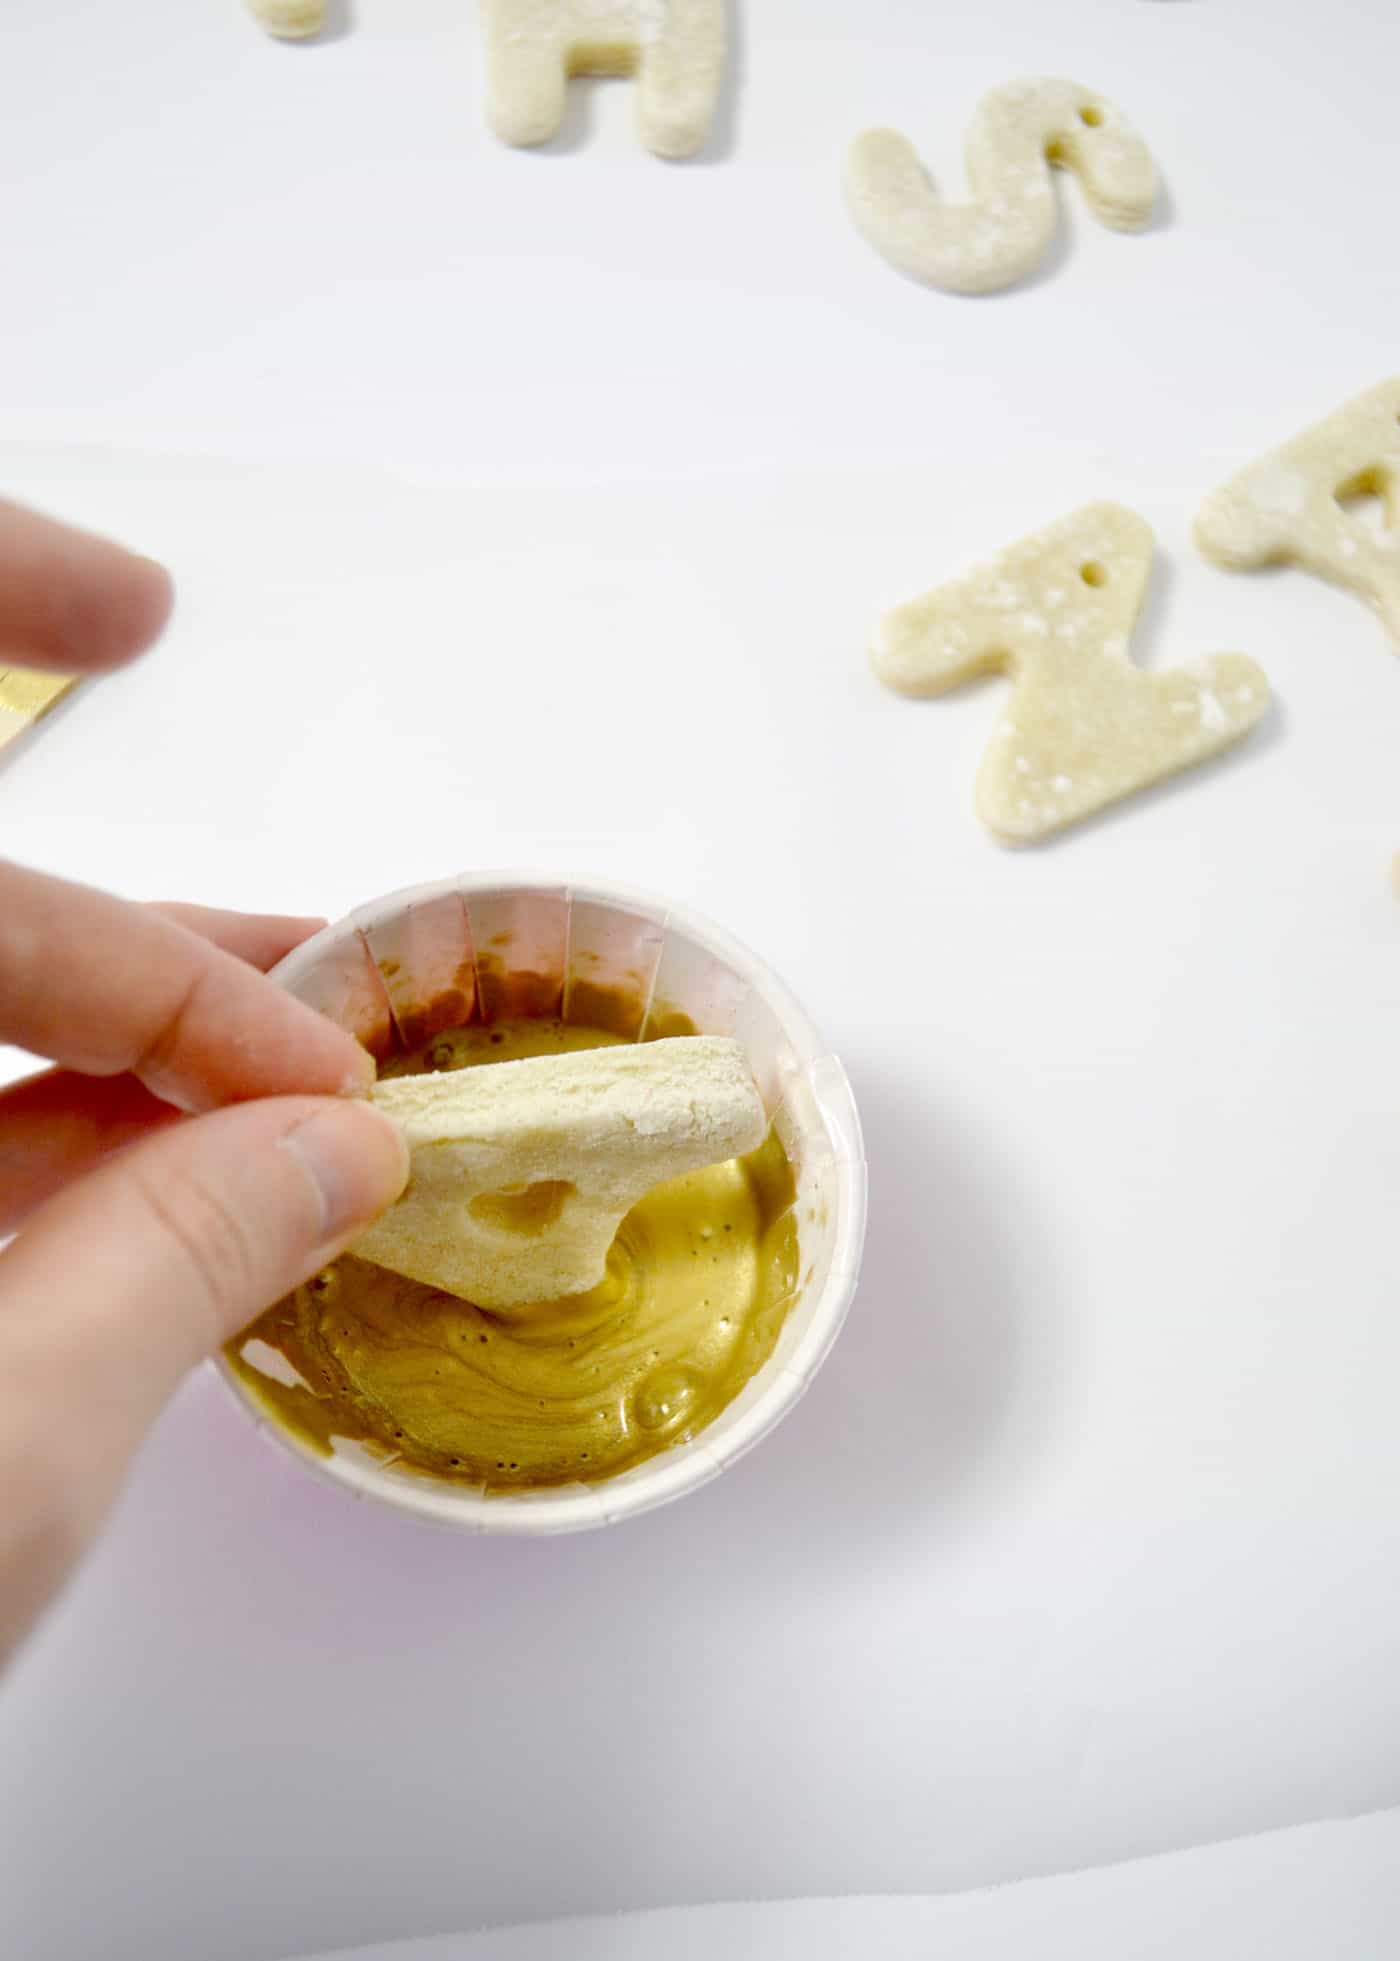

The salt dough ornaments are being shown dipped in the paint, but you could dip them into Mod Podge and then sprinkle with glitter. If you do that, wait until dry and brush off the excess with a dry brush before hanging.


Step 5: Once dry, add a coat (or more) of Mod Podge Sparkle to help seal the ornaments and give them a bit of shimmer.

It’s as simple as that! These are so fun and easy to make, and it’s a great kids’ craft, as well!
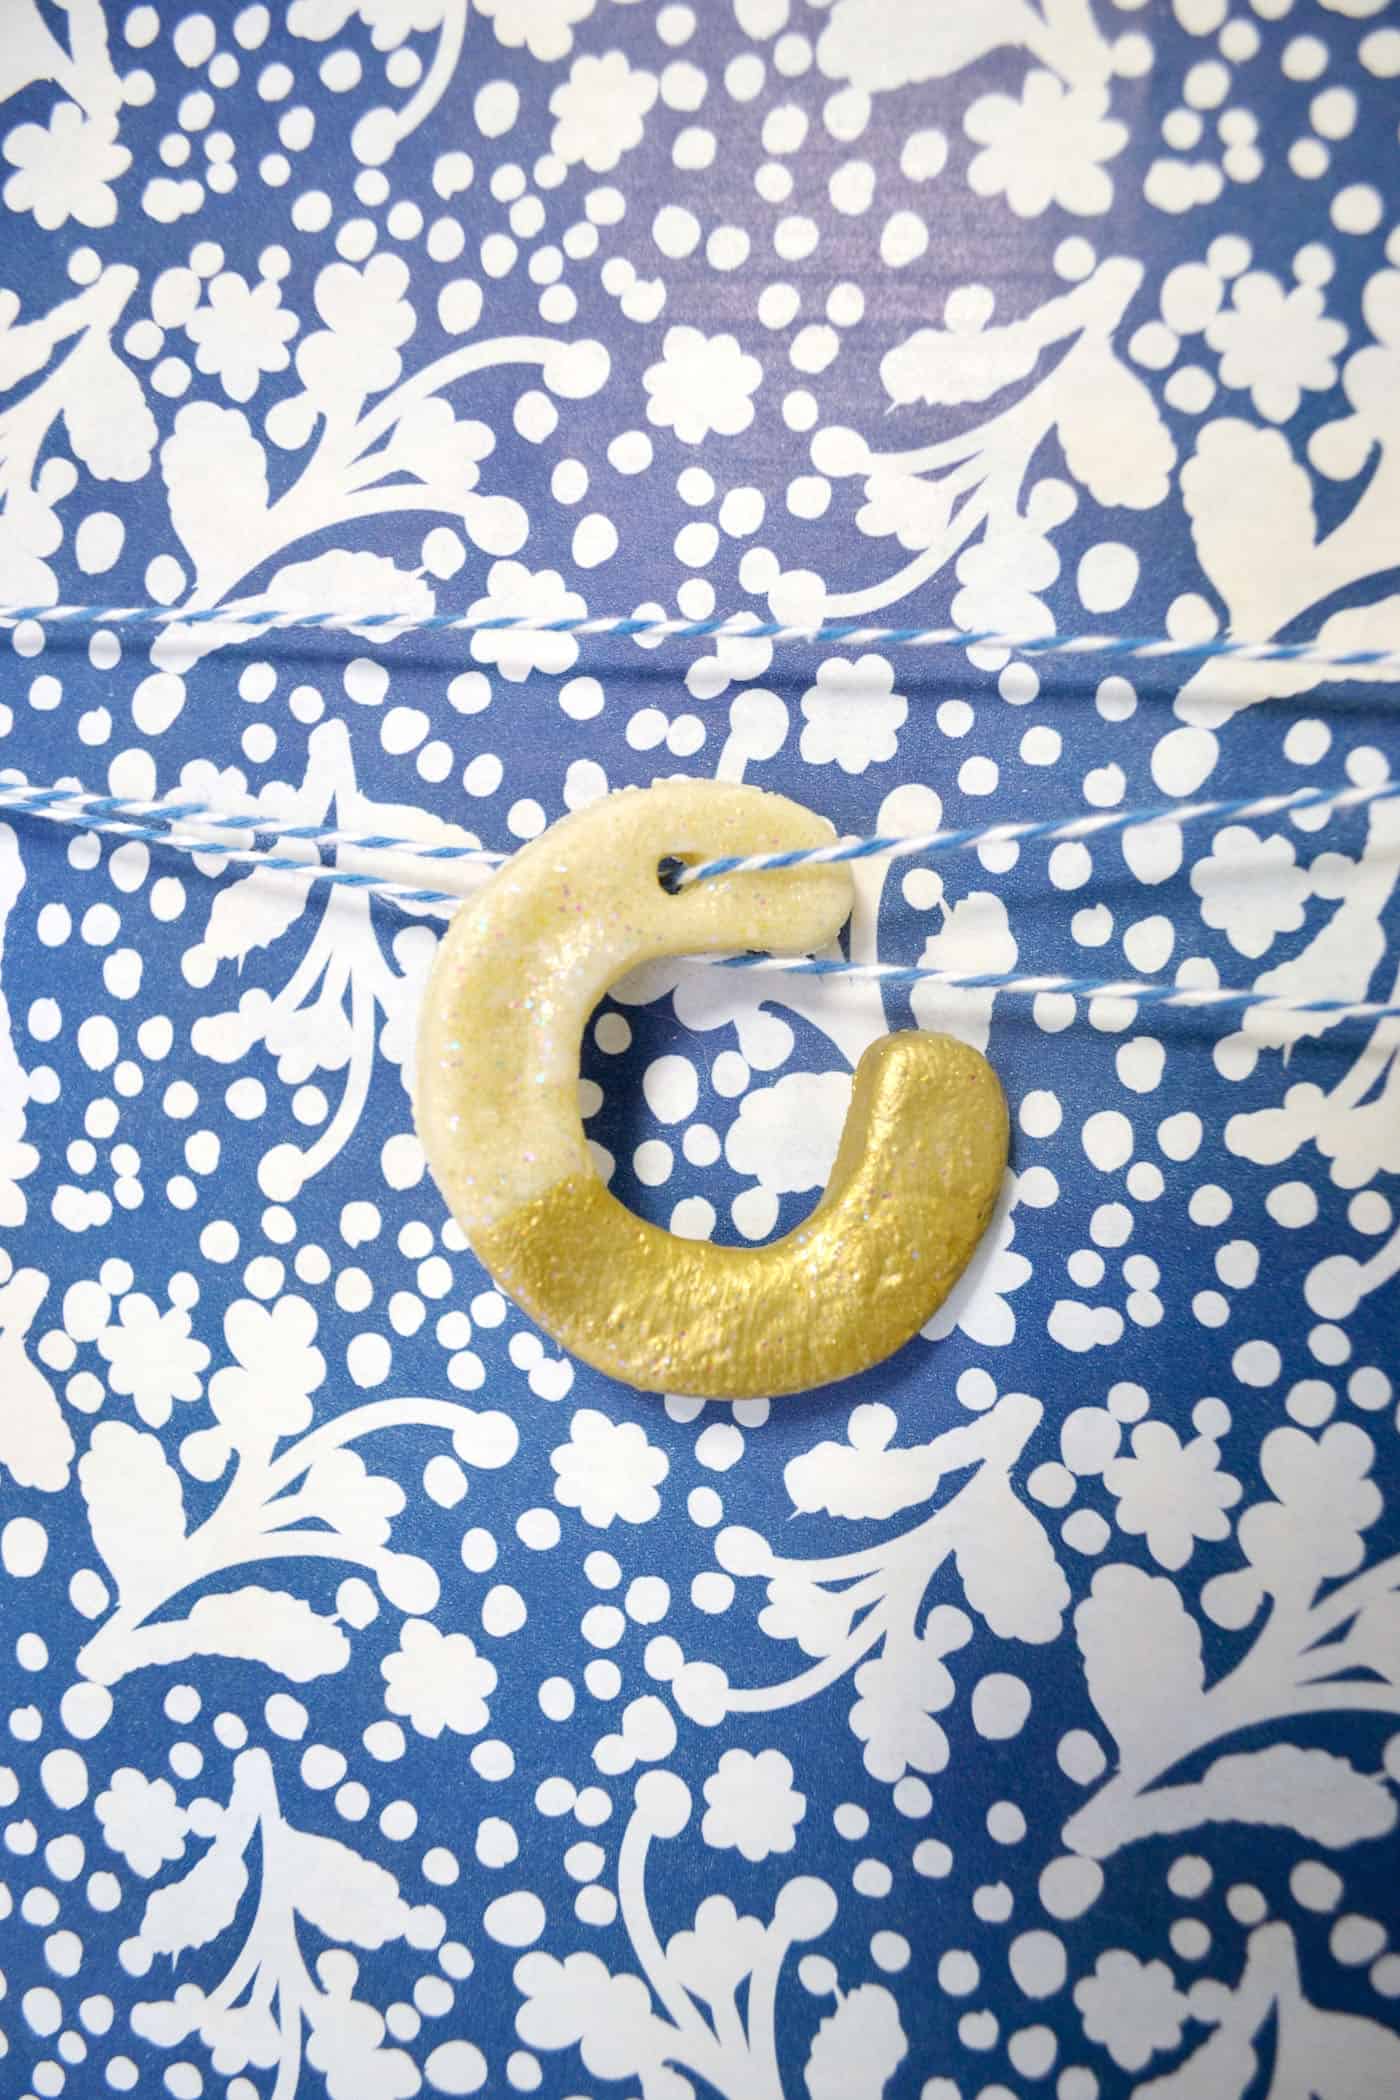

You can tie these salt dough ornaments to gifts with baker’s twine, or you can grab some ornament hooks and put them on the tree.


They look great on top of packages . . . wouldn’t it be fun to spell out a name and tie one letter to each gift? There are so many things you can do with this idea!
Thank you so much for letting me share my salt dough ornaments with you all today! You can find lots of other tutorials and inspiration on my blog.
Salt Dough Ornaments

Learn how to make salt dough ornaments for Christmas using this how-to! This salt dough recipe can be used for many other kids' crafts.
Materials
- 2 cups flour
- 1 cup salt
- 3/4 - 1 cup water
- Mod Podge Sparkle
- Paint for dipping (optional)
- Baker's twine
- Parchment paper
Tools
- Cookie cutters
- Scissors
- Cookie sheet
- Oven
Instructions
- Make your dough by mixing your flour, salt and water. If your dough is too dry, add a bit more water, if it's too wet, just add more flour . . . salt dough is very forgiving; it's hard to mess it up!
- Roll out your dough and cut out your shapes (in this case, initials) with the cookie cutters. Place on a sheet pan lined with parchment paper.
- Use the end of a skewer to poke a hole at the top of each ornament for hanging.
- Bake at 250 degrees for 2-3 hours. Let cool.
- If desired, dip ornaments in paint or glitter. Let dry on parchment paper.
- Once dry, add a coat (or more) of Mod Podge Sparkle to help seal the ornaments and give them a bit of shimmer. Let dry.
- Use baker's twine to hang.
And if you are interested in making some additional gift tags with salt dough, get inspired by our faux cookie gift tags. I’d also love for you to check out these other kids’ Christmas crafts:
Sonali
Friday 10th of June 2022
I am a mother of 5month baby and I want to preserve his hand and foot prints with salt dough recipe. I want to ask if I can air dry salt dough and not bake it. Will it still last for longer time.
Amy
Saturday 11th of June 2022
You could use air dry clay: https://www.amazon.com/Crayola-Clay-White-Pounds-Pack/dp/B001GIB3FQ
OR you can try just letting it dry. I've never done it with salt dough and just let it dry; I've always baked it. I'm assuming it would dry but not sure how long it would take (and my concern is mold depending on the humidity of where you live). So if you choose to attempt it just be sure to watch it and make sure it's not getting gross! The air dry clay takes just a few days: https://modpodgerocksblog.com/easy-handprint-ornament/
Andrea
Friday 3rd of December 2021
This is my third attempt today at making some ornaments with my daughters and when they bake they keep puffing up. This time I did go in an poke a little hole and press them down mid-bake and hoping they don’t puff up again. I’m not sure what I’m doing wrong!
Amy
Monday 6th of December 2021
There are two reasons why it will puff up. If the oven is at too hot a temperature – you need to make sure it is as low as possible. ... it may also puff up if you have used self-raising flour instead of plain or all-purpose flour. Since all ovens are a little different, I would try turning it down a bit! See if that helps. You might have to bake longer.
Shanda
Tuesday 30th of November 2021
Hello! I sealed my salt dough ornament with mod podge, and the next day, it softened. Is not OK ? Is that normal?
Amy
Monday 6th of December 2021
Hi Shanda - I wonder if they weren't baked enough? That's the only reason why I can think it would do that. You can put them back in the oven at a very low temp and watch them to dry them out further.
Pam
Sunday 7th of November 2021
Hi Amy Thank you so much for the wonderful tutorial. Please could you tell me if the 250 degree temperature is centigrade or fahrenheit? Many thanks. Pam.
Amy
Sunday 7th of November 2021
It is fahrenheit! Thanks for noting - I'll correct it :)
Amanda Veloso
Thursday 9th of September 2021
Hi there!! I'm hoping you can help me! I can't seem to find any answers on my own and my salt dough project is far too special to risk ruining. Unfortunately, I don't have the opportunity for a re-do! My neighbors Pug, Guinness, became suddenly ill and he had to make the difficult decision to let him go :( Before I drove them to the vet, I whipped up a batch of salt dough (thanks for the recipe!!) and I asked for a few minutes of alone time with Guinness so I could get his little prints in the dough to surprise my neighbor with a Christmas ornament in December.
I was able to get 4 great prints so I have 4 ornaments to make and choose from. I wasn't exactly sure how I was going to decorate/paint them or if I was just going to leave them natural so they have been sitting on parchment paper air drying for well over a week.
My question is, can I seal the salt dough with a sealer (mod podge or an acrylic or polyurethane spray) and then eventually go back and possibly paint them with acrylic paint? I feel like I should get them sealed ASAP because I'm afraid of them cracking, but I'm not ready to paint them yet (basically because I'm so indecisive and can't decide what to do with a gift so special).
Everything I read says that surfaces can't be painted after sealing without prepping the surface so the paint sticks, but I can't find anything specific to salt dough! Is there anything you can tell me about it? Can I seal, paint and then apply seal again?
I'm so sorry for the long question!! I consider myself pretty crafty, but I have zero experience working with salt dough. My biggest fear is doing something that would ruin Guinness' special little irreplaceable prints!!
Great, thorough and informative post, btw...I applaud you for keeping it current and continuing to read and respond to comments!! That's very awesome of you!!
I appreciate any advice you can give me. Thank you SO MUCH in advance!!
XOXO
Amy
Friday 10th of September 2021
Sorry to hear about the pug! I am a pug lover myself :) I have one. Anyway, acrylic products work together well. That means if you seal with Mod Podge, yes you can paint over it with craft paint, and then even Mod Podge or seal over it again, and it's going to be fine. You are fine to go ahead and seal them. You can also simply paint over them with white acrylic paint which would act as a "sealer" until you are ready to paint. Just make sure all the products are acrylic. Good luck, you're going to be fine!