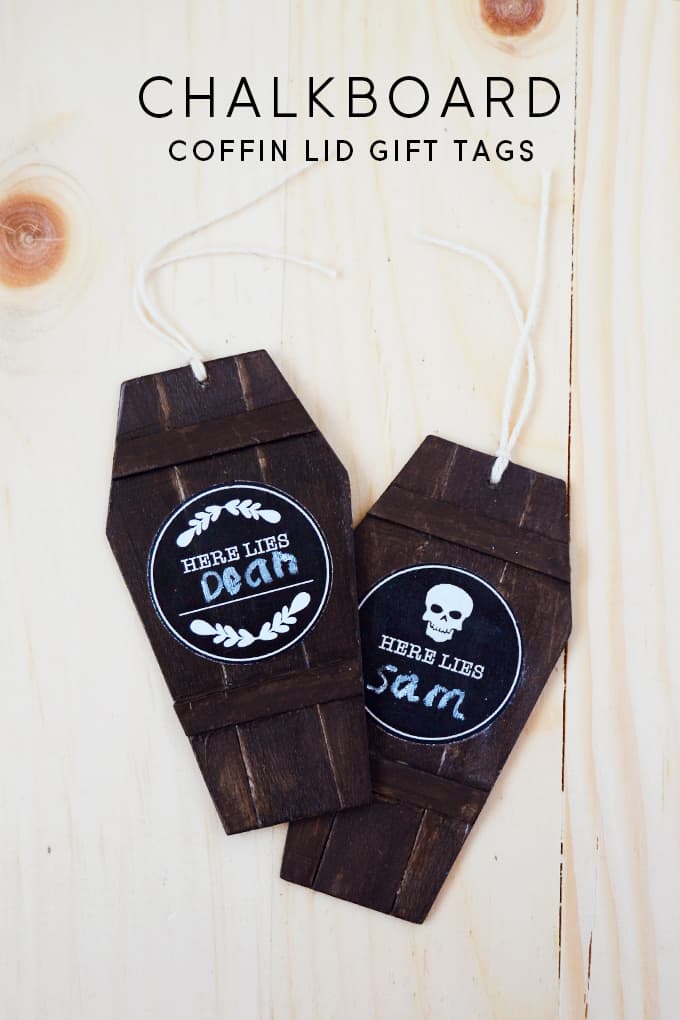
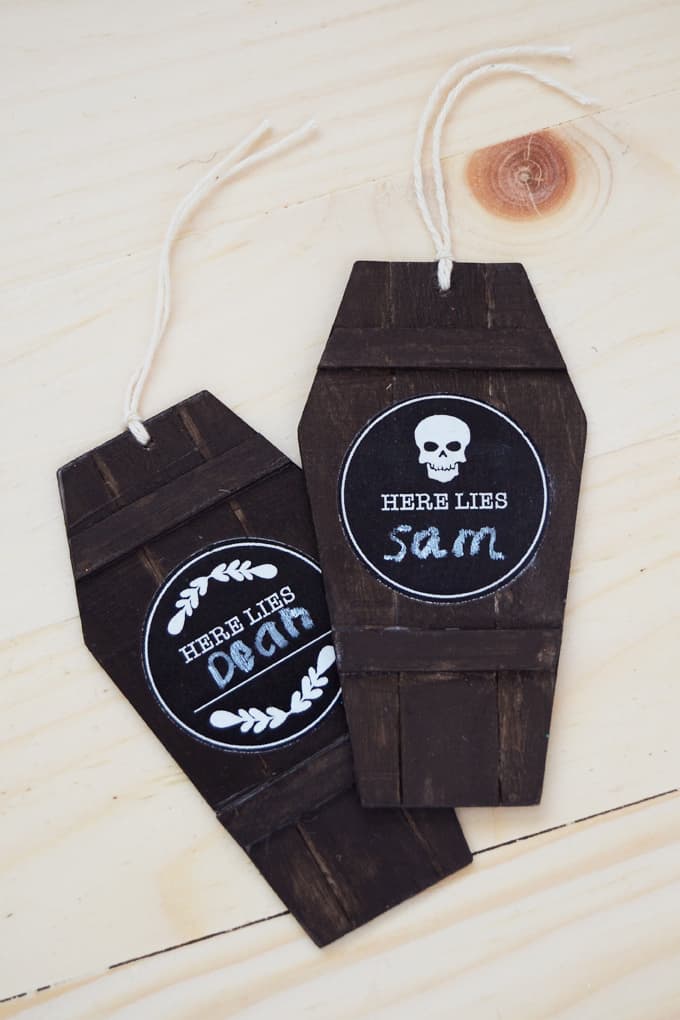
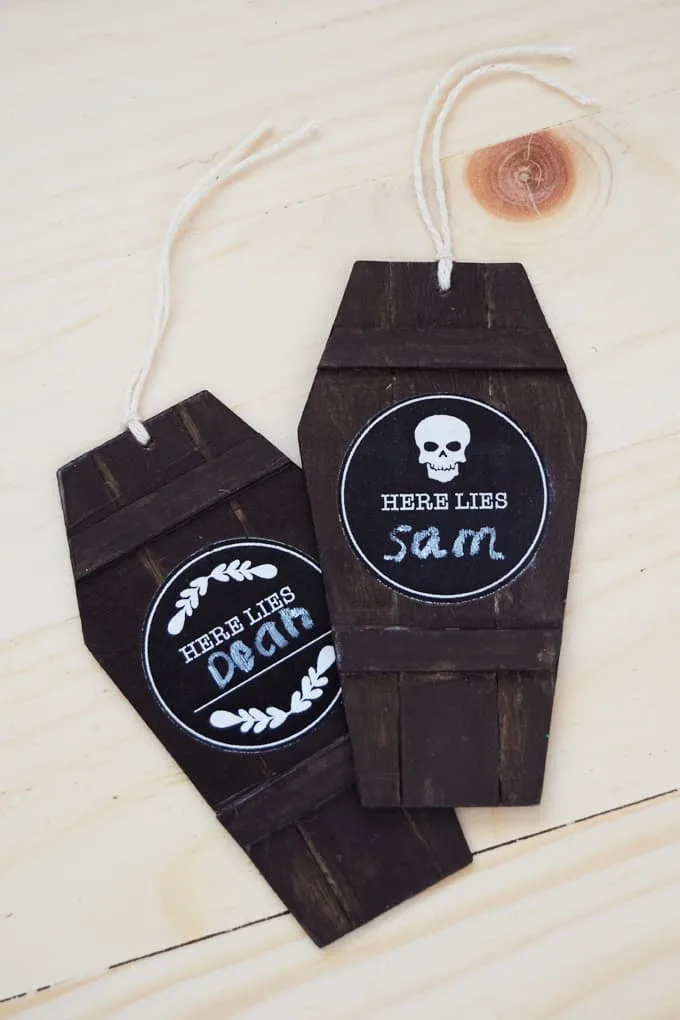
Use these unique Halloween gift tags to add to favor bags, candy, or even use as place cards for a holiday party! You can write on them, too.
Skills Required: Beginner. You’ll be doing a little of bit of cutting popsicle sticks, painting, and some Mod Podge. It’s pretty easy for a newbie crafter.

Hey guys – it’s Aki here from Minted Strawberry with another project to share with you: Halloween gift tags. It’s been feeling more and more like fall lately, so I’m starting to feel in the mood for spooky!
While I’m still wearing shorts (before I’m restricted to just pants and leggings again), I’m thinking of fall and Halloween craft projects already.
Chalkboard Halloween Gift Tags
The idea for these awesome Halloween gift tags came to me while crafting up dollhouse furniture for my little sister using popsicle sticks. I dreamed up this wood Halloween craft and then I absolutely had to make it.
Here’s how this Halloween craft came together!
Gather These Supplies
- Jumbo popsicle sticks
- Glue
- Sandpaper
- Scissors
- Craft knife / Box cutter and cutting mat
- Steel ruler
- Brown paint
- Drill
- Label – download the one I used here
- Mod Podge
- Chalkboard topcoat
- Brush
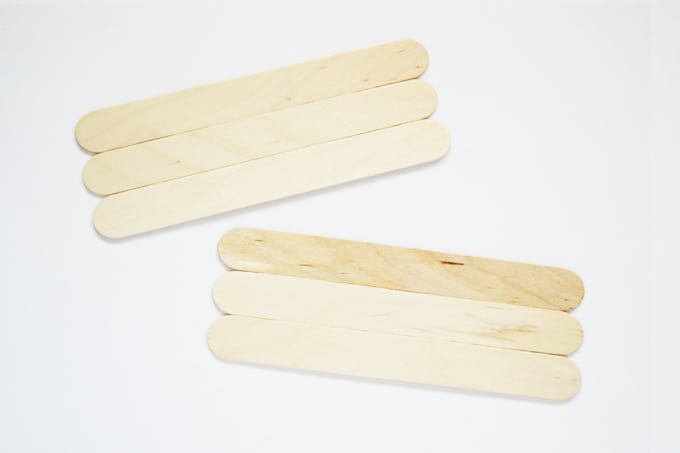
Step 1. Take three popsicle sticks and line them up – if they line up perfectly, glue the edges together as in the photo. If not, keep trying until you find a trio that lines up perfectly (since some come bent).
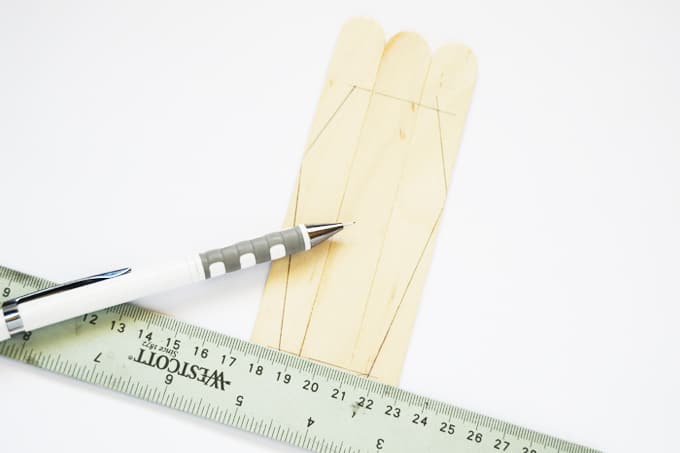
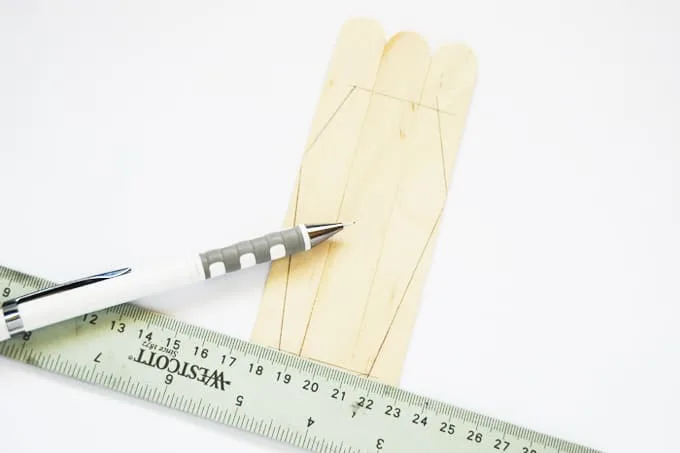
Step 2. Draw a basic coffin shape with a pencil and a ruler.
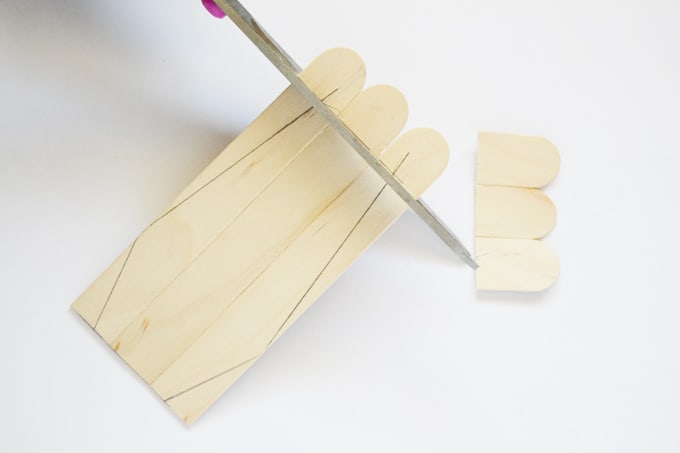

Step 3. Cut the horizontal lines with a pair of scissors like in the photo above.
TIP: Lines perpendicular to the wood grain are easier to cut with scissors, and lines parallel to the wood grain or even in a diagonal position are easier to cut with a box cutter or craft knife.

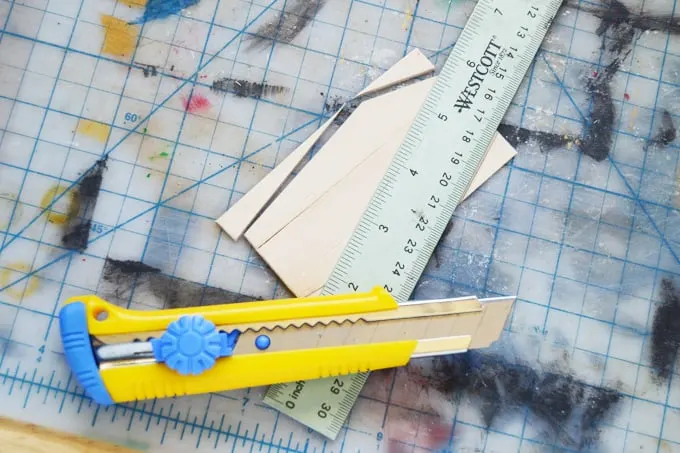
Step 4. Cut the diagonal lines with a box cutter or craft knife to prevent splits (if you use scissors, you would more likely get splits on the popsicle sticks).

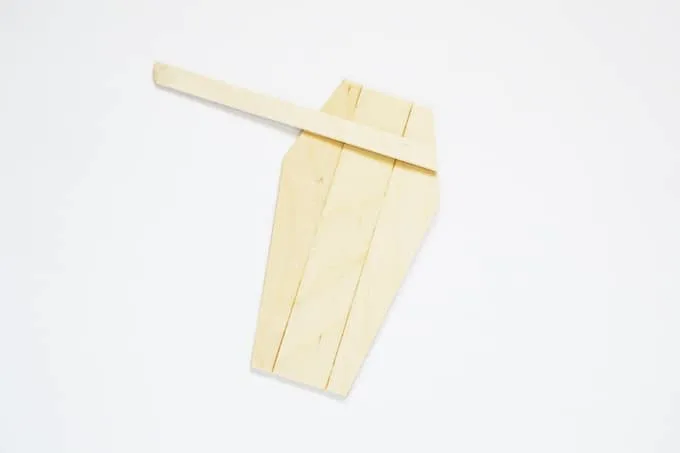
Step 5. Add details – using a popsicle stick cut in half vertically, add plank details to the coffin. Cut off the excess with a pair of scissors.
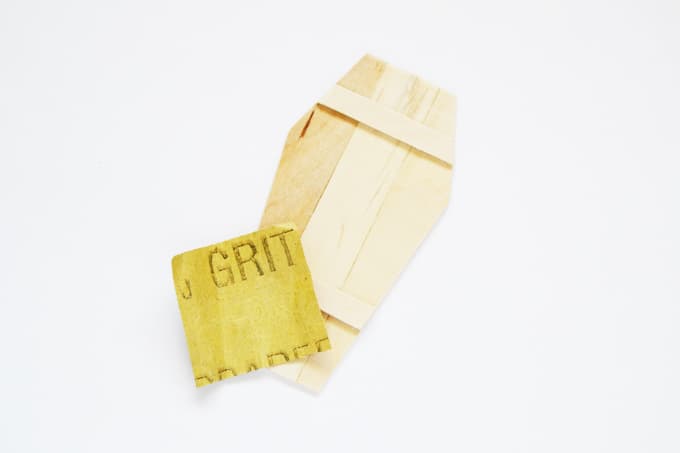

Step 6. Sand down the Halloween gift tag, making sure to sand the excess glue from when you stuck the three main popsicle sticks together.
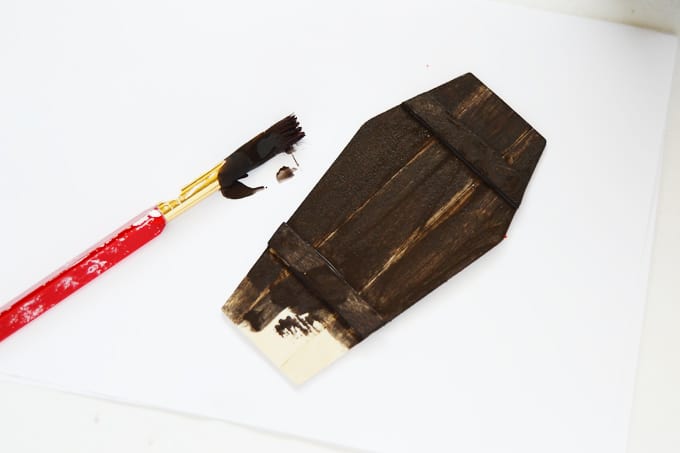
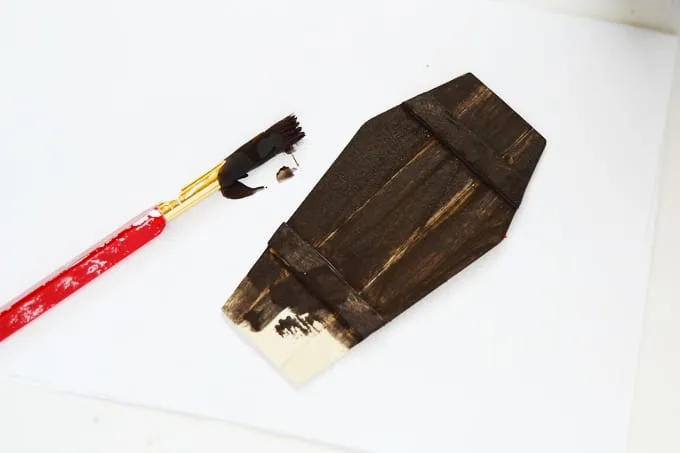
Step 7. Paint the coffin lids with partially watered-down brown paint. Use as many coats as you deem necessary. You want a ‘stained wood’ look in the end.
Don’t worry about the areas that don’t get covered by the paint (seams and areas that the glue touched) – this will give your tags a rustic, aged finish.

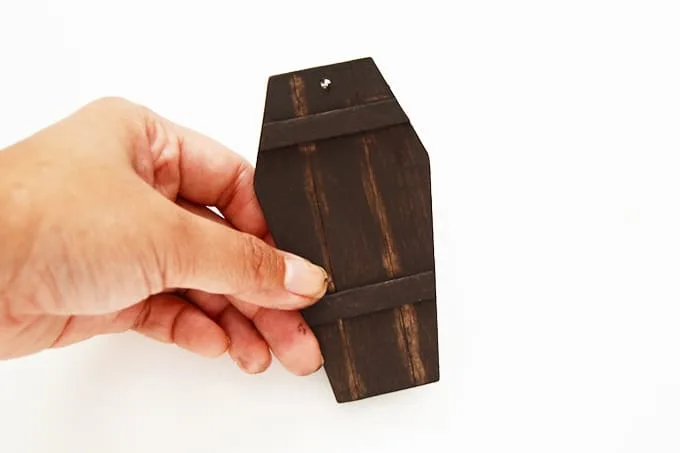
Step 8. Drill a hole for the string. Ideally you should do this before painting the piece, but it’s easy to just color it in again.
Make sure to carefully drill the hole to reduce popsicle stick splitting. Also, be careful and drill at least a few millimeters away from the edge.
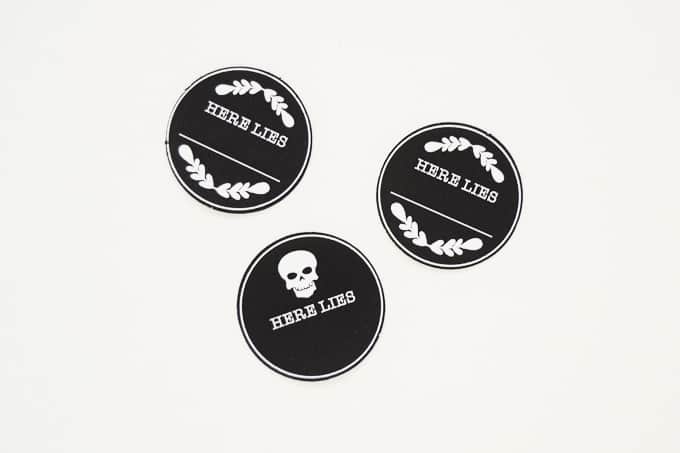
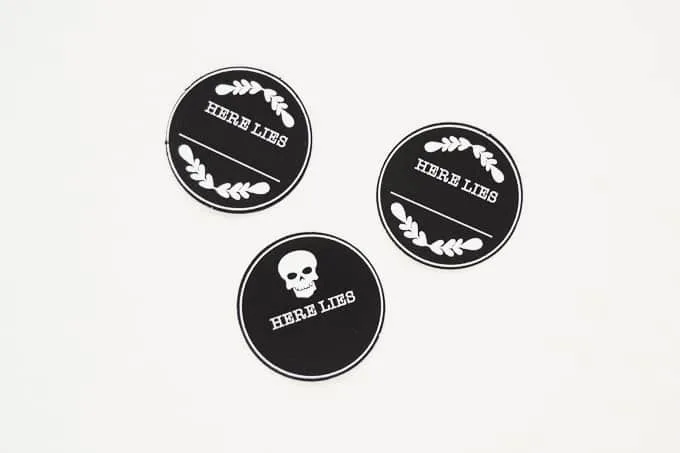
Step 9. Print and cut the labels, or make your own. Download the ones I used here. You can cut them out by hand or use a 1.5″ circle punch.
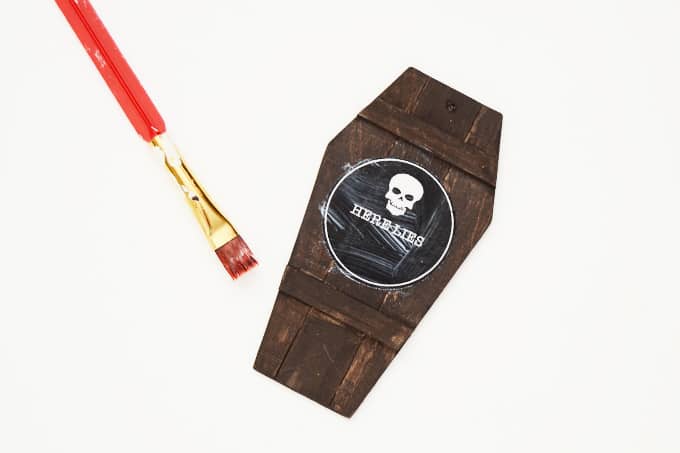
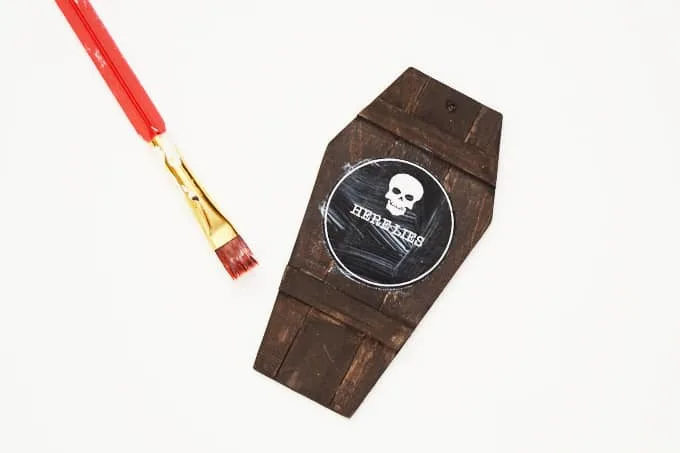
Step 10. Mod Podge the label onto the front of the tag.
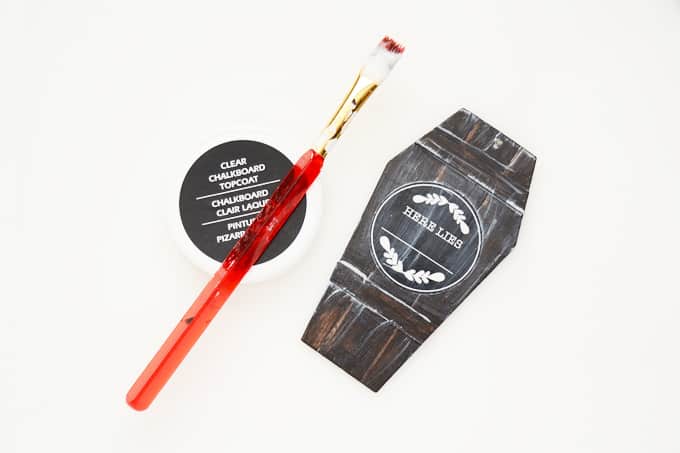
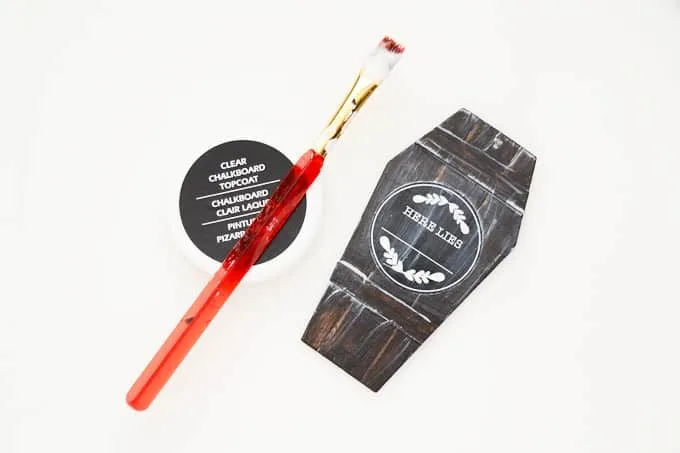
Step 11. Use the Mod Podge Chalkboard Finish as a topcoat and wait to dry. String them up with your preferred gift tag string and you are done!

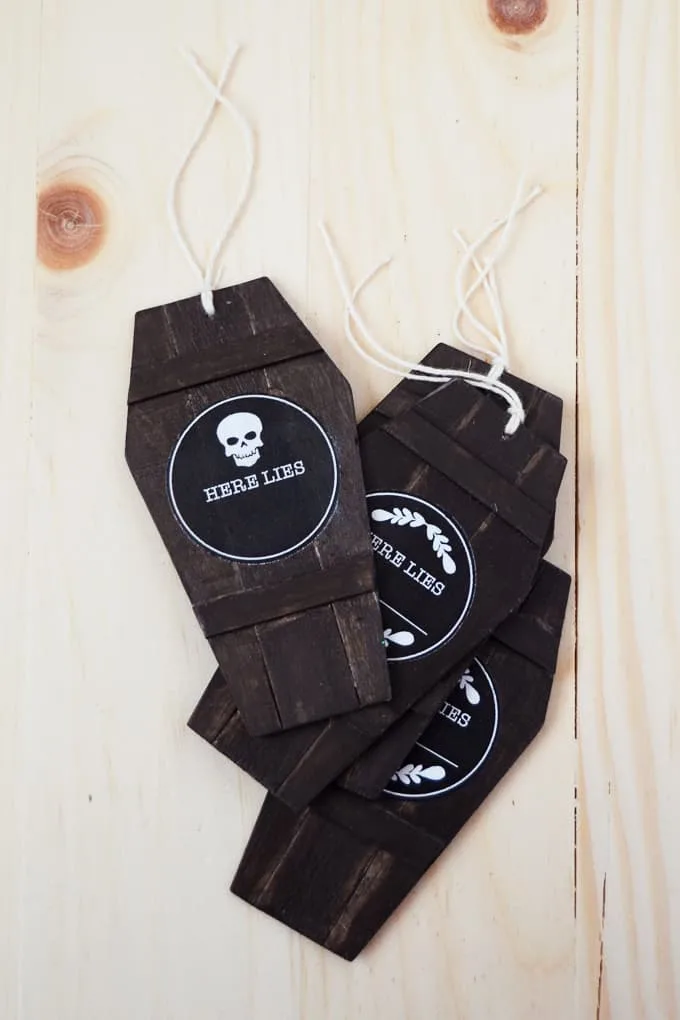
These are perfect for candy gift bags – way more fun than ordinary gift tags, don’t you think? You can also use them as place setting cards!
Halloween Gift Tags
Learn how to make these coffin gift tags for Halloween! The chalkboard label allows them to be reused.
Materials
- Mod Podge
- Chalkboard topcoat
- Jumbo popsicle sticks
- Glue
- Sandpaper
- Brown paint
- Gift tag labels
Tools
- Scissors
- Craft knife and cutting mat
- Steel ruler
- Drill
- Paintbrush
Instructions
- Take three popsicle sticks and line them up; glue the edges together.
- Draw a basic coffin shape with a pencil and a ruler.
- Cut the horizontal lines with a pair of scissors.
- Cut the diagonal lines with a box cutter or craft knife to prevent splits.
- Using a popsicle stick cut in half vertically, add plank details to your coffin. Cut off the excess with a pair of scissors.
- Sand down the tag, making sure to sand the excess glue.
- Paint the coffin lids with partially watered-down brown paint until they look stained. Let dry.
- Drill a hole for the string..
- Print and cut the labels. Cut them out with scissors or use a 1.5" circle punch.
- Mod Podge the label onto the front of the tag. Let dry.
- Paint the chalkboard topcoat on the tag and wait to dry. String them up with your preferred ribbon or twine.
If you like these Halloween gift tags, you might also like the following holiday projects. Happy crafting, friends!
Paige
Wednesday 16th of September 2015
These are so adorably cute! You did an awesome job!
Paige https://www.thehappyflammily.com/