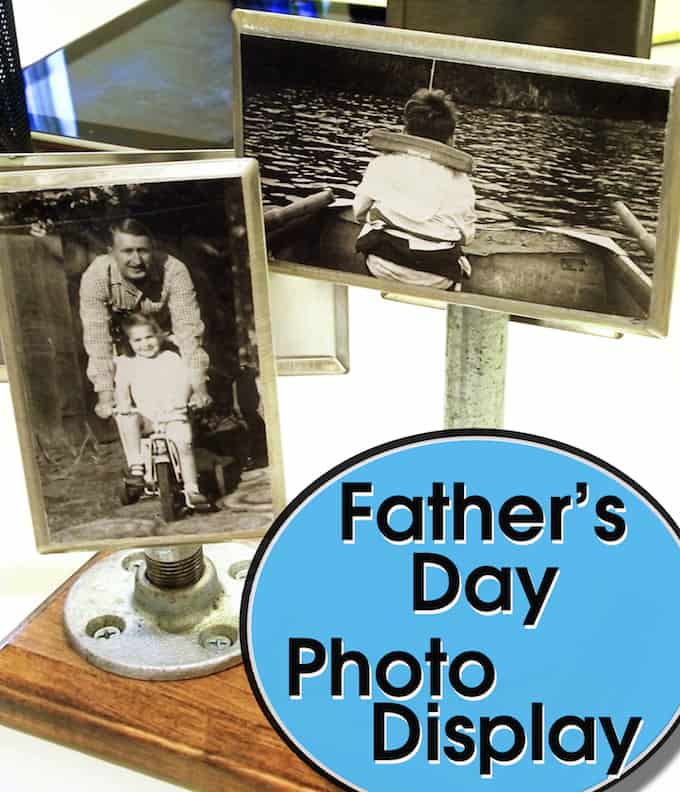
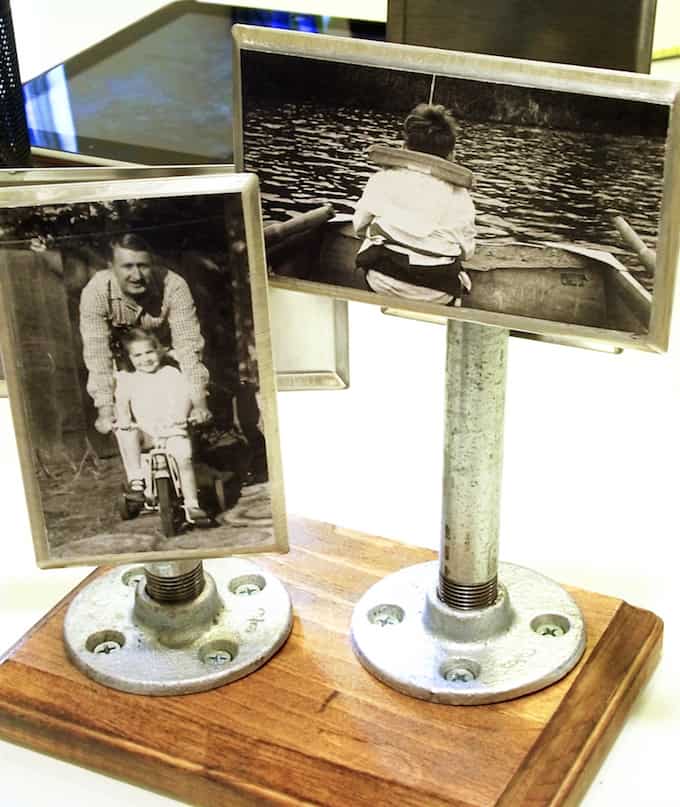
If you need a unique gift idea, these industrial picture frames fit the bill! Make them using hardware store materials – it’s really easy!

As you know if you’ve followed my projects here on Mod Podge Rocks or on my blog, Cheltenham Road, sometimes I go to Home Depot with a master plan for what I’m going to make and sometimes I just go and wander the aisles and, A-Team-like, see if a plan comes together.
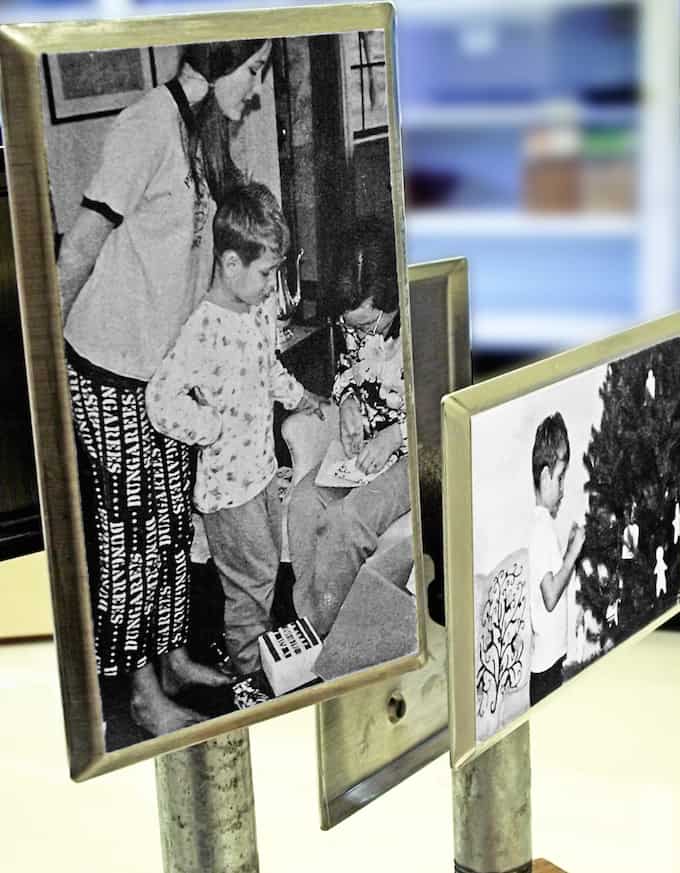
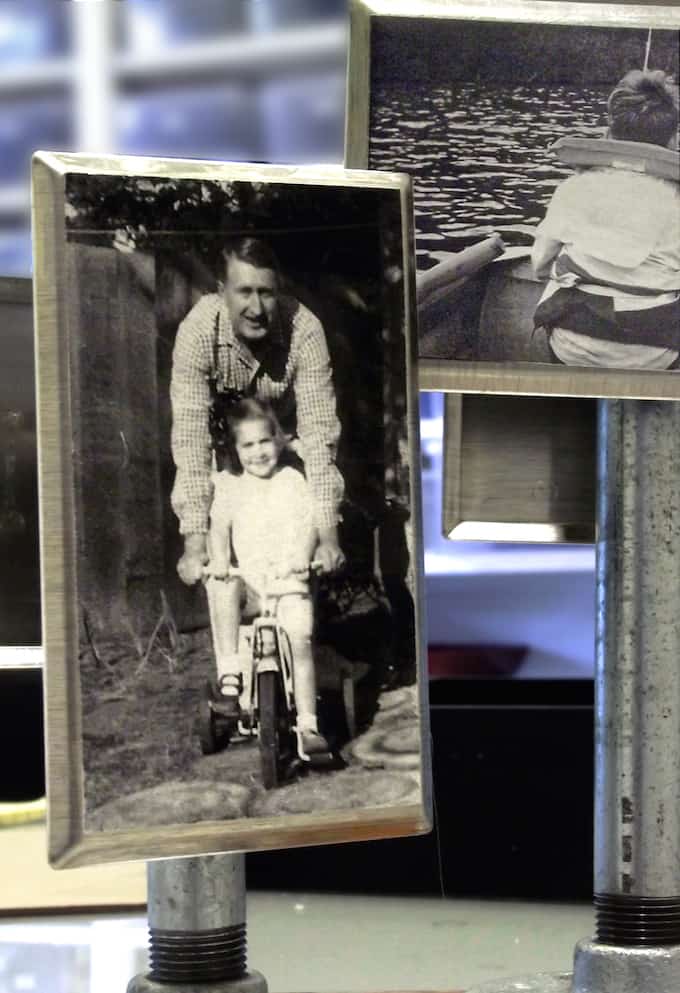
This time around I wanted see if I could do something with galvanized pipes that might be fun for Father’s Day. That’s how I came up with these industrial picture frames.
Affordable, versatile and easy was the goal – and as I played around with the various fittings I started to see a kind of sculptural photo display that would look cool on a desk or shelf. These work well with industrial or farmhouse decor, in my humble opinion.
Here’s how they were made.
Industrial Photo Frames

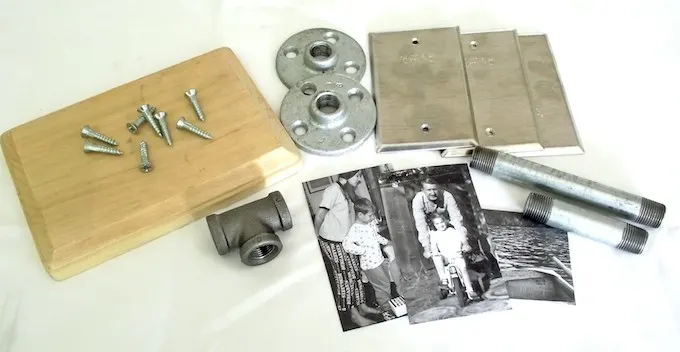
Supplies
- Wood Plaque
- 2 (two) 3/8″ Galvanized Floor Flanges
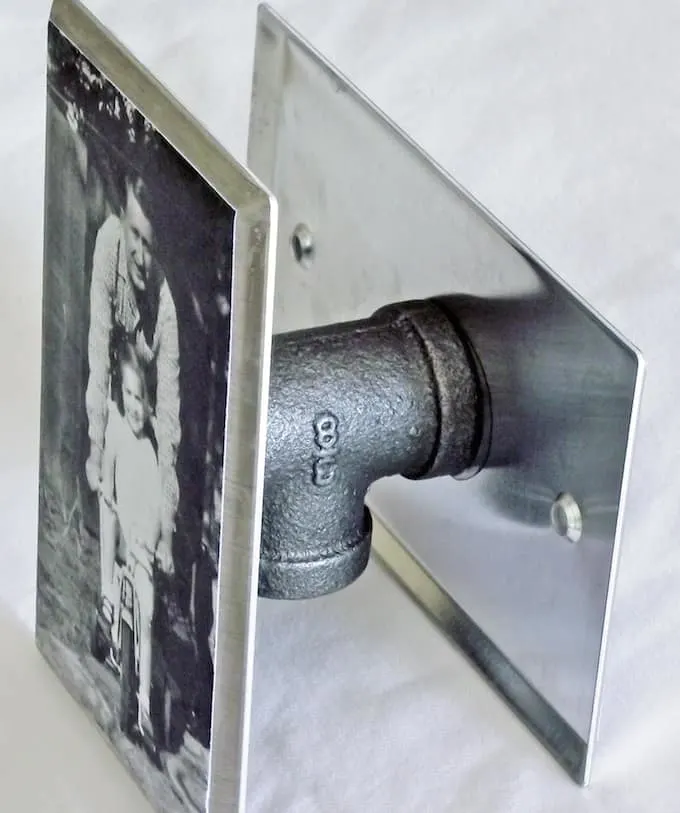
- 2 (two) 3/8″ Galvanized Tee Connectors
- 1 (one) 3/8″ by 3″ (long) Galvanized Steel Pipe Nipple
- 1 (one) 3/8″ by 5″ (long) Galvanized Steel Pipe Nipple
- 4 (four) Outlet Cover Blanks
- Screws
- Wood Stain
- Glue (Gorilla Glue, E-6000, Super Glue etc)
- Mod Podge
- Foam Brush
- Rags (for staining)
- Photos
- Drill (optional)
- Screwdriver
- (the photo is missing one Tee Connector and one Outlet cover…I was experimenting)
The galvanized pipes and flanges are found in the plumbing section of Home Depot. The outlet cover blanks are in the electrical section.
My wood base is from Michaels but, of course, any piece of wood would work.
First up I stained the wood base and set it aside to dry.
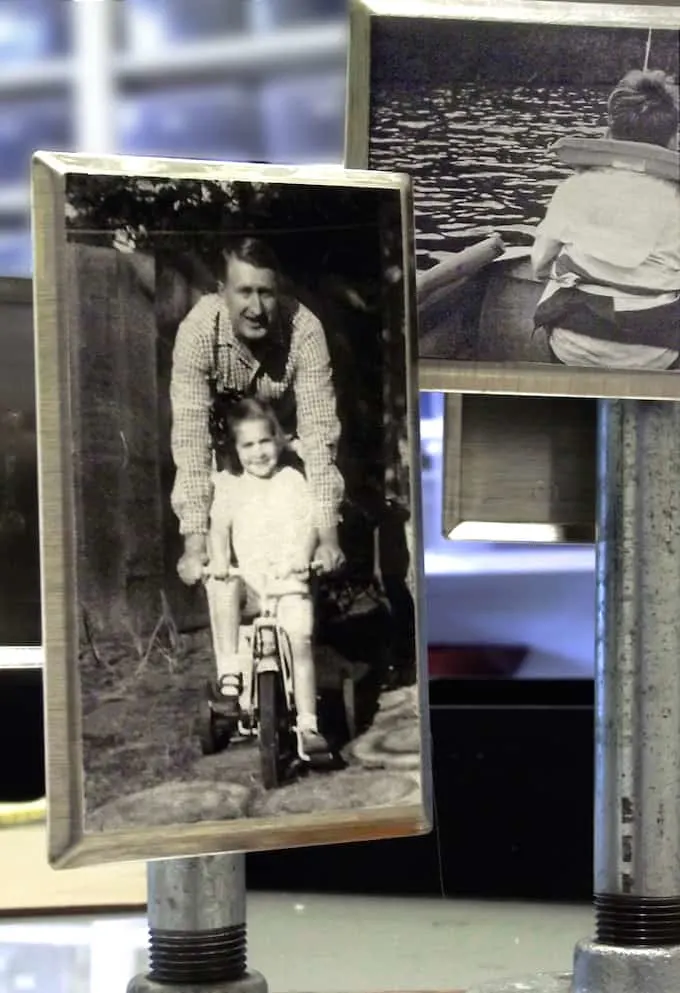
The outlet cover blanks measured 2.5″ wide by 4.25″ high. After resizing my photos on the computer, I trimmed them down about 1/16″ smaller than the dimensions for the blank because I wanted to have a little wiggle room when I decoupaged them into place.
I smoothed out any bubbles or wrinkles with my fingers and wiped away any excess Mod Podge that had squeezed out.

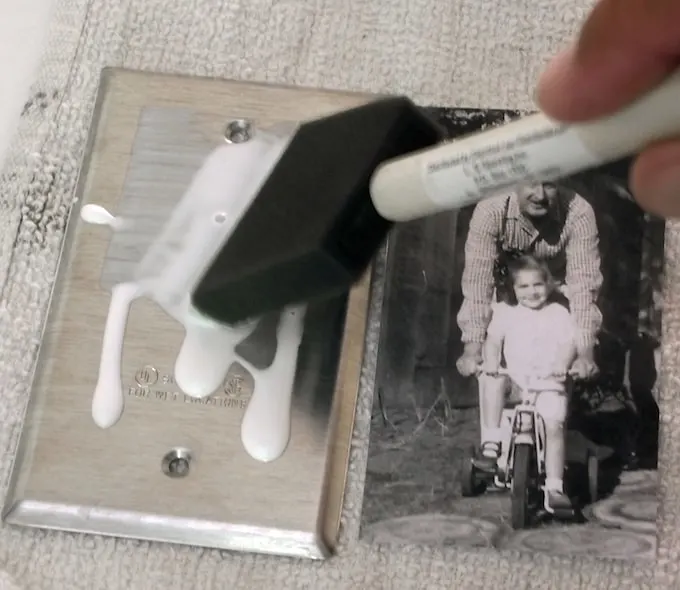
After about 20 minutes I gave the photos a sealing top coat of decoupage (I used Matte MP but Gloss would give them a bit of shine if you’d like).
Once the pictures were dry enough (about 30 minutes), I glued the outlet cover blanks to either side of the tee connectors and let the glue dry thoroughly. Your industrial picture frames are getting close!
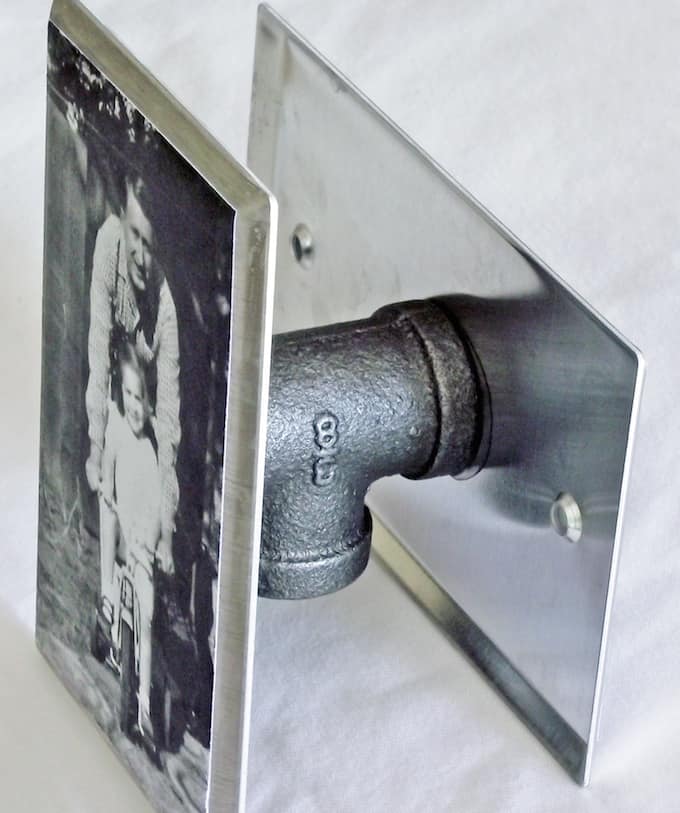
To make screwing the floor flanges into place easier, I marked and drilled pilot holes into the wooden base.
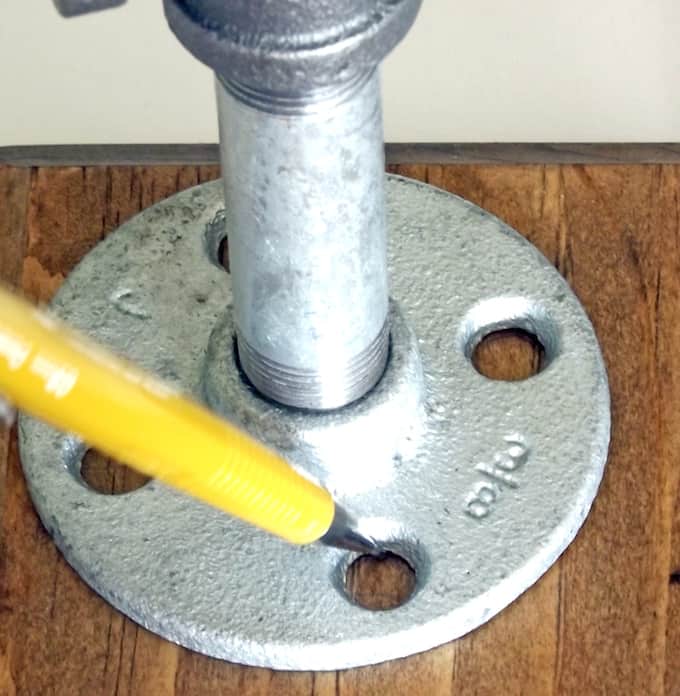

Now it was a simple matter of threading the Tee Connectors onto the pipes and the pipes to the flanges and screwing them into place.

The total cost for all the parts for my industrial picture frames was less than $20 (admittedly I had the glue and screws on hand). I think you could adapt the basic idea in a lot of different ways.
There are hundreds of connectors available so you could make one giant stand or perhaps a metal family tree!

As always, if you have any questions don’t hesitate to ask. I’d love to hear what you think about these industrial picture frames in the comments! I’d also love it if you would visit these other ideas:
Judy
Friday 30th of May 2014
I love this project! These would be great with furniture from Restoration Hardware and The House Of Industry on Instagram.
Catt
Thursday 29th of May 2014
Cool idea. Better than a tie!
Morena
Saturday 24th of May 2014
This looks so cool! I want one for myself.
Angi Barrs
Friday 23rd of May 2014
Super creative! Love this idea!
Barbara
Friday 23rd of May 2014
I love this idea David! It's perfect for Dad's!