Learn how to make DIY clip frames using wood shapes and clips! Decorate with your favorite papers and Mod Podge. Such an EASY project.

Hello there, fellow Mod Podgers! It’s Linda here, from burlap+blue, and I’m thrilled to be here today sharing another wood craft with you all! As you may or may not know, we love decorating photo frames around here.
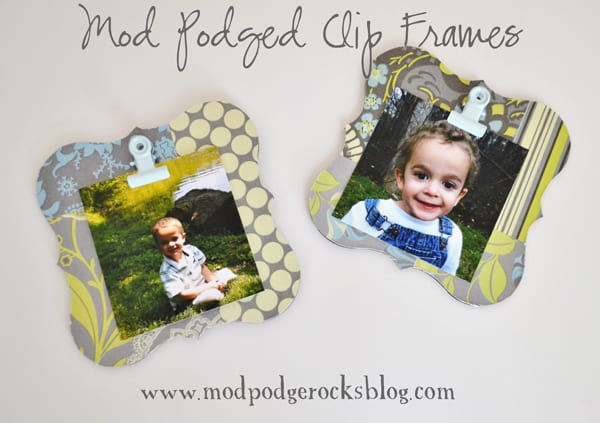
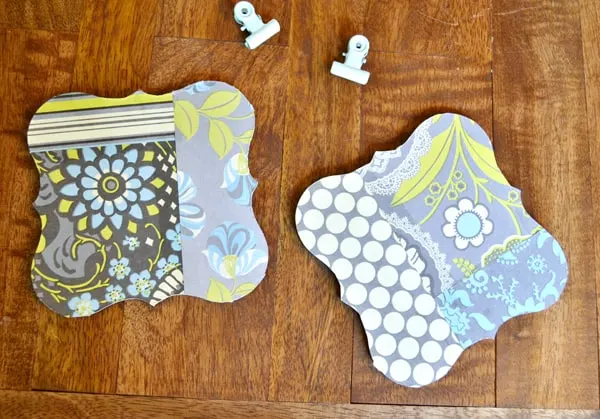
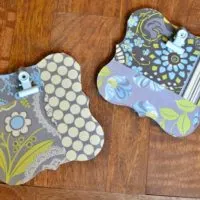
When I found these plain, wooden shapes at Joann’s the other day, I knew they’d make perfect frames for displaying pictures of my kids. I used scrapbook paper for mine, but leftover fabric would work as well!
Keep in mind, you can use scraps for this project. You can also turn a variety of wood pieces into a clip frame. There are so many ways to personalize this project.
DIY Clip Frame
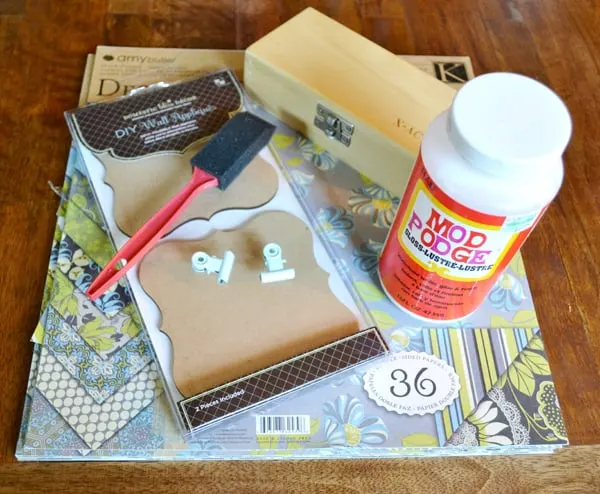
Gather These Supplies
- Mod Podge Gloss
- Wood shapes (I found mine at Jo-Ann)
- Craft knife
- Foam brush
- Scrapbook paper
- Metal clips or clothespins
- E-6000

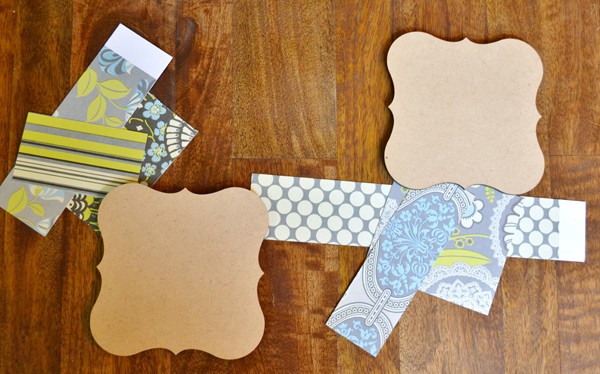
Decide on your design, and cut your scrapbook paper to cover your shape. I chose a simple design using three coordinating pieces of paper, but you could easily do stripes, squares, or anything you can come up with.
Don’t worry about cutting the paper to fit your shape, that’s where the X-Acto knife will come in!

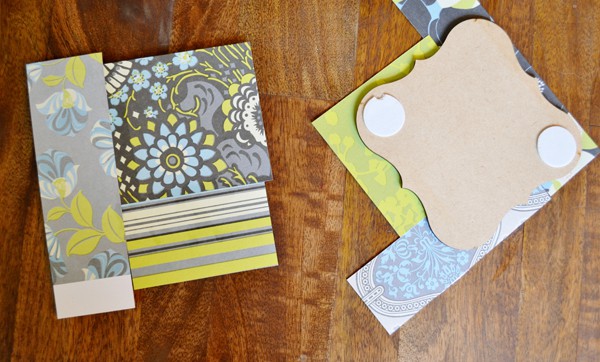
Step 1: Apply a coat of Mod Podge to your shape, and adhere your pieces. The one below on the left shows the front of one of my shapes, the one on the right shows what the back looks like.

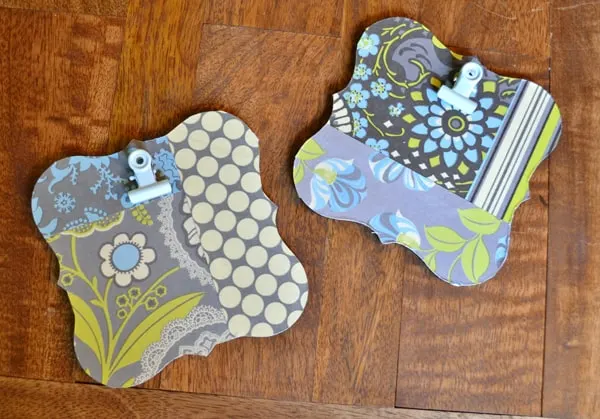
Step 2: Take your craft knife and (carefully!) cut around the shapes. If you don’t have a craft knife, scissors should work for this step. I don’t have a picture of this step . . . turns out you really should use both hands when working with a craft knife. 🙂
Step 3: Apply 2 – 3 coats of Mod Podge to seal, allowing your frames to dry well in between coats.

Step 4: Attach your clips or clothespins with E-6000.

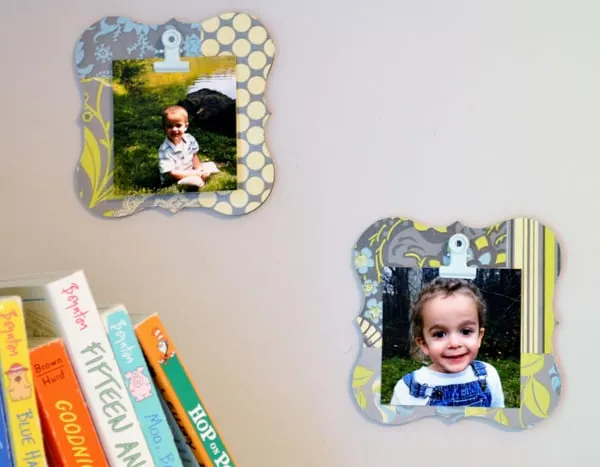
And there you have it! An easy and customizable way to display photos of your favorite people . . .

Clip Frames
Equipment
- Scissors or craft knife and mat
Materials
- Mod Podge Gloss
- Wood shape(s)
- Scrapbook paper
- Metal clips or clothespins
Instructions
- Choose the papers you’d like to use for your project; enough to cover the wood. shape.
- Apply a coat of Mod Podge to the shape and smooth the paper pieces down, overlapping if necessary. Let dry.
- Use a craft knife to trim around the shape – scissors will also work.
- Apply 2 – 3 coats of Mod Podge to seal, allowing the frame to dry well in between coats.
- Attach the clips or clothespins with E-6000. Let dry completely before using.
Thank you so much for letting me share these DIY clip photo frames with you today! I’d love for you to check out these other cool projects:
Beverly York
Friday 4th of October 2013
If you use a fine grit sandpaper and sand around the edges after the paper dries you get a much sharper and smoother trim on the paper. Just remember to use a downward motion from the paper side when sanding it off. This is how I trim all of my paper on chipboard or wood pieces when the paper hangs over the edge.
Susie
Wednesday 2nd of October 2013
Where did you find the little clips? I walked around Michaels but couldn't find them. I wasn't sure what department they would even be in.