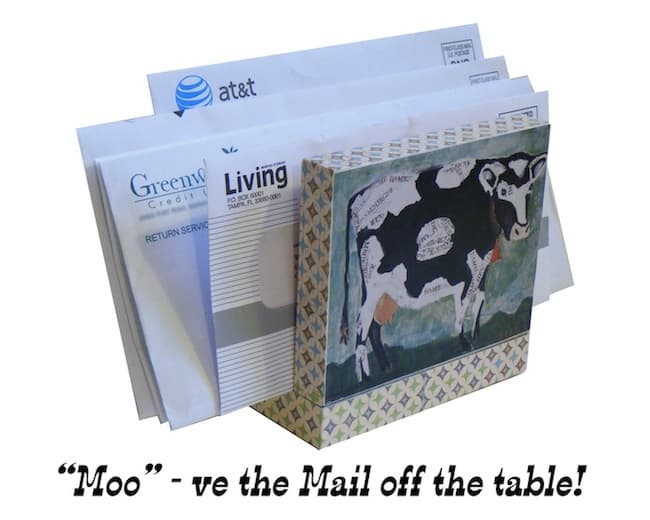
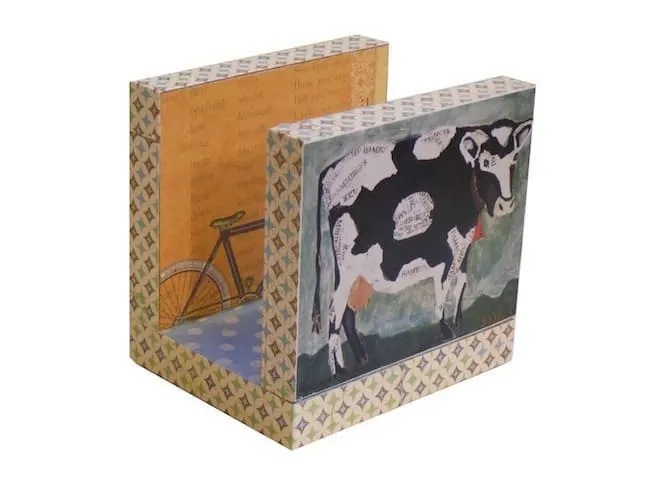
If you’re like me, you throw the mail on the table when you walk in the door. Instead, make a DIY mail holder using Mod Podge and keep it all together!
Skills Required: Beginner. You’ll be using basic tools, a screwdriver, and Mod Podging paper to wood pieces. If you’ve crafted before, this should be relatively simple for you.

Mod Podge Walter is at it again – making practical projects that we all can use! There’s nothing wrong with that, now is there? In this tutorial, he’ll show you how to make a mail holder.
Do you have that person in your life who stacks the mail in piles? And you’ve asked that person politely to place the mail somewhere but they don’t?
This DIY mail holder might help. Here’s the wood craft project straight from Walter.
If you’re like me and big on organization, then this DIY mail holder will be perfect. No more leaving mail on the edge of something-or-other in a messy pile. Keep it all together with this idea.
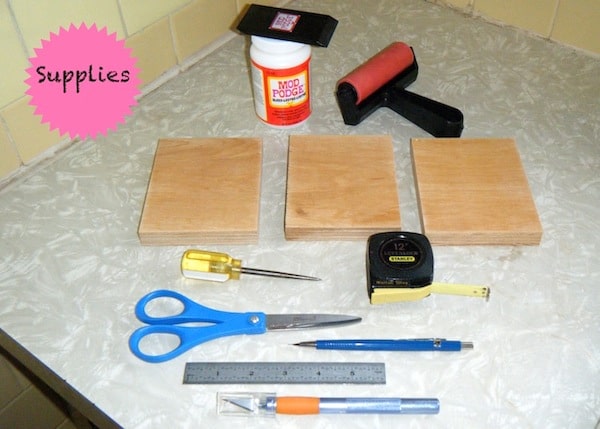
The first step is going to be gathering your supplies.
DIY Letter Holder
Some of the basic supplies and tools you will need:
- Plywood, 3 pieces – 4″ x 5″ x 3/4″
- Scrapbook paper
- Mod Podge Gloss
- Wood screws – 1 1/4″
- Table saw
- Drill press – with bits and countersink bit
- Tape measure
- Ruler
- Philips head screwdriver
- Pencil
- Scissors
- Craft knife
- Paintbrush
- Adhesive rubber pads (optional)
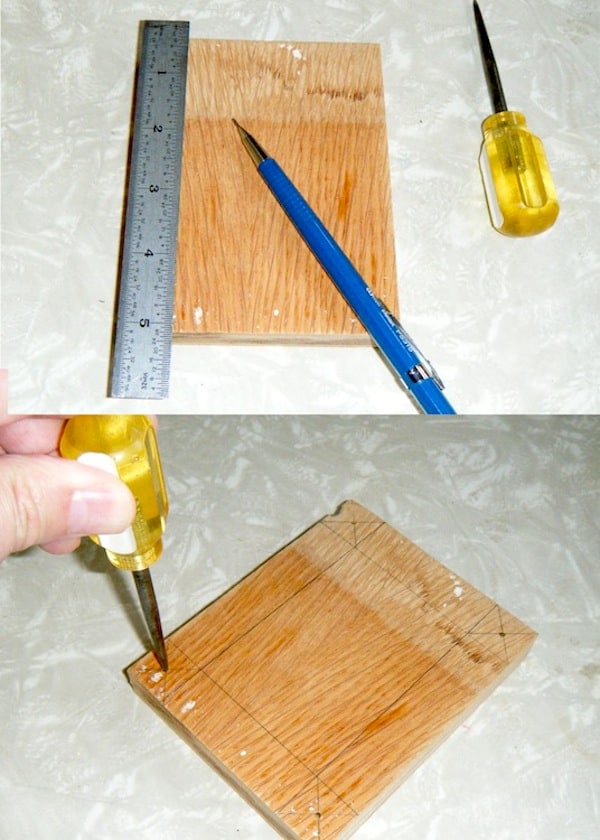

Select one of the three plywood pieces to use as your base. You’re going to want to make a mark in each corner, 3/8″ from each side. You can mark this a variety of ways, I’ll let you use whatever method is best for you.
Press the pencil head into the “x marks the spot” so your drill press head wants to seat right in there.

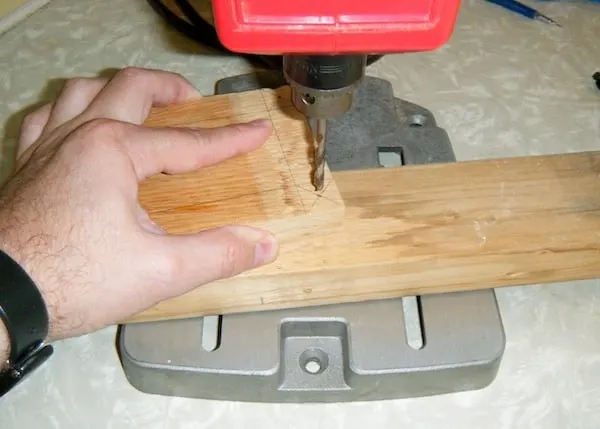
Using the drill press, drill into and through the plywood. Then you’ll use a countersink bit to drill down, so that you give the screw head a place to seat. This will make the wood of your DIY mail holder flush on the counter.
Drill each hole about 1/8 – 2/8″ deep. This is what your base is going to look like.
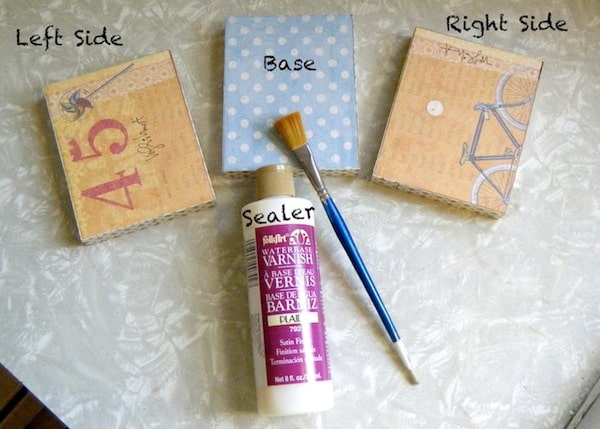

At this point you will decoupage all the DIY mail holder pieces. You’re going to want to choose your favorite papers for your letter holder – do something mailed themed or something that matches your kitchen. Choosing the design is fun!
Trim all pieces of scrapbook paper to fit all sides of your wood pieces using your ruler, craft knife, and mat. You’ll cut a total of six pieces of paper for each piece of wood – four side pieces and two larger pieces.
Add Mod Podge to each surface in turn, then place down the paper and smooth with your hands or a brayer. Let dry for 15 – 20 minutes, and add a top coat. Let dry.
Optional: seal all three pieces with a sealer. I really like using FolkArt Satin Sealer. Let dry for 15 minutes and then give a second coat!

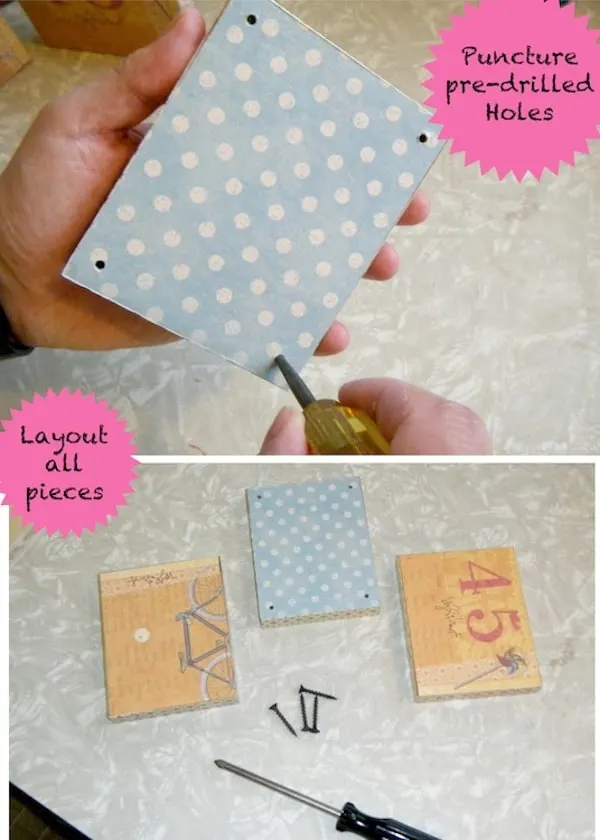
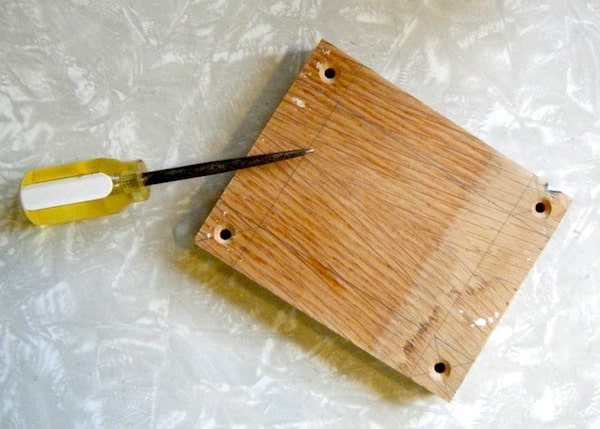
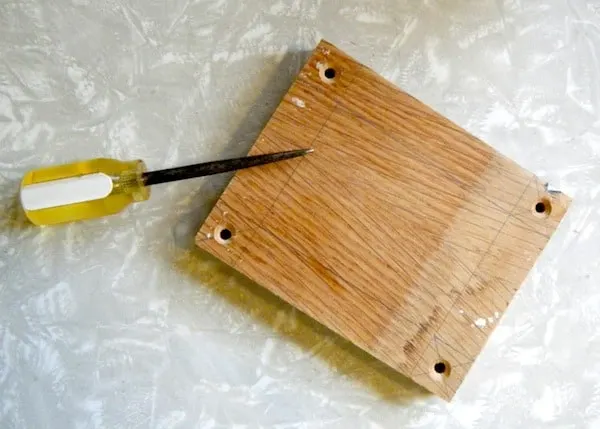
Find the base piece and use a pencil or tool to poke the holes. Lay out the pieces and your four wood screws.
Yes, mine are drywall screws – but I have a ton of them. If you’re buying screws, use wood screws.

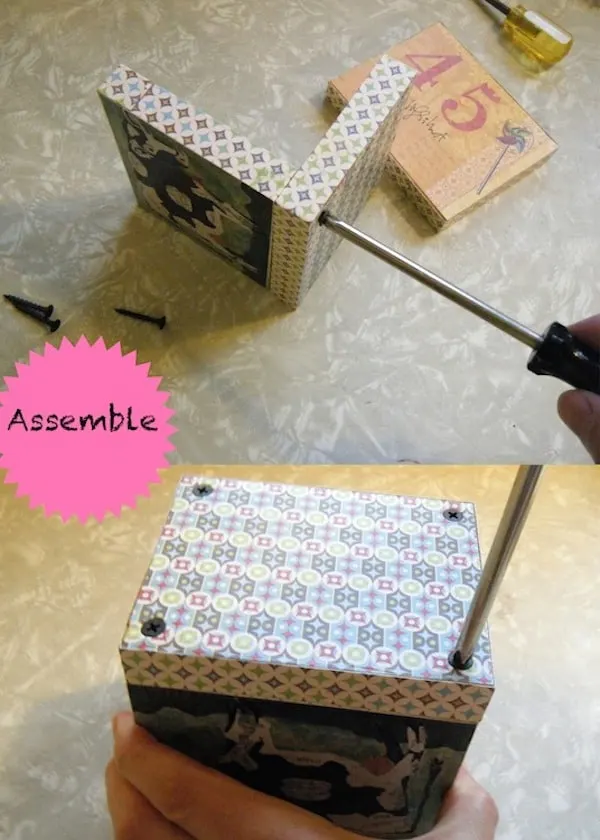
Lay the pieces out and assemble your DIY mail holder from the bottom. Screw the wood screws through the base and straight into the side pieces.
The screws should be flush to the base because you used the countersink bit on the bottom. Repeat the screwing until you are done. Place a rubber pad / bumper over each screw head to finish.
Tip: if you want to make screwing easier, you can pre-drill holes into the side pieces. I’ll leave that up to you.


Thanks Walter – I totally need this letter holder. Yes, I’m one of “those” mail people. I need to make this mail organizer, stat!
DIY Mail Holder

Learn how to make a DIY letter holder using plywood, and decorate with scrapbook paper and Mod Podge.
Materials
- Plywood, 3 pieces - 4" x 5" x 3/4"
- Scrapbook paper
- Mod Podge Gloss
- Wood screws - 1 1/4"
- Adhesive rubber pads (optional)
Tools
- Table saw
- Drill press
- Tape measure
- Ruler
- Philips head screwdriver
- Pencil
- Scissors
- Craft knife
- Paintbrush
Instructions
- Select one of the plywood pieces to use as a base. Make a mark in each corner with the pencil, 3/8" from each side.
- Using the drill press, drill into and through the plywood. Use a countersink bit to drill down, so that you give the screw head a place to seat.
- Drill each hole about 1/8 - 2/8" deep.
- Trim all pieces of scrapbook paper to fit all sides of your wood pieces using your ruler, craft knife, and mat. Cut a total of six pieces of paper for each piece of wood.
- Add Mod Podge to each surface in turn, then place down the paper and smooth with your hands or a brayer. Let dry for 15 - 20 minutes, and add a top coat. Let dry.
- Find the base piece and use a pencil or tool to poke the holes. Lay out the pieces and the four wood screws.
- Assemble your mail holder from the bottom. Screw the wood screws through the base and straight into the side pieces.
- Repeat the screwing until you are done. Place a rubber pad / bumper over each screw head to finish.
Did you enjoy this DIY mail holder? I’d love for you to check out the following ideas too:
Marie
Tuesday 23rd of August 2011
So cute! I'm cohosting a link party at southernlovely.blogspot.com on Wednesday. Would love it if you'd link up!
Mariemylilpinkpocket.blogspot.com
SewSweet
Saturday 20th of August 2011
You could also use one of those old wooden napkin holders...less tools required
WhichCraft-Liz
Friday 19th of August 2011
Great tutorial. Thanks for sharing Liz
CREATIVE MIND
Wednesday 17th of August 2011
hmm..interesting..easy as well!!!thanks for sharing with all :)
Walter Silva
Wednesday 17th of August 2011
@Amy Jeanie, Love that idea, LOL!