Learn how to make a DIY dog toy box out of a simple wood craft from the craft store! This project is so easy, anyone can do it.

I haven’t posted a project in awhile, so I wanted to share my latest. It’s a DIY dog toy box that I did for my pooches.
What I enjoy about this toy bin is how delicately they select their toys out of it, like they know I made it for them and how mad I’d be if they messed it up. I’ve trained them well, maybe?
Homemade Dog Toy Box
Gather These Supplies
- FolkArt Acrylic Paint: Coffee Bean, Sky Blue, Terra Cotta
- Mod Podge Gloss
- Wood bin – mine is from JoAnn from their everyday wood section
- Wood balls for feet (1.5″) – 4
- Scrapbook paper – I used KI Memories Pet Shop purchased at JoAnns, 2 sheets
- Embellishments – Spare Parts brand from Hobby Lobby, bones and paws
- Ribbon – I used KI Memories Pet Shop, 2 rolls of striped purchased at JoAnns
- Buttons – brown, a total of 8 (4 for each side)
- Flat Paint Brush
- Craft glue
- Stencil tape
- Scissors
- Ruler
- Pencil or pen
1. I always trace the shapes for my finished project first. Why? Because if pencil marks get on my surface, then I can paint over them. Start by tracing the side of your bin onto the back of both sheets of paper.
Using the ruler, measure 1/2″ on the inside of the tracing lines. Use the scissors to cut out the sheets and then set aside.
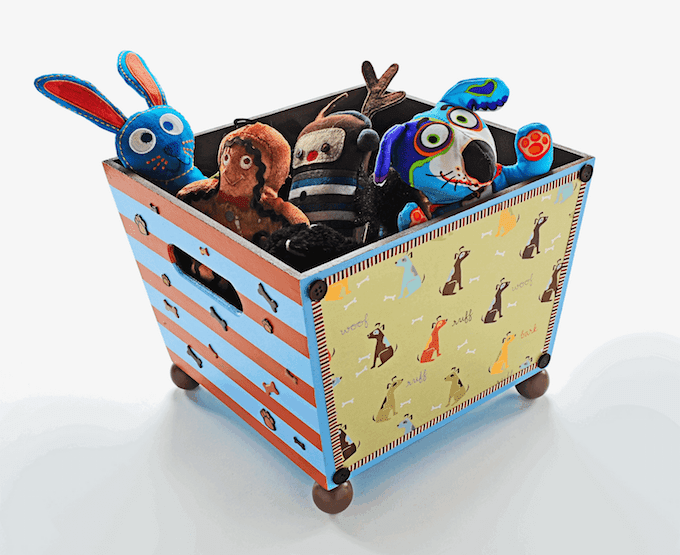
2. Use the paint to basecoat the inside of the bin Coffee Bean and the entire outside and bottom Sky Blue. Allow to dry. Paint the four wood balls with Coffee Bean and allow to dry.
3. When the paint is dry, use the stencil tape to make stripes on the sides with the handles. Paint a few coats of Terra Cotta on the exposed areas, and remove the stencil tape as soon as you are done. Allow to dry.
4. Use the Mod Podge to apply the two paper shapes to the sides without the handles. Completely smooth out all air bubbles and allow to dry for 15 – 20 minutes.
5. Coat the entire bin with at least two coats of Mod Podge. Do the wood balls at this time as well. Allow to dry completely.
6. Cut the ribbon to trim around the edges of the paper and glue down. Glue the bone and paw embellishments down on the striped side. Glue the buttons down where the ribbon meets. Finally, glue the wood balls to the bottom of the bin as feet.
7. Allow the bin to dry for at least 24 hours before using.
Would you decorate a DIY dog toy box like this one? Let me know in the comments! If you enjoyed this project, I’d also love for you to check out these options:
Rachel
Friday 5th of February 2010
My guilty pleasure is sleeping in during the week when my husband is at work and even when I have a ton of stuff to do at home. So guilty!
Crystal
Thursday 4th of February 2010
love this toy bin! totally need to make one for our fur baby! let's see...my guilty pleasure is probably the gossip rags! even though i know it probably isn't true, and it terribly unethical, i love to read all the dirt on the celebrities! and so does my hubby too! he's the worst! LOL! oh, here is my email too, just in case (LOL!) crystalbeshear at yahoo.ca
Kathryn
Thursday 4th of February 2010
Dark Chocolate!
Amy
Thursday 4th of February 2010
My secret guilty pleasure is earrings. I can never have enough and sometimes buy them without telling the hubs... Too bad he is good at noticing new things anyway!
Mrs. Olsen
Thursday 4th of February 2010
I love eating chocolate chips late at night. Mmmmm. rebolsen at gmail dot com